Wednesday, November 8, 2017

Vintage Rings Hot Pad Crochet Pattern | Posh Pooch Designs


Vintage Rings Hot Pad Crochet Pattern
By Sara Sach of Posh Pooch Designs
is our 4th pattern in our series 
Vintage Patterns With A Modern Twist.
Many years ago, I was given some of these as a wedding
 gift. They were yellow and white and I loved them. 
But they were made out of Acrylic yarn, With plastic rings in each circle. and I didn't know they would burn. 
I learned this the hard way.
Acrylic yarn burns when it is exposed to heat!
Only make these out of cotton yarn.

See The Video on my Youtube Channel 
at This LINK


Vintage Rings Hot Pad Crochet Pattern By Sara Sach

Please add this Pattern to your Ravelry Favorites

Skill: Easy

Materials:
Crochet Hook- H / 5.00MM
Yarn- Cotton Yarn – 4 oz. Sugar and Cream 
Yarn needle

Stitches:
Chain (ch)
Slip Stitch (slst)
Single Crochet (sc)
Double Crochet (dc)
Skip (sk)

Size: 8.5 inches across

Notes:
Ch1 does not count as a st
Ch3 counts as a dc

Rings: you will need to make 6 rings.

R: 1 – Ch 20, join in a circle, place 26 sc around the circle, join to 1st sc, ch 3
(26 dc)

R: 2 – 1 dc in the same st as the ch3, *1 dc in the next sc, 2 dc in the next dc*
Repeat From * to * around, join to top of ch3, tie off and weave in your ends.
(39 dc)

Strap:
Ch 50, 1 dc in the 4th ch from the hook and in each ch across. 
Tie off leaving a 12 inch tail . (48dc)
Lay out the rings, over lapping each ring on the next ring.
Lace the strap through the rings. It is easier to lace them through when the rings are flat,
then form the circle.
Sew the ends of the strap together.
You will need to smooth out the rings and adjust the strap so it lays nicely.

Trim:
Attach yarn to the 1st ring as shown in the picture,
1 sc in the next 10 sts,
Stitch the next 2 stitches going through this, and the next ring,
*1 sc in the next 10 sts, 1 sc in the next 2 sts, stitching through this and the next ring*
Repeat From * to * 4 more times. Join to the 1st sc.

You will need to do a little adjusting of the rings, as you go.

*Ch3, sk next 2 sts, slst in the next st*
Repeat from * to * around the edge of the potholder, join to 1st slst,

For a hanger: 
Ch 12, slst in the last sl,
tie off and weave in your ends.

I especially love the Christmas Colors,
 but I love them all!

An Ad Free PDF File is Now Available
For $3.50 in my Ravelry Shop
 At This LINK

For the first 3 Crochet patterns in our Series
"Vintage Crochet Patterns With a Modern Twist", Click this LINK
Next week's Pattern is 
"Santa Alarm, Door Hanger".

Tuesday, November 7, 2017

Live Video - What is Freeform Crochet? | Posh Pooch Designs

Live With Sara of
See the Video on my Youtube Channel 
at this LINK
Today's Topic - What is Freeform Crochet?
Often called "Painting With Yarn", is basically 
"designing as you go". 
There are no rules or special techniques
 that you have to follow. It is up to your creativity and imagination what you can crochet. 
Freeform Crochet is more Art, then Technique.

What is "Scrumbling in Freeform Crochet

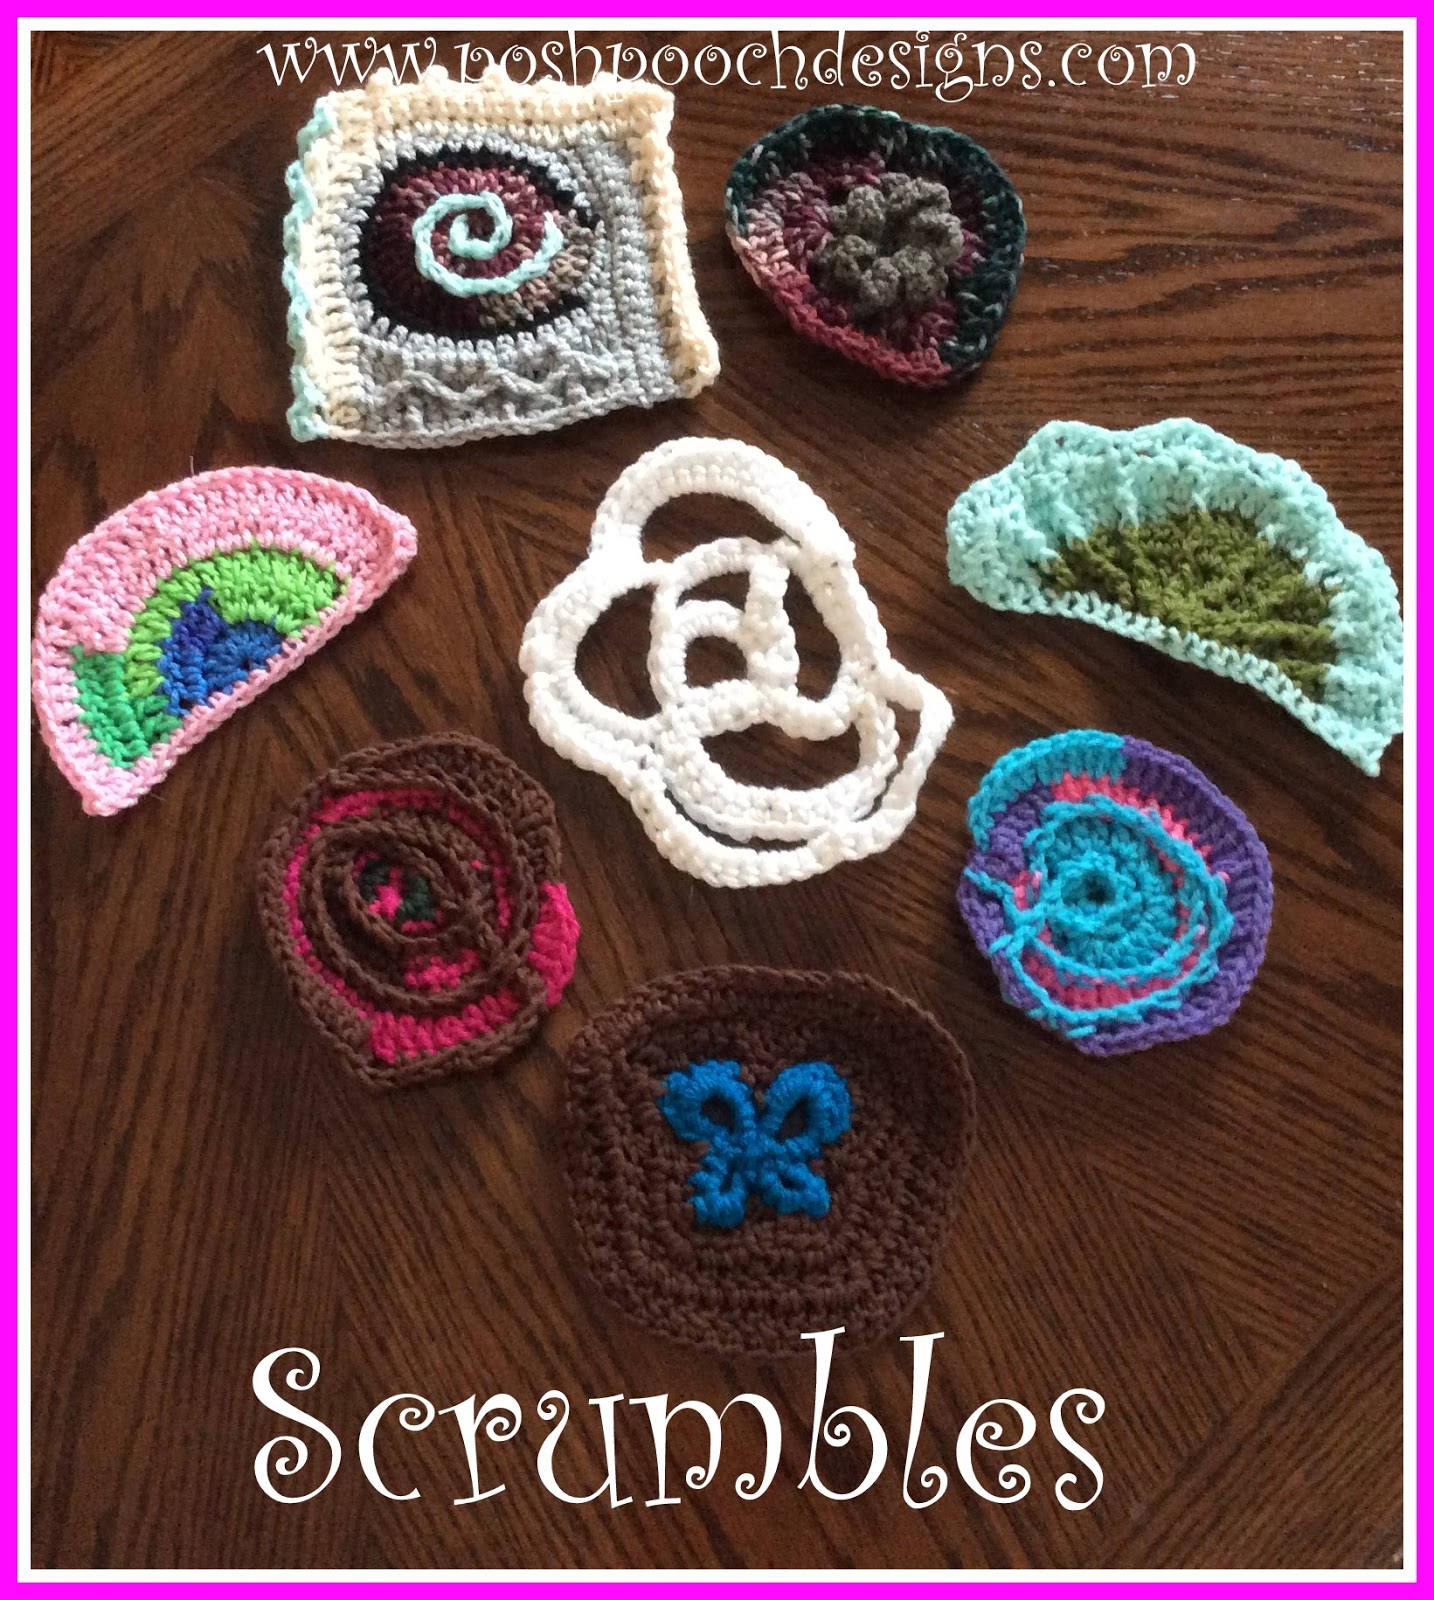
Scrumbling is when you  crochet several different style pieces, Crocheted from several different colors of yarn, stitching in several textures, stitches and sizes. 
These pieces are called Scrumbles - They can be crocheted or knitted. They can be circles, spirals, flowers, and shapes. They  can be thick or thin and add different thicknesses add more dimension. You can even mix yarn textures and fibers.
There are no rules!
You can choose a color theme, or just wing it!
No counting stitches! No counting Rows!
Then these individual pieces are sewn together to form one finished piece.
Another Method of "Scrumbling is to make Swatches, or use existing Swatches, sew them together for make a new item.
Then Once the pieces are sewn together, continue to add stitches and techniques - I call it create as you go.
Lastly - Freestyle Crochet  is all about  finding
 your own style and doing your own thing!
Use up your yarn scraps, 
mix colors and textures, and just have fun!

There are some patterns to get you started, 
here are some that might help you - LINK @@@@@@@@@@@@@@@@@@@@@@@@@@@@@@@@@
What's New This Week at 
Posh Pooch Designs

November Yellow Topaz Crochet Square Free Crochet Pattern, Photo Tutorial and Video

Doll Dress For 18 inch 
Free Crochet Pattern - LINK

Vintage Rings Hot pads
Free Crochet Pattern and Video - LINK


See you next week - We will be talking about
"How to join Thick and Chunky Yarns".

Monday, November 6, 2017

November Yellow Topaz Crochet Square | Posh Pooch Designs

November Yellow Topaz Crochet Square
This is the 11th Crochet Square in our year long Crochet A Long.


THIS CROCHET PATTERN HAS BEEN RETESTED AND UPDATED WITH A NEW WRITTEN PATTERN AND A BRAND NEW VIDEO AT THIS LINK


Each month I have designed a 6 inch Crochet Square, using the month's Birthstone as my inspiration.


Friday, November 3, 2017

Christmas Appliques Crochet Pattern Collection | Posh Pooch Designs

Christmas Appliques Crochet 
Pattern Collection
Put them anything you want to make festive and Christmasy!
We are making a Video for each applique Just
 click the link for the Videos.
1. Deer - Video Link
2. Candy Cane - Video Link
3. Snowman - Video Link
4. Snowflake - Video Link
5. Peppermint Candy -  Video Link
6. Christmas Tree - Video Link

6 Christmas Appliques Crochet Pattern by Sara Sach
Please add this Pattern Set to your Ravelry Favorites

Skill: Easy

Materials:
 Yarn: Small amounts of Worsted Weight (4) 
            (Beige, brown, red, green, White and yellow)
Crochet Hook: H / 5.00MM
Yarn Needle

Stitches:
Chain (ch)
Single crochet (sc)
Double Crochet (dc)
Slip Stitch (sl st)
Half Double crochet (hdc)

Appliqués:
Measure approx. 2 to 2.5 inches.

Notes:
Ch1 does not count as a st
Ch3 counts as a t
Rounds are joined with a slst

1. Deer - 
R: 1 - With Brown yarn, Ch3, 8 sc in the 2nd ch from the hook, join, ch1(8sc)
R: 2 - 2 sc in each sc around, join, (16sc)
R: 3 - Ch3,2 dc in the next st, ch2, 2 dc in the next st, ch3, join to the next st, 
sl st in the next 2 sts, Ch3,2 dc in the next st, ch2, 2 dc in the next st, ch3,
 join to the next st, tie off.

Antlers - With Dark Brown yarn, Ch 8, tie a knot in the each end and
 attach to the center of the deer head.

Eyes and Nose are made by French knots.
Then tie a Bow from Green yarn.

2. Candy Cane -
With 1 strand each of red and White yarn, Ch 19, turn 1 sc in the 1st 4 chs,
 2 sc in the next 2 chs, then 1 sc in the rest of the chs, tie off.
Add a Green Bow made from a piece of green yarn.

3. Snowman -
R: 1 - With White yarn, ch 3, 8 sc in the 2nd ch from the hook,(8sc)
 join with a sl st to form a circle, ch1
R: 2 - 2 sc in each sc, join, ch 1(16sc)
R: 3 - 2 sc in the 1st St, *1 sc in the next st, 2 sc in the next st, 
Repeat from * around, join,(24sc)
R: 4 - (hat) Change to red yarn, 1 sc in the next 8 Sts, ch1, turn
R: 5 - St the 1st 2 sc together), 4 sc, st the last 2 sc together, ch1, turn
R: 6 - - St the 1st 2 sc together), 2 sc, st the last 2 sc together, tie off.

With Green yarn, make a tiny pompom and attach to top of snowman hat.


Scarf - Count down 4 sts from the left side of the hat,
 attach green yarn to the next st,
 1 sc in the next 7 sts, ch 6, turn 1 sc in the end of the ch, 
sl st back down the ch to the hat, and join with a sc, tie off. 
Add a red tassel to the end of the scarf.

4. Snowflake Applique and Ornament - 
R: 1 - With White yarn, ch 3, 5 sc in the 2nd ch from the hook, join. (5sc)
R: 2 - ch3, dc, ch2 in the 1st sc,
* 2 dc, ch 2 next sc*  Repeat from * to * 3 more times, join.
R : 3 - Sl st to the 1st ch 2 space, ch3, dc, ch2 in the 1st sc,
 *1 dc, 1 pcst, 1 dc, ch3 in each ch2 space,
 3 more times, join and tie off. Weave in your ends.
If you are going to sew this on leave a 12 -14 inch tail yarn.

5. Peppermint Candy - LINK
R: 1 - With 2 strands of yarn, 1 of white and 1 of red or green,
Ch 5, counts as 1st dc, 11dc in the 4th ch from the hook, join in a circle,
(12dc)

R : 2 – Cut the Red/Green Yarn only, with the 1 strand of white yarn,
*2sc in the next st, 1 sc in the next st*
Repeat From * to * again, 
Ch 6 sl st in the same st, ch 6, sl st in the same st, 

Repeat From * to * 3 times,

Ch 6 sl st in the same st, ch 6, sl st in the same st,

2 sc in the next st, 1 sc in the last st
 join with a sl st, tie off.

6. Christmas Tree - 
R: 1 - With Green yarn, Ch 4, 3 hdc in 3rd chain from hook. Ch 2, turn
R: 2 - 2 hdc in 1st st, hdc in next st, 2 hdc in last st. Ch 2, turn
R: 3 - 2 hdc in 1st st, 1 hdc in next 3 sts, 2 hdc in last st. Ch1, turn. 
R: 4 - Slipstitch in 3 sts, ch 2, 2 hdc in same st, hdc in next st, 
2 hdc in next st. Ch 2, turn
R: 5 - 2 hdc in 1st st, hdc in next 3 sts, 2 hdc in last st. Ch 2, turn
R: 6 - 2 hdc in 1st st, hdc in next 5 sts, 2 hdc in last st. Ch 2, turn. 

R: 7 - 2 hdc in 1st st, hdc in next 7 sts, 2 hdc in last st. Ch 1, turn. 

R : 8 - Slipstitch in 3 sts, ch 2, 2 hdc in same st, hdc in next 5 sts,
 2 hdc in next st. Ch 2, turn
R : 9 - 2 hdc in 1st st, hdc in next 7 sts, 2 hdc in last st. Ch 2, turn.

R: 10 - 2 hdc in 1st st, hdc in next 9 sts, 2 hdc in last st. Ch 2, turn. 
R: 11 -2 hdc in 1st st, hdc in next 11 sts, 2 hdc in last st. tie off.

You can leave it blank or add Red "bulbs" By stitching French knots with red yarn.
And Star by stitching a Star shape at the top of the Tree.
These appliques are perfect for hats, 
coats, sweaters, scarves, bags, any where 
you want to add a touch of Holiday cheer.

How to stiffen your appliques to make into Ornaments.
Equal Parts of school glue and Water.
Mix in a bowl, dip the appliques and lay 
out to dry.
Spray with Spray Glitter for sparkle.

Thursday, November 2, 2017

Christmas Stocking Crochet Patterns Collection | Posh Pooch Designs

Free Christmas Stocking Crochet Patterns Collection By Sara Sach of
Posh Pooch Designs

"The Stocking were hung by the Chimney
 with care, with hope that St. Nicholas 
soon would be there,"

 This is a Crochet Pattern Round Up of 
Free Patterns For Christmas Stockings.
All Designed by Sara Sach 

Just Click the LINK 
next to the name of the Patterns and
 it will take you to the Free Pattern.

1. Mini Christmas Stocking - LINK

2. Dog Bone Christmas Stocking - LINK

3. Paw Print Christmas Stocking - LINK

4. Granny Square Christmas Stocking - LINK

5. Big Christmas Stocking - LINK

6. Puppy Love Christmas Stocking - LINK
"Christmas is coming,
The Goose is getting fat..."
So Get Those Stockings Made!

Tuesday, October 31, 2017

Live Video - Virtual Halloween Party and Let's Throw A Little Fit! | Posh Pooch Designs

Live With Sara 
of
Today's Topic:
 Virtual Halloween Party and 
Let's Throw A Little Fit!

See The Video on my Youtube Channel
 at This LINK


For a Halloween Party we need:

1. Costume - Oma's Curler Hat
or as My Grand daughter says,"
Oh No, Oma has Curlers in her hair, Let's Go to Walmart!
Free Crochet Pattern and 
Video at This Link

2. Drinks - Say No to Pumpkin Coffee -
Fall Coffee
Coffee,Cinnamon sticks, and an Orange 
I hot cup of coffee
Cinnamon Stick
1 Slice of Orange - Squeeze into cup,
a little sugar or Splenda to taste
 then put the slice in the coffee cup and sip slowly.
YUM!

3. Snacks - Harvest Snack Mix
Bag Candy Corn
Salted roasted nuts
Candy coated Chocolates
You can add Corn Chex for a little Crunch if you like.
Mix equal amounts in a bowl and eat it!

4. A Craft - "Throw A Little Fit".
A Little Left over Yarn
Set of Wiggly Eyes
Scissors
Hot Glue and gun, or Fabric Glue
Make a pompom, about 2 - 3 inches across.
 Glue on the eyes.
And print this, and attach to pompom with
 a piece of yarn.


5. Dogs and Halloween -
Do not let them get into the candy - 
Sugar and Chocolate are bad for them. 

If you dress them up, pay attention to make sure the costume has not shifted. Hats can flip down and 
become a strangling or tripping hazards.

Also dogs can get scared from all the door knocking
 and Children, and even most pleasant dog might become agitated. They may need the safety of their crate or
 bed, were ever they feel safe.

Do Give them Pumpkin - Don't throw out your used real pumpkin, give it to your pooch. Slice it into little pieces Fresh pumpkin is a great treat for a dog, and great for digestion. And you can also dehydrate it and store it in
 zip bags.


Have a Happy Halloween!
See you next week.
 The topic will be "Free Form Crochet".

Monday, October 30, 2017

Granny Square Angel Ornament Crochet Pattern | Posh Pooch Designs

Granny Square Angel Ornament
Crochet Pattern
This is the 3rd Pattern in our Series of
 Vintage Crochet Patterns With a Modern Twist
The Modern Twist is the Sparkly Yarn!
I love Sparkly yarn!

See The Video on my Youtube Channel 
at This LINK


Granny Square Angel Ornament Crochet Pattern by Sara Sach
Please Add this Pattern to Your Raveltry Favorites

Skill: Easy

Materials:
Crochet Hook – H / 5.0MM
Yarn – Worsted Weight (4) I used I Love This Yarn Metallic For White Angels
                                        Caron Simply Soft – Silver Sparkle For Silver Angels
             C1- for Body, halo, Wings and flower, C2- for trim and bows
Yarn Needle
Decorative Christmas Button

Stitches:
Chain (ch)
Slip Stitch (slst)
Single crochet (sc)
Double Crochet (dc)
Skip (sk)
Space (sp)
Change to (chgto)

Size: 7.5 X 5 inches

Notes:
Rounds are joined with a slst.
Ch3 Counts as a Dc

You will need to Make 2 Granny Squares: 1 For Body and 1 for Wings:
R: 1 – With C1, Ch 5, join in a circle, in the circle, ch3, 2 dc, ch1,
*3dc, ch1* Repeat From * to * 2 more times,
Join to top of ch 3, slst to 1st ch1 sp. (12dc, 4 ch1 sps)

R: 2 – ch3, 2 dc, ch1, 3 dc, ch1 in the 1st ch1 sp,
*3dc, ch1, 3dc, ch1 in the next ch 1 sp*
Repeat From * to * 2 more times, join to top of ch3, slst to 1st ch1 sp.
(4 corners)

R: 3 - ch3, 2 dc, ch1, 3 dc, ch1 in the 1st ch1 sp, 3dc,
Ch1 in the next ch1 sp,
*3dc, ch1, 3dc, ch1 in the next ch1 sp,
3dc, ch1 in the next ch1 sp,*
Repeat From * to * 2 more times, join to top of ch3, slst to 1st ch2 sp.
(4 corners, 4 sides)

R: 4 –Chgto C2, *ch3, sk 2 sts, slst in the next st*
Repeat From * to * working around all 4 sides of the square,
Join to 1st slst, tie off. Weave in your ends.

Halo: With C1, Ch 12, join in a circle.
12 sc stitching around the ring, join to 1st sc, (12 sc)

*1 sc in the 1st sc, 2 sc in the next sc*
Repeat From * to around, join to 1st sc. (18sc)

Tie off leaving a 12 inch tail for sewing onto the angel.

Assembling the Angel.
Fold 1 Square in half.


Place the 2nd Square in the 1st square.

Make a Bow - Bow:
With C2, ch 30, tie off both ends and trim.

Use the Bow To  attach the 2 squares together as shown.
attach a fun Christmas button to the front of the bow.
Sew the halo on top of the wings.

Make a hanger.
I Love Christmas Angels!
And These are quick, easy and lovely!

An Ad Free PDF File is Now Available
For $3.50 in my Raverly Shop
 At This LINK

Pattern 1 - Granny Square Christmas Tree - LINK
Pattern 2 - Granny square Stocking -LINK