Square Granny Shopping Bag
Crochet Pattern
You can find these Fabric cubes at just about any dept Store.
Target, Walmart, IKEA, Home Goods, And
Even The Dollar Stores.
You can slide the cube in for use, and then out if you need
to wash the bag. And it does not add any extra weight to the bag.
I Love This Shopping bag because you have a nice sturdy bag.
It will hold all sorts of groceries, books, toys and even yarn.
And it will not roll around the back of the car.
See The Video On my Youtube Crochet
channel At This LINK
Square
Granny Shopping Bag
Please Add This Crochet Pattern To Your Ravelry Favorites
Skill: Easy
Materials:
Crochet Hook
– H/ 5.00 MM
Yarn- Cotton
Yarn (4) 12 OZ. (I used my left over from my Yarn stash)
10 Inch Fabric Cube/ Square Basket
Yarn needle
Stitches:
Chain (ch)
Slip Stitch
(slst)
Single
crochet (sc)
Double
Crochet (dc)
Size: 14 X 14 Square when finished
Size: 14 X 14 Square when finished
Notes:
Ch3 Counts
as a dc
Round are
joined with a slst to the ch3
Make 5 Squares -
R: 1
- Ch 5, form into a circle,
ch3,
2 dc, ch 2 in the circle, * 3dc, ch2*
Repeat
From * to * 2 more times,
Join
to ch 3, slst to the next ch2 sp
(4
sets of 3dc, ch2)
R: 2
- Ch3, 2 dc, ch2, 3dc in the 1st ch2 sp, (1st corner)
*3dc,
ch2, 3dc in the next ch 2 sp*
Repeat
From * to * 2 more times,
Join
to ch 3, slst to the next ch2 sp
(4
sets of 3dc, ch2, 3dc)
R: 3
- Ch3, 2 dc, ch2 in the 1st ch2 sp,
3dc,
ch2, 3dc in the next ch 2 sp,
*3
dc, ch 2 in the next ch2 sp, 3dc, ch2, 3dc in the next ch 2 sp*
Repeat
From * to * 2 more times,
Join
to ch 3, slst to the next ch2 sp
(4
sets of 3dc, ch2, 3dc, and 3dc, ch2)
R: 4 - Ch3, 2 dc, ch2 in the next 2 ch2 sps,
3dc,
ch2, 3dc in the next ch 2 sp,
* 3
dc, ch 2 in the next 2 ch2 sps, 3dc, ch2, 3dc in the next ch 2 sp*
Repeat
From * to * 2 more times, ch 2, 3 dc in the last ch2 sp,
Join
to ch 3, slst to the next ch2 sp
(3dc,
ch2, 3dc, and 2 sets of 3dc, ch2 on each side)
R: 5
- Ch3, 2 dc, ch2 in the next 2 ch2 sps,
3dc,
ch2, 3dc in the next ch 2 sp,
* 3
dc, ch 2 in the next 2 ch2 sps, 3dc, ch2, 3dc in the next ch 2 sp*
Repeat
From * to * 2 more times, ch 2, 3 dc in the last ch2 sp,
Join
to ch 3, Tie off and Weave in your ends.
(3dc,
ch2, 3dc, and 3 Sets of 3dc, ch2 on each side)
R: 6
– R: 9 - Repeat R: 5 increasing every row.
Tie
off and weave in your ends after R: 9
Repeat 4 More Times For 5 Squares
Assembly:
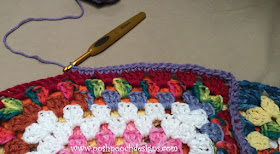
Lay them out as shown in the picture - 5 Squares - A Bottom and 4 sides
Sc The 4 sides of the Bag to form a Box.
Edge: Sc around the top edge of the box, join to the 1st sc.
Handles: Sc across the 1st square, Ch 25, join to the next corner.
Sc across the top of the next square.
ch 25, join to the next corner.
Sc around the top of the bag and handles,
Join to the 1st sc, tie off and weave in your ends.
Slide the cube inside and Go Shopping.
An Ad Free PDF FILE is Available
in my Ravelry Shop At This LINK
For $4.50


In the written pattern it says size is 14x14 in video you say size is 11x11. My 9 row sq is 12x12. Does it really matter the size of the sq?
ReplyDeleteA pattern like this doesn’t really matter what size of square the first side measures, as long as you will be happy with the finished size of the bag. You just need to keep in mind that the front and back of the bag should measure exactly the same, & the 2 sides also need to measure the same as each other as well. The side pieces could be narrower or be the exact same size as front & back pieces, whatever you would like for your finished product. The bottom piece should measure to fit accordingly.
DeletePs- If you make the back piece higher than the front piece this would make a flap so your bag could close (using a simple tie or a button/loop enclosure).Make sure to make the flap measure - at least the width of the sides plus approx 2-3 inches or more if you prefer.