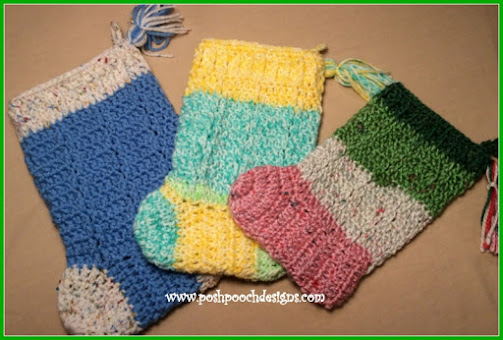
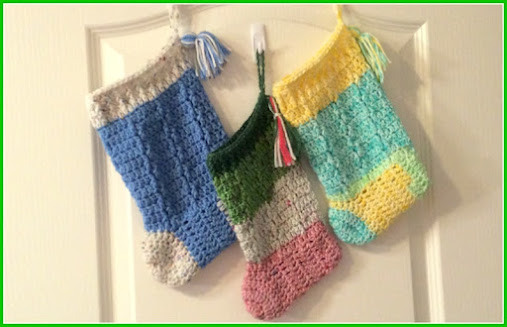
The Gift Stocking Crochet Pattern
By Sara Sach of Posh Pooch Designs
The Gift Stocking was designed for giving during
the Christmas Holidays, as a gift filled with goodies.
As well as, a great way to use up Your yarn stash.
The Pattern is designed with med (4) yarn and
any med (4) yarn will work. Mix and match your colors,
use striping, variegated or solid yarns.
groups and for donations.
It measure about 10 inches long,
so it's the perfect size.
Kids of All Ages, and Adults will love them!
See The Video On my Crochet Youtube
Channel At This LINK
The Gift
Stocking Crochet Pattern
Please Add This Crochet Pattern To Your Raverly Favorites
Skill: Easy
Materials:
Crochet Hook – H / 5.00 MM
Yarn- Med (4) 2.5 oz.
Yarn Needle
Stitches:
Ch (ch)
Slip Stitch (slst)
Single Crochet (sc)
Double Crochet (dc)
Front Post Double Crochet (fpdc)
Double Crochet together (dctog)
Size: 10 Inches tall
Notes:
Ch3 Counts as dc
Rounds are joined with a slst to the ch 3
Crochet Hook – H / 5.00 MM
Yarn- Med (4) 2.5 oz.
Yarn Needle
Ch (ch)
Slip Stitch (slst)
Single Crochet (sc)
Double Crochet (dc)
Front Post Double Crochet (fpdc)
Double Crochet together (dctog)
Ch3 Counts as dc
Rounds are joined with a slst to the ch 3
If Changing Colors, ch2 after the color change
Demo - We hanged color on R; 5, R;10, R: 14, R: 26
R: 1 – Ch 5, join in a circle, Ch3, 11 dc in the circle, join, ch 3
(12 dc)
2 dc
in each dc around, join,
(24 dc)
R: 3 – Ch3, 1 dc
in each dc around, join, (24 dc)
R: 4 – Repeat
R: 3
R: 5 – Ch3, 1 dc
in the next 17 dc, leaving the last 6 dc unworked,
turn, ch 3 (18 dc)
R: 6 – 1 dc
in each dc, turn, ch 3 (18 dc)
R: 7 – R: 10
– Repeat R: 6
R: 11 – 1 dc
in the 1st 6 dc, dctog the next 2 dc,
Dctog the next 2dc, 1 dc in the last 7 dc, turn, ch 3 (16 dc)
R: 12 - 1 dc
in the 1st 5 dc, dctog the next 2 dc,
Dctog the next 2dc, 1 dc in the last 6 dc, turn, (14 dc)
R: 13 -
Place the sides of the heel together wrong sides out,
(24 dc)
turn, ch 3 (18 dc)
Dctog the next 2dc, 1 dc in the last 7 dc, turn, ch 3 (16 dc)
Dctog the next 2dc, 1 dc in the last 6 dc, turn, (14 dc)
and slst closed,ch1 turn
And slst back up the inside of the heel, Flip the heel right side out.
1 dc in the 6 sts at the front edge of the stocking that we left unworked,
Evenly st 18 dc across the other of the stocking, join (18 + 6 + 18 = 42 dc)
*1 dc in the next 5 dc, fpdc in the next dc*,
Repeat From * to * 4 More times, 1 dc in the last 6 dc,
Repeat From * to * 4 More times, 1 dc in the last 6 dc,
join. (36 dc, 6
fpdc)
R: 16 – Ch3, 1 dc
in the next 3 dc, fpdc in the next,
*1 dc in the next 5 dc, fpdc in the next dc*
Repeat From * to * 4 More times, 1 dc in the last 7dc, join,
(36 dc, 6 fpdc)
R: 17 – R:
25 – Repeat R: 15 and R: 16 – alternating rows
*1 dc in the next 5 dc, fpdc in the next dc*
Repeat From * to * 4 More times, 1 dc in the last 7dc, join,
(36 dc, 6 fpdc)
or more rows if a longer stocking is desired.
R: 26 - 1 dc in each st around, join (42dc)
R: 27 - Ch3, fpdc in the next st,
*1
dc in the 1st st, fpdc in the next st*
Repeat From * to * around, join, ch 3 (42sts)
R:
28 – Ch3, fpdc in the next st,
Repeat From * to * around, join, ch 3 (42sts)
*1 dc in the 1st st, fpdc in the next st*
join to the last sc, tie off and weave in your
ends.
Make a
tassel an attach it to the top back of the stocking.
Demo in the Video
An Ad Free PDF file is available
In My Ravelry Shop At This LINK
For $3.50


No comments:
Post a Comment
Note: Only a member of this blog may post a comment.