
Twisted Christmas Headband
Crochet Pattern
By Sara Sach of Posh Pooch Designs
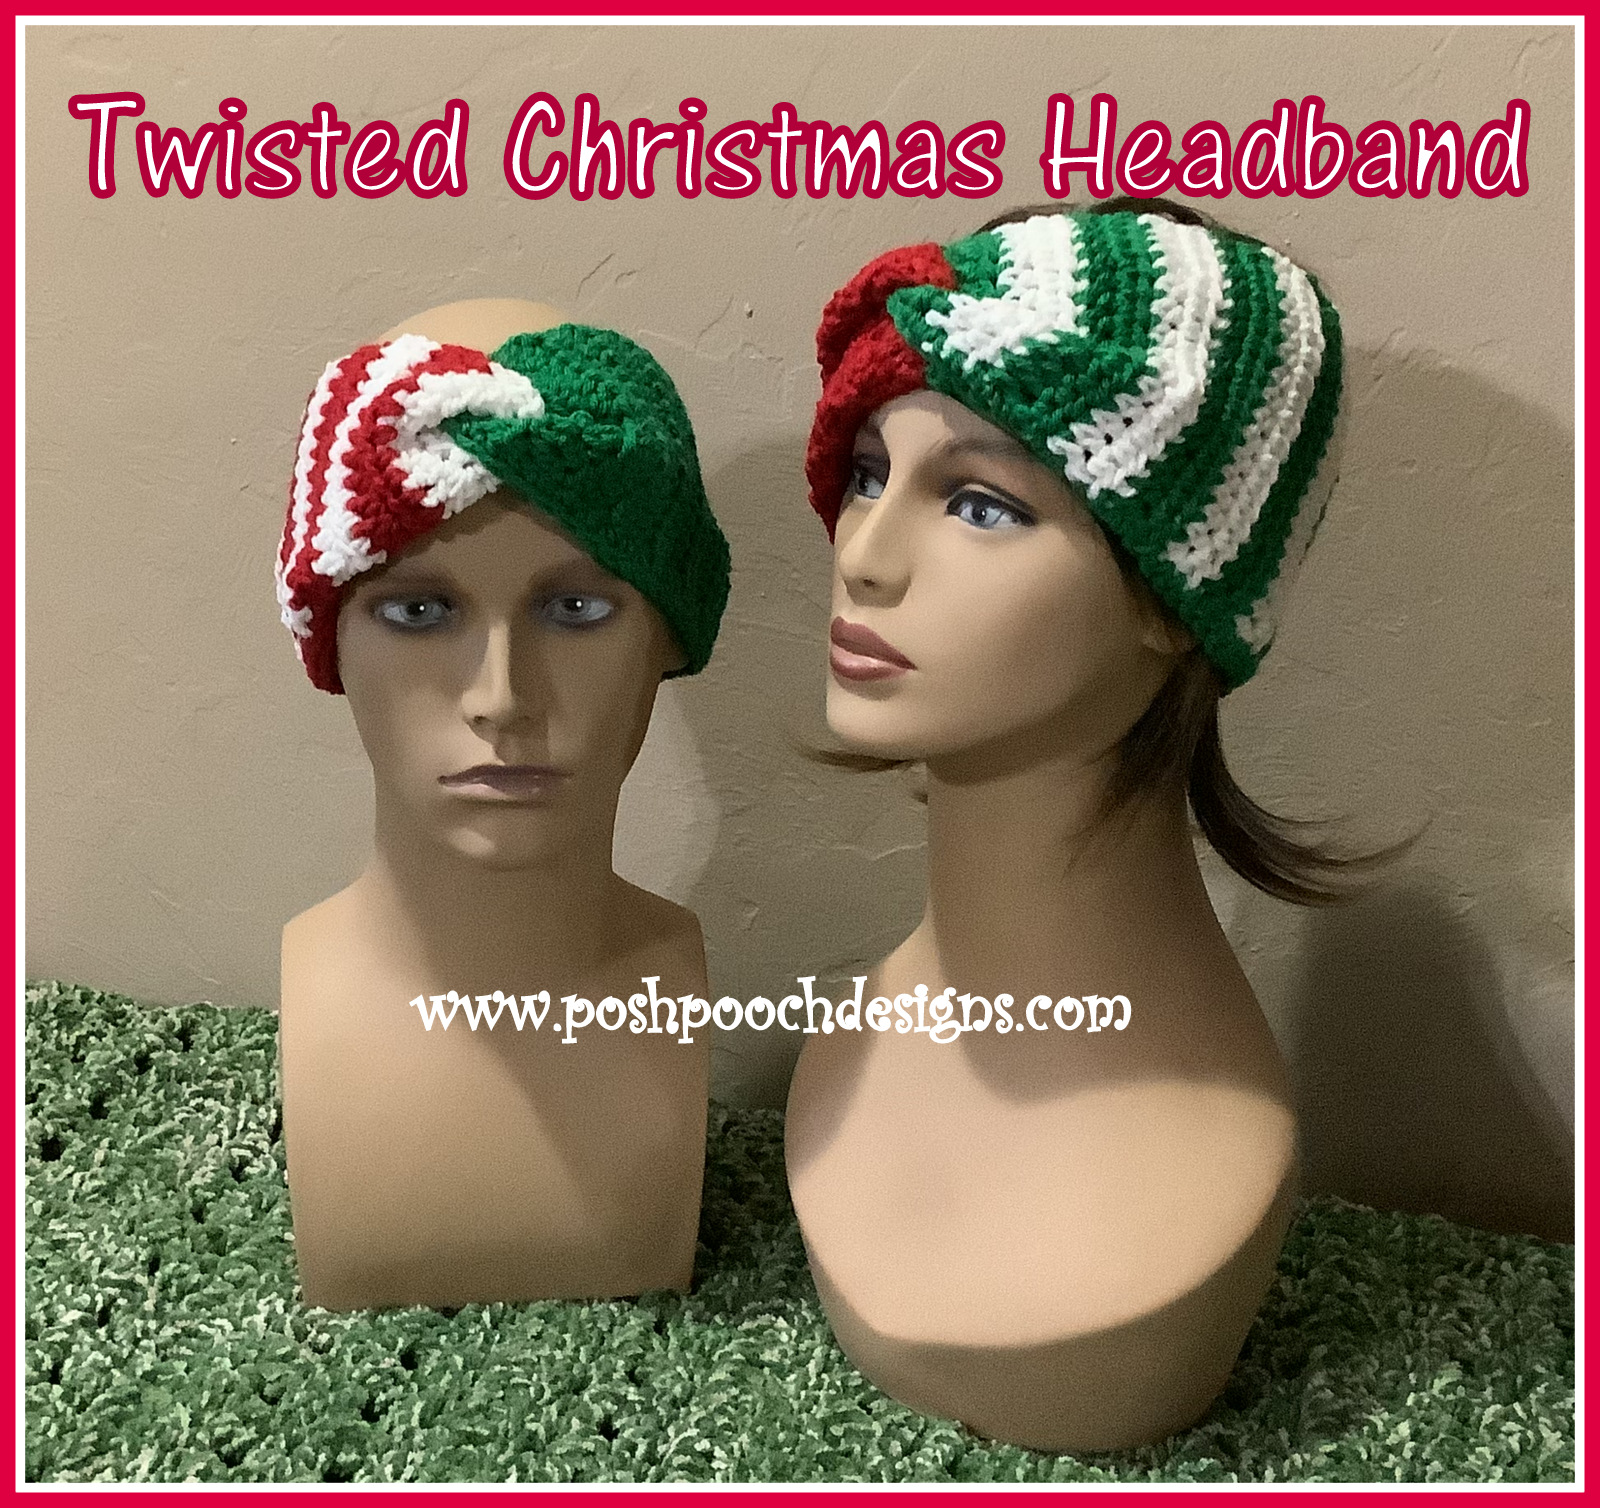
The Christmas Twisted Headband is a simple headband
to stitch up. It's so festive and cute. It makes great
photo props, as well as, fun to wear during the
Christmas Season. I designed mine in Traditional
Christmas colors. You can change the colors to your
liking and to match your Holiday wardrobe.

You can even stitch it up in other colors to be worn
any time of year, when you need a warm Ear warmer.

It measures 5 inches thick so it makes a great ear warmer.
It's super comfy to wear and also makes a great gift.
See The Video On My Crochet Youtube
Channel At This LINK
Channel At This LINK
Video Will Be Released Monday
At 10:30 CT AM
Twisted Christmas Headband Crochet Pattern
Please Add This Crochet Pattern to Your Raverly Favorites
Skill: Easy
Materials:
Crochet Hook – I / 5.5 mm
Yarn- Med (4) I used I Love This yarn / Hobby Lobby
C1- Red 1 oz., C2- White 1 oz., C3 – Green 2 oz.
Yarn Needle
Stitches:
Chain (ch)
Single Crochet (sc)
Half Double Crochet (hdc)
Change to (chgto)
Size: 22 inches X 5.5 Inches
(Fits 18 – 24 inches heads)
2 rows = 1 inch
Notes:
Ch1 Does not count as a st.
When changing color, ch1 after the color change
Pattern:
1 hdc in each ch across, turn, ch 1 (15 hdc)
Crochet Hook – I / 5.5 mm
Yarn- Med (4) I used I Love This yarn / Hobby Lobby
C1- Red 1 oz., C2- White 1 oz., C3 – Green 2 oz.
Yarn Needle
Chain (ch)
Single Crochet (sc)
Half Double Crochet (hdc)
Change to (chgto)
(Fits 18 – 24 inches heads)
2 rows = 1 inch
Ch1 Does not count as a st.
When changing color, ch1 after the color change
1 hdc in each ch across, turn, ch 1 (15 hdc)


1 hdc in each hdc across, turn (15 hdc)


1 hdc in each hdc across, turn (15 hdc)

Changing colors every 2 rows

1 hdc in each hdc across, turn, ch1 (15 hdc)

where we carried our yarn across.
Evenly sc across, chg to C1 where the stripes begin, and
Evenly sc across, chg to C1 where the stripes begin, and
continue to evenly sc across.
Tie off, Weave in all the other ends.
Tie off, Weave in all the other ends.

without twisting the headband.
Fold the ends over as shown in the picture.

Fold the ends over as shown in the picture.

going through all 4 thicknesses,
and knot securely. Flip the right side out.
and knot securely. Flip the right side out.

An AD Free PDF File is Available in
My Raverly Shop At This LINK
For $3.50

No comments:
Post a Comment