


This lovely Snowflake is designed to be a Christmas
And Holiday ornament, measuring 6 X 6 inches
One it stiffened up for hanging, we add a ribbon hanger
with beads for a fun touch.
The Snowflakes stitch up pretty quick and you can
make sever in one sitting.
They will look wonderful hanging on your Christmas tree,
stockings, the mantel and any place you would like to
hang them for all your festive occasions.

There are 3 Ways of Stiffening Your Snowflake
For Hanging up.
1. Glitter Spray - Go outside, Lay the snowflake on a paper towel.
Spry the back of the Snowflake let it dry. Turn it over and
spray the front.
When it's dry add a hanger.
2. Glitter Glue - Lay the snowflake on a paper towel.
Mix equal parts of Glue and water.
With a paint brush, paint the back of the snowflake.
When it's dry, turn it over and paint the front.
When it's dry add a hanger.
3. White School Glue - Mix equal amounts of white school glue and water
in a bowl. Dip the snowflake in the mixture, until it's covered.
Lay on a paper towel to dry or paper plate. Pat out some of
the moisture. You will need to turn it a few times as it's
drying to keep it from sticking to the paper towel.
You can sprinkle with glitter while the glue is wet
for a glitter effect.
I have used all three methods and love #1 the best. It
is the quickest to apply and dry, and least messy.
Plus it adds glitter and stiffen at the same time.

See The Video On Crochet Youtube
Channel At This LINK
Snowflake
Ornaments Crochet Pattern
Please Add This Crochet Pattern To Your Raverly Favorites
Skill: Easy
Materials:
Crochet Hook – H / 5.00 MM
Yarn – Med (4) Cotton / White 1.5 oz/ Premier Just Cotton
Yarn Needle
Stitches:
Chain (ch)
Slip Stitch (slst)
Single Crochet (sc)
Double Crochet (dc)
Space (sp) Skip (sk)
Picot Stitch (pcst)
Size: 6 X 6 Inches
Notes:
Ch1 Does not count as a dc
Ch3 counts as dc
Pattern:
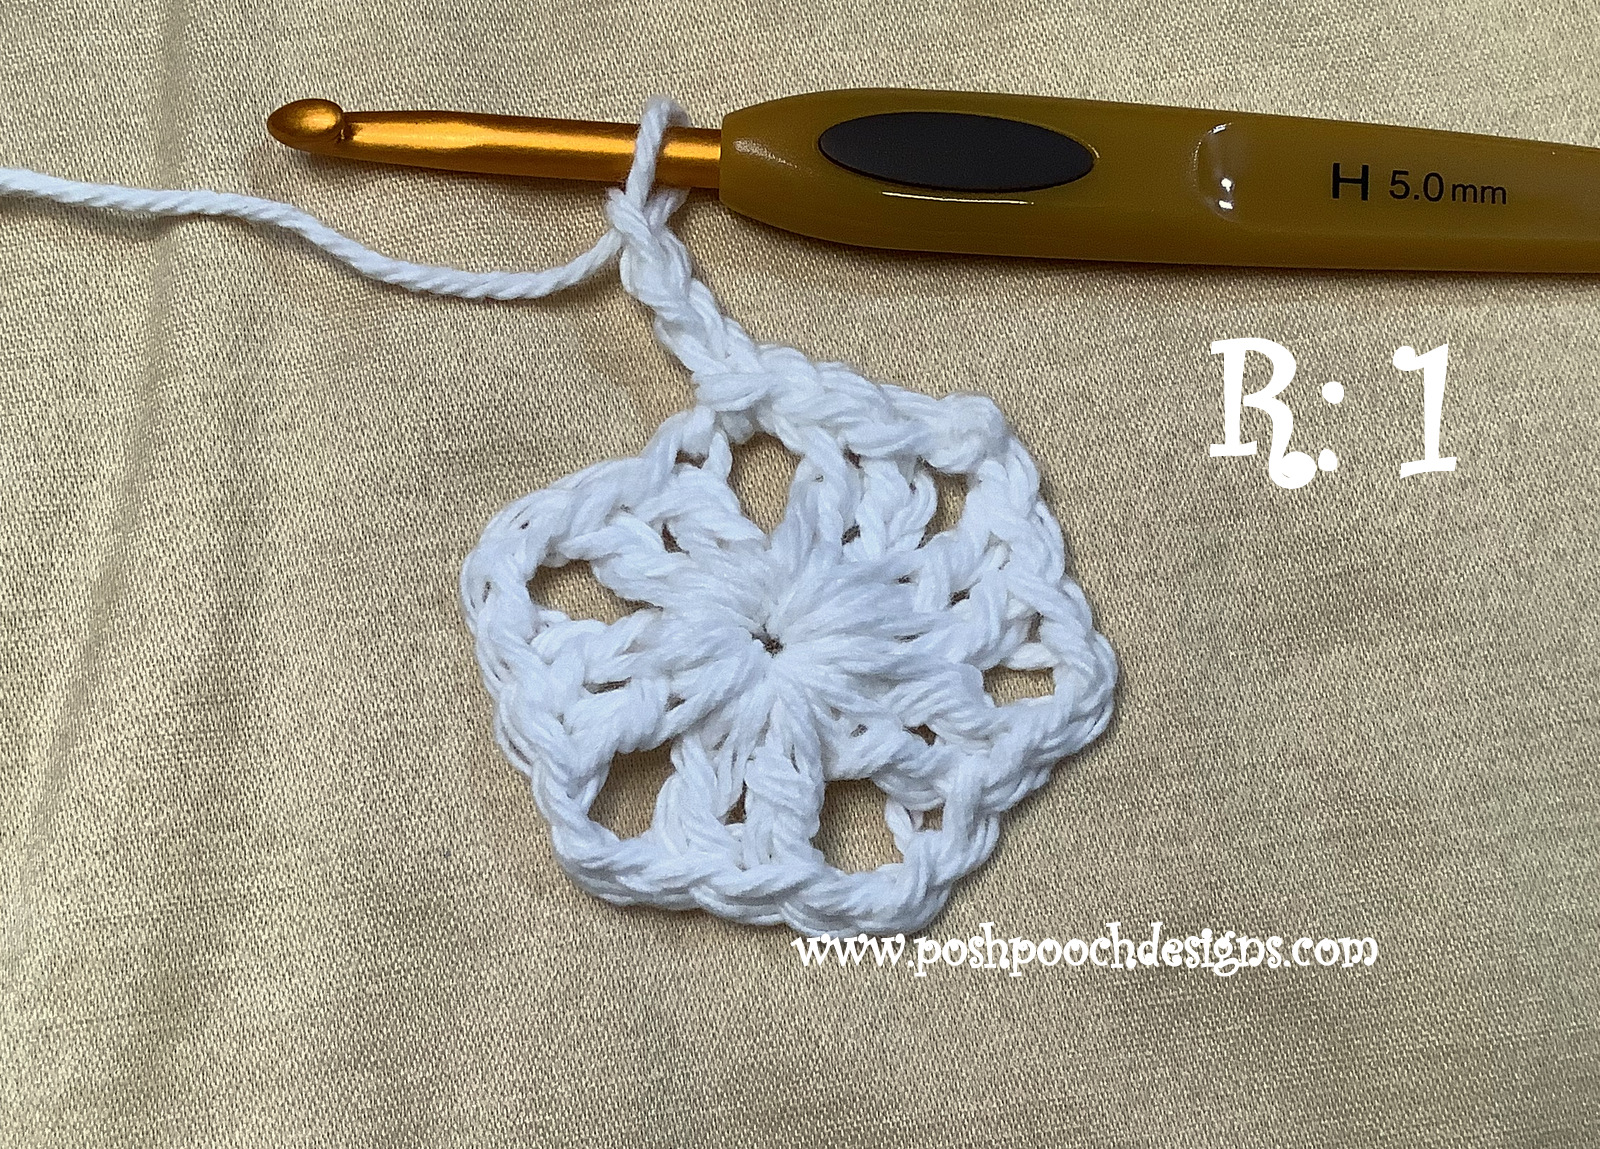
R: 1 – With
C1, Ch 5 join in a circle,
Ch3, dc, ch2 in the circle,
*2dc, ch2*
Repeat From * to * 4 more times, join to the ch3 with a slst,
Slst in the next 2 dc, slst in the ch 3 sp
(6 sets of 2dc, ch2)
Crochet Hook – H / 5.00 MM
Yarn – Med (4) Cotton / White 1.5 oz/ Premier Just Cotton
Yarn Needle
Chain (ch)
Slip Stitch (slst)
Single Crochet (sc)
Double Crochet (dc)
Space (sp) Skip (sk)
Picot Stitch (pcst)
Ch1 Does not count as a dc
Ch3 counts as dc
Ch3, dc, ch2 in the circle,
*2dc, ch2*
Repeat From * to * 4 more times, join to the ch3 with a slst,
Slst in the next 2 dc, slst in the ch 3 sp
(6 sets of 2dc, ch2)
*2dc, ch2, 2dc, ch1 in the next ch2 sp*
Repeat From * to * 4 more times
Join to the ch3 with a slst,
Slst in the next 2 dc, slst in the ch 3 sp
(6 sets of 2dc, ch2, 2dc, ch1)

*2dc, ch2, dc, ch1 in the next ch2 sp, ch1, sc in the ch1 sp, ch1*
Repeat From * to * 4 more ties, join to the ch3 with a slst,
Slst in the next 2 dc, slst in the ch 3 sp
(6 sets of 2dc, ch2, 2dc, ch1, sc, ch1)

Sc, pcst, sc in the sc, ch2,
* 2 dc, pcst, 2dc in the 1st ch2 sp, ch2,
Sc, pcst, sc in the sc, ch2*
Repeat from * to * 4 more times,
Join to the ch3 with a slst, tie off and weave in your ends.
(6 sets of 2dc, pcst, 2dc, ch2, sc, pcst, sc, ch2)


An Ad Free PDF File Is Available
In My Ravelry Shop At This LINK
For $3.50


No comments:
Post a Comment