Showing posts with label make it premier. Show all posts

Monday, November 3, 2025

Autumn Breeze Scarf Crochet Pattern By Sara Sach

 Autumn Breeze Scarf
Crochet Pattern 
By Sara Sach Of Posh Pooch Designs


The Autumn Breeze Scarf was designed to match
 The Autumn Breeze Beanie Beanie Hat.
They make a Wonderful set for gift giving or
 keeping for your self.


The Autumn Breeze Beanie Beanie Hat.
Crochet Pattern LINK

I yarn I used is Premier Basix Trendy in the Desert Sands color. It is Medium 4 weight yarn that is 100 %
acrylic yarn. So it's easy care. When it gets dirty 
just toss it in the wash.

The Premier Basix Trendy Yarn
 has 6 beautiful colors.

Click My Premier Yarn Link To See All
 The Basix Trendy Yarns - LINK

The Autumn Breeze Scarf can be made
 using any Medium (4) weight Acrylic yarn.
Striped, Ombre, Variegated or Solid.
It's stitches up quick for a last minute gift 
or style need.


It Can be a regular scarf, a Cowl and
 even an Infinity Scarf. You Do 
what works best for you.

See The Video On My Crochet Youtube
 Channel At This LINK


Autumn Breeze Scarf Crochet Pattern

Please Add This Crochet Pattern To Your Raverly Favorites

Skill: Easy
 
Materials: Hook – I / 5.5 mm.
Yarn- med (4) Acrylic – 3.5 oz / 35 yds.
                  Premier Basix Trendy / Desert Sands
Yarn Needle
 
Stitches:
Chain (ch)
Double Crochet (dc)
Space (sp)
Skip (sk)
 
Size 8 X 40 inches
Repeat of 11 rows = approx. 8 inches
 
Notes:
Ch 3 Counts as a dc

Pattern:
 
R: 1 – Ch 29, dc in the 4th ch from the hook,
1 dc in each ch across, turn, ch 3 (27 dc)


R: 2 – Dc in the next 7 dc, ch1, sk 1 dc,
Dc in the next 9 dc, ch1, sk 1 dc,
Dc in the last 8 dc, turn, ch 3 (25 dc, 2 ch1)


R: 3 – Dc in the next 6 dc,
Ch1, sk 1 dc, dc in the ch1 sp,
Ch1, sk1 dc, dc in the next 7 dc,
Ch1, sk 1 dc, dc in the ch1 sp,
Ch1, sk1 dc, Dc in the last 7 dc,
Turn, ch 3 (23 dc. 4 ch1)


R: 4 – Dc in the next 5 dc, ch1, sk 1 dc,
Dc in the next ch1 sp, dc in the next dc,
 dc in the next ch1 sp,
Dc in the next 5 dc,
Ch1, sk 1 dc, Dc in the next ch1 sp,
dc in the next dc, dc in the next ch1 sp,
Dc in the last 6 dc, turn, ch 3 (23 dc. 4 ch1)


R: 5 – Dc in the next 4 dc,
Ch1, sk 1 dc, Dc in the next ch1 sp,
Dc in the next 3 dc, ch1, sk 1 dc,
Dc In the next 5 dc,
Ch1, sk 1 dc, Dc in the next ch1 sp,
Dc in the next 3 dc, ch1, sk 1 dc,
Dc in the last 5 dc, Turn, ch 3 (23 dc. 4 ch1)


R: 6 - Dc in the next 4 dc,
Ch1, Sk the next ch1 sp, 1 dc in the next 5 dc,
Ch1, sk the next ch1 sp, 1 dc in the next 3 dc,
Ch1, Sk the next ch1 sp, 1 dc in the next 5 dc,
Ch1, Sk the next ch1 sp, 1 dc in the last  5 dc,
Turn, ch 3 (23 dc. 4 ch1)


R: 7 – Repeat R: 6


R: 8 – Repeat R: 4


R: 9 – Repeat R: 3


R: 10 – Repeat R: 2


R: 11 – 1 Dc in each dc Across, Turn, ch3 (27 dc)


Repeat R: 1 – R: 11 For 5 more times, or more if a longer scarf is desired
 
Regular Scarf: If making a Regular Scarf, Tie off and weave in the ends.


Cowl Scarf: If making a Cowl Scarf, Do not tie off,
place the ends of the scarf together
sc the ends together to form a tube. Tie off weave in the ends.


An AD Free PDF File is Available
 In My Raverly Shop At This LINK
 For $3.50


Friday, October 24, 2025

Christmas Ornament Pillow Crochet Pattern By Sara Sach

 Christmas Ornament Pillow 
Crochet Pattern 
By Sara Sach Of Posh Pooch Designs


  FRIDAY FUN DAY!  

It's Our First Friday Fun Day Crochet Pattern And 
The Christmas Ornament Pillow is Our First Christmas
 Crochet Pattern Of  The 2026 Holiday Season.

It is an Easy and Quick Crochet Pattern to Stitch up,
and they are so fun to make you will want to make a 
bunch of them. I love this pillow so much because 
it's so soft, fuzzy and squishy.


I designed the ornament pillow with Premier Gumdrop 
Yarn. It is super bulky (6) yarn. The color I used is
 called Holly Jolly And you can make the pillow with just
 one Cake. It is a long striping yarn. You an stitch up the
 pillow as the colors flow or do color control. 
That is up to You.


Click My Premier Yarn Link To See All
 The Gumdrop Yarns - LINK

Although I used the Gumdrop yarn, you can use
 any super bulky (6) yarn. I do recommend a blanket
 or fuzzy type yarn, so It's soft and fuzzy.
And Remember To pick out some bright Christmas
 ribbon to make it fun and festive.

To Stuff the pillow You can use Polyfiberfil stuffing
 or a 12 inch round pillow form. I actually made a pillow
 form my pillow. I could not find one anywhere.
I  Just out a 12 inch circle of fabric, sewed it around,
stuffed it and sewed the hole closed. I used a mixed match
 pillowcase. worked great.


See The Video On My Crochet Youtube Channel At This LINK


Christmas Ornament Pillow Crochet Pattern


Please Add This Pattern to Your Ravelry Favorites 
 
Skill: Easy

Materials:
Crochet Hook – L/ 8 mm.
Yarn- Super Bulky (6) Premier Gum Drop/ Holly Jolly - 7 oz. / 174 yds.
12 inch round pillow form or Stuffing
Yarn Needle with large eye
Christmas Ribbon of Choice. (36 inches or more, any width you prefer.)
 
Stitches:
Chain (ch)
Slip Stitch (slst)
Double Crochet (dc)
Front Post Double Crochet (FPDC)
 
Notes:
Ch1 Does not Count as st
Ch3 Counts as dc
You can color control the stripes, or
           let them change as the yarn colors naturally change.
 
Size: 13 Inch Circle
 
Pattern:

R: 1 – Ch 5, join in a circle, ch3
9 dc in the circle, join to the ch 3 with a slst, ch3 (10 dc)


R: 2 – DC in the same st s the ch3, 2 dc in each dc
Around, join to the ch 3 with a slst, ch3 (20 dc)


R: 3 - DC in the same st s the ch3, 2 dc in each dc
Around, join to the ch 3 with a slst, ch3 (40 dc)


R: 4 - DC in the same st as the ch3, FPDC in the next dc,
*2dc in the next dc, FPDC in the next dc*
Repeat From * to * around, join to the ch 3 with a slst, ch3
 (40 dc, 20 FPDC)


R: 5 - DC in the next dc, FPDC in the next FPDC,
*1 dc in the next 2 dc, FPDC in the next dc*
Repeat From * to * around, join to the ch 3 with a slst, ch3
 (40 dc, 20 FPDC)


R: 6 - DC in the same st as the ch3,2 dc in the next dc,
 FPDC in the next dc,
*1dc in the next dc,2 dc in the next dc,  FPDC in the next dc*
Repeat From * to * around, join to the ch 3 with a slst, ch3
 (60 dc, 20 FPDC)

R: 7 - DC in the same st as the ch3,1 dc in the next dc,
2 dc in the next dc, FPDC in the next dc,
*1dc in the next 2 dc, 2 dc in the next dc, FPDC in the next dc*
Repeat From * to * around, join to the ch 3 with a slst,
Tie off weave in the ends.
 (80 dc, 20 FPDC)

Repeat R: 1 – R: 7
Leave the yarn attached to the 2nd circle


Place the Circle Together, with the right sides out.
Sc evenly around, leave a 10 inch opening for stuffing.
Slide the pillow form inside or stuff with stuffing,
 Sc the hole closed.


Make a nice big Bow with the ribbon and attach
To the top of the pillow.


An Ad Free PDF file Is available
In My Ravelry Shop At This LINK
 For $4.50


Monday, October 13, 2025

The Gradient Glitter Shrug Crochet Pattern By Sara Sach of Posh Pooch Designs

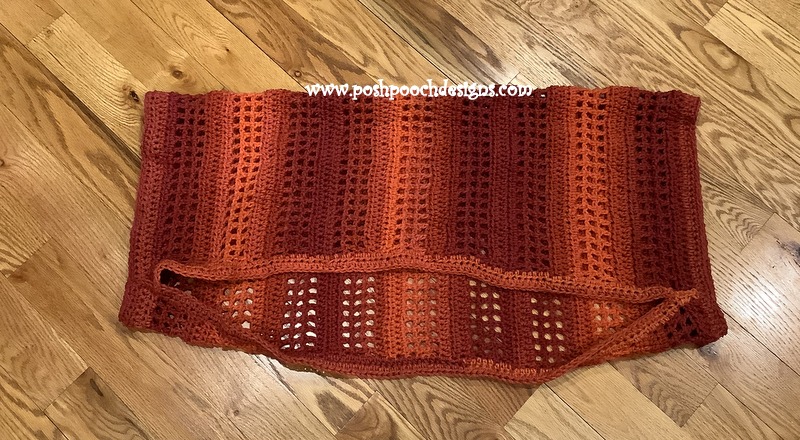
 The Gradient Glitter Shrug
 Crochet Pattern
 By Sara Sach of Posh Pooch Designs


The Gradient Glitter Shrug is The perfect addition to 
any outfit when you want to add some glamor and sparkle,
 any time of year. Wear it with a Casual look or evening
 clothes. It will add a special glitter and warmth, 
morning, noon or night.


A Shrug is  short, cropped garment, similar to a
 very short cardigan. They Have also been called a Cocoon
 Sweater or Cardigan. It is designed to cover the 
shoulders and upper arms. It typically has short or long
 sleeves and is often made from knitted or crocheted
 materials, though other fabrics like lace or chiffon 
are also used. 


Shrugs are a versatile layering piece, 
worn over dresses, tops, or tank tops to add warmth
 or a stylish element without full coverage.
Basically Any rectangle can be a shrug,
 you decide the length and width.

I designed the Shrug using Premier 
Gradient Glitter Anti Pilling Everyday Worsted yarn. 
It is a new yarn that is long Ombre with a silver 
thread running through it. 


These Are The Four colors I used:
C1 -Fawn Tones – 7 oz.
               C2 – Royal Blue Tones – 3.5 oz.
               C3 – Fern Green Tones – 3.5 oz.
               C4 - Sangria Tones – 3.5 oz.

Click My Premier Yarn Link To See All
 The Parfait Yarns - LINK


This Shrug Is Designed to work for any size need.
You can use the measurements to adjust The Pattern.
If You want it wider add more repeat rows, 
if you want it longer add more beginning chains. 
Keep your tape measure near and measure as you work. 
The crochet pattern is basically a rectangle and 
easy to adjust as needed.


See The Video On My Crochet Youtube
 Channel At This LINK


Gradient Glitter Shrug Crochet Pattern –

Please Add This Crochet Pattern To Your Raverly Favorites

Skill: Easy
 
Materials:
 Hook – I / 5.5 MM
Yarn – Med (4) Acrylic - Premier Gradient Sparkle 
               C1 – Fawn Tones – 7 oz.
               C2 – Royal Blue Tones – 3.5 oz.
               C3 – Fern Green Tones – 3.5 oz.
               C4 - Sangria Tones – 3.5 oz.
Yarn Needle
Tape measure
 
Stitches:
Chain (ch)
Single Crochet (sc)
Double Crochet (dc)
Skip (sk)
Space (sp)
Change to (chgto)
Long Triple Stitch (Ltr)Explained in the pattern
 
Note:
Ch3 counts as a DC
Ch 1 at end of rows does not count as a st.
 
 
Size: 24 X 40 inches With Trim
 3 FDC = 1 inch
1 Row = 1 inch
Multiples – 3 + 7 FDC
 
Pattern -
Remember To Measure as you go for a proper fit.
Demo is 22 FDC-

R: 1 – With C1, 70 FDC, turn ch3 (70FDC)


R: 2 – 1 dc in each FDC, turn, ch 3 (70 dc)


R: 3 – Ch3 counts as a dc, 1 dc in the next 2 dc, ch1, sk the next dc,
*1dc in the next 2, ch1, sk the next dc*
Repeat From * to * across, 1 dc in the last 3 dc, turn, ch 3
(22 ch1, 48 dc)


R: 4 – Chgto C2, Tie off C1, dc in the 1st 3 dc,
*Ltr in the next stitching in the rows below the ch1 sp,
1 dc in the next 2 dc*
Repeat from * to * across, dc in the last 3 dc, turn, ch 3
(22 Ltr, 48dc)


R: 5 – 1 DC in each st across, turn, ch3 (70dc)

R: 6 – Repeat R: 5


R: 7 - Ch3 counts as a dc, 1 dc in the next 2 dc, ch1, sk the next dc,
*1dc in the next 2, ch1, sk the next dc*
Repeat From * to * across, 1 dc in the last 3 dc, turn, ch 3
(22 ch1, 48 dc)


R: 8 - R: 11 – Chgto C1 – Repeat R: 4 - R: 7


R: 12 – R: 15 - Chgto C3 – Repeat R: 4 - R: 7
 
R: 16 – R: 19 - Chgto C1 – Repeat R: 4 - R: 7
 
R: 20 – R: 23 - Chgto C4 – Repeat R: 4 - R: 7
 
R: - 24 – R: 27 - Chgto C1 – Repeat R: 4 - R: 7
 
Repeat R: 8 – R: 27 – For 1 time
 
Repeat R: 8 – R: 23 – for 1 time
 
Repeat R: 5 – 7 For 1 time, tie off.
There are a lot of ends to weave in.
 

Remember to measure And add or subtract Rows For width as needed.
 
 
The Hem With C2 - 
Fold Rectangle in half, 
Make sure rows are going vertically.


Starting at the right bottom corner of rectangle, Measure 6 inches, 
Sc the front and back together to form a sleeve.


Evenly sc across the shrug only stitching through the top layer, 
Measure 6 inches from the other end, sc the last 6 inches
stitching the front and back together to form the other sleeve.


Turn, slst in the sc of the sleeve, evenly sc across the bottom layer,
slst in the sc of the sleeve, tie off, weave in the ends. 


 The Sleeve Trim:
Join yarn to the seam at the sleeve edge, ch1, sc around, 
 the sleeve opening, join to the 1st sc  with a slst,
Tie off, weave in your end.
 Repeat on the other Sleeve opening.


An Ad free PDF File Is Available 
In My Ravelry Shop At This LINK
$4.50