Wednesday, June 18, 2014

What Day Is It? Humphrey The Camel Stuffie Crochet Pattern

Do You Know What Day It Is?
"It is Hump Day!"
Says, 
Humphrey The Camel.
Crochet Pattern By Sara Sach of
 Posh Pooch Designs
Meet Humphrey The Camel.
He measure about 
10 inches from head to foot.
He is a Fun Little Stuffie,
Looking all dressed up
 in his Bow Tie .
Please, Add This Crochet Pattern to your

Isn't he adorable!
He has a little hump on his back, 
and a cute little tail.
I used Safety eyes, 
and embroidered his nose and mouth.

I had not made a stuffie in a while,
 and I thought it would be fun
 to make a camel and release
 him on a Wednesday! 

Okay. lets Get You started making your own 
Humphrey The Camel.

Skill - Easy,  but the pattern has a few pieces to keep up with.

Materials - Caron One Pounder worsted weight - 
beige, small amount of cream
 ( any cotton or worsted weight yarn will work)
Lime Green Cotton - small amount for bow
Dark Brown or black- small amount to embroider the nose
Hook - H
2 safety eyes - solid black
Yarn needle
Stuffing - Poly fiberfil

Stitches -
Chain ( ch)
Single Crochet ( sc)
Half Double Crochet ( hdc)

Starting At The Body -
R : 1 - ch 3 , in 2nd ch from the end, 6 hdc, 
join with a sl st to the first hdc, ch1, 
R : 2 - 2 hdc in each hdc, join ch2, 
R : 3 - 2 hdc in each hdc, join ch 2, 
R : 4 - 1 hdc in each hdc, join ch2 
R : 5 - 1 hdc in each st, join ch2, 
R : 6 -16 - Repeat R - 5, at the end of the 
R : 17, tie off leaving a 10 inch tail of yarn.
This makes about a 7 inch body. Stuff the body up to the end, 
sew all along to top of the end with the tail of yarn,
 and gather closed, making a few sts to secure the opening shut.

Head -
R : 1 - ch 3 , in 2nd ch from the end, 6 hdc, join with a sl st to the first hdc, ch1, 
R : 2 - 2 hdc in each hdc, join ch2, 
R : 3 - 1 hdc in each hdc, join ch 2, 
R : 4 - 1 hdc in each hdc, join ch2 
R : 5 - 1 hdc in each st, join ch2, 
R : 6 -15 - Repeat R - 5, tie off, set aside.


Snout - 
R : 1 - ch 3 , in 2nd ch from the end, 5s c, join with a sl st to the first sc, ch1, 
R : 2 - 2 sc in each sc, join ch2, 
R : 3 - 1 sc in each sc, join ch 2, 
R : 4 - 7 - Repeat R : 3, tie off leaving an 8 inch tail, stuff, and set aside.


Ears -Ch 7, 1 hdc in the 1st 3 chs, 1 sc in the last 3 chs, turn working down the opposite side of the ch, 1 sc in the 1st 3 chs, 1 hdc in the last 3 chs, tie off, weave in the ends, set aside.
Putting The Head Together - 
Place the snout on the front of the head
 and sew in place, attach a safety eye to each side of the snout. 
Place ears on each side of the head and sew in place. 
Stuff the head.
Use the Brown or black yarn to embroider the nose 
and mouth on the Camel's Snout.

Tail -Ch 9, 1 hdc in the 1st 4 chs, 1 sc in the last 4 chs,
 turn working down the opposite side of the ch,
 1 sc in the 1st 4 chs, 1 hdc in the last 4 chs,
 tie off, weave in the ends. Cut a Pice of yarn about 16 inches long,
 fold in half and slip through the end of the tail to form a tassle.
 trim evenly.

Feet and Hump - Make 5 ( 4 feet and 1 for the hump)

R : 1 - Ch 4, 6 hdc in the 2nd ch from the end, join, ch1

R : 2 - 2 hdc in each hdc, join, ch 2

R : 3 - 1 hdc in each hdc, join ch 2

R : 4 - 1 hdc in each st, join, ch 2

R : 5-8 - repeat R : 4, leaving a 8 inch tail of yarn.


For Hump - Stuff lightly, place on back of Camel and sew in place.


For Feet - Stuff and gather closed, place each foot on the bottom of the 

Body of the camel and sew in place.

Bow Tie - 
R : 1 -Ch 11, 1 sc in the 2nd ch from the end and in each ch, ch 1, turn 
R 2-4 - 1 sc in each sc, ch 1 turn, tie off after R: 4.
With a 8 inch piece of Yarn Wind tightly around the center of the bow,
tight securely.
Make a 8 inch chain, attach bowtie to the ch and 
tie around The camel's neck.

I really had fun designing and

 putting Humphrey together.

 I hope you will make one also.

This is intended as a toy to be played with,

 loved on and and thrown around.

An ad Free PDF file is 


available in my Ravelry  shop


 For $3.50 at this LINK


Tuesday, June 17, 2014

Lanyard Crochet Pattern By Repeat Crafter Me

With Flash

I saw the Stars and Stripes Lanyard
Designed By 
Repeat Crafter Me, 
and I thought,
 "I bet that would be great using reflective yarn". 
I had a small amount left
 from a previous project 
so I made one using the
  orange reflective yarn
 from Hobby Lobby.
I Like their reflective yarn,
I just wish they had more colors.
Like pink and purple.

The Lanyard is perfect for taking those
early morning walks,
or late in the evening walks.
Also for going to the Park and you don't want
to have to keep up with the keys.
without flash

I had the white and teal yarn handy,
 so I just used a few straps of yarn,
added a few cute buttons,
and we are ready to go.

Any way, the pattern is super easy
and fun to make.
Here is the link for the pattern.
Crochet Stars and Stripes Lanyard

Have fun coming up with color combinations
 and cute button or embellishments.

Monday, June 16, 2014

My Adventures With Polymer Clay

I Love Playing with clay.
It smells good, its squishy, and bendy.
And Can be molded around 
or into just about anything.
 Here are a few ideas I tried for fun,
that you might like to try.


These are a few tools I picked up at Hobby Lobby.
I bought the assortment pack of polymer clay,
 because I wasn't sure what colors I wanted to use. 
They do have a great selection of clay and tools.

Just click the link and it will take you to 
the blog where I explained what I did.
I wanted to try this and I really like how they
 turned out. I use them quite often.

This took a little practice but I ended
up with a pretty nice yarn bowl.

This is basically a tutorial of how 
I make my buttons.

Polymer Clay is lots of fun and 
you can make lots of cool things.
I want to make some beads and jewelry 
next so be looking for a fun blog
 on how they turned out, real soon.

Saturday, June 14, 2014

Opa's Hat - Men's Summer Bucket Hat

Opa's Hat Crochet Pattern 
 By Sara Sach of Posh Pooch Designs

I designed The "Opa's Hat" just for my hubby.
We are Opa and Oma 
to our 3 precious Grandchildren.


It is a loose fitting hat, and very comfy to wear on
 a warm day.
I chose to make it out of Cotton yarn,
so it would be cooler.

I absolutely Love this picture.The view in the back ground, 
and one of my Husband's toys a jeep.
My Son has a Race team Called
And my hubby gets to "play" with them.

We just retested and Updated This Crochet Patterns with lots of new pictures,
 And a Brand New Video

See this Video on my Youtube channel at this LINK


Opa's Hat - Crochet Pattern by Sara Sach
Please Add This Pattern To Your Ravelry Favorites


Skill - Easy


Materials - 
Hook - I / 5.50 MM/ 5.25 MM
Yarn – Cotton (4) Main Color / MC - 4 oz. Color Two/ C2 – 1 oz.
Yarn Needle

Stitches -
Chain (ch)
Slip Stitches (sl st)
Single Crochet (sc)
Half Double Crochet (hdc)
Double Crochet (dc)
Change to (chgto)
Front Post Only (FPO)
Back Post Only (BLO)

Size: 20 - 22  inch head
The Hat is intended to be loose and comfortable to wear.
You can adjust the size by going up or down a hook size.

Gauge: 3 dc = 1 inch 

Note:  
Ch2 and Ch 3 at ends of rows counts as a stitch unless otherwise stated.
When changing colors ch2, or ch3 after the color change.
Color change are up to your preference, Colors in Pictures are from the Video Demo.

R: 1 – With MC, Ch5, join in a circle, ch 3, 9 dc, join with a sl st, ch3 (10 dc)

 R: 2 - 1 dc in the same st as the ch3, 2 dc in each dc around, join, ch 3 (20 dc)

 R: 3 - 1 dc in the same st as the ch 3, 2 dc in next dc around,
 join, ch 3 (40 dc)

 R: 4 - 1 dc in the same st as the ch3, *1 dc in the next dc, 2 dc in the next dc*, 
Repeat from * to * around, ch 3 (60 dc)

 R: 5 - 1 dc in the same st as the ch3, *1 dc in the next 2 dc, 2 dc in the next dc*, 
Repeat from * to * around, join. Do not tie off, Do not ch 3 (80 dc)

The top of your hat should be nice and flat.

 R: 6 - Chgto C2, Do not cut MC, FLO of R: 5, ch1, sc in each dc around, join to ch1,
tie off. (80 sc)


 R: 7 - Chgto MC, BLO of R: 5, ch 3, 
1 dc in each dc around, join, ch 3 (80 dc)

 R: 8 - R: 12 - 1 dc in each dc around, join, ch 3 (80 dc)
Do not tie off MC, Do not ch 3 after R: 12

 R: 13 – Chgto C2, ch2, 1 hdc in each dc around, join to ch 2, Ch 2 (80 hdc)

R: 14 - 1 hdc in each hdc, join, tie off, weave in the ends. (80 hdc)

 R: 15 - Chgto MC, Ch 3, 1 dc in the same st as the ch3,
*1 dc in the next 3 hdc, 2 dc in the next hdc*, 
Repeat From * to * around brim of the hat, join, ch 3. (100 dc)

R: 16 - 1 dc in each dc, join, ch1 (100 dc)

R: 17 -1 sc in each dc, join. (100 sc)

R: 18 - Chgto C2, ch1, 1 sc in each sc,
 Join, Tie off weave in your ends.  (100 sc)
This is the perfect Father's Day gift and you can
 stitch it up in a evening.


 It is perfect for my hubby to wear 
while while mowing the lawn, working in the yarn or playing 
with the jeeps. The back of the hat comes down on his neck,
 to keep him from getting sunburned too.


And it is Oh So Stylish!
I tried to get him to Model it but he did not have time, 
Maybe later.

An Ad Free PDF file is available 
For $4.50 in my Ravelry shop
At This LINK

Friday, June 13, 2014

Lazy Daisy Chain and My Mini Garden

Lazy Daisy Chain Necklace
Crochet Pattern
 By Sara Sach of Posh Pooch Designs

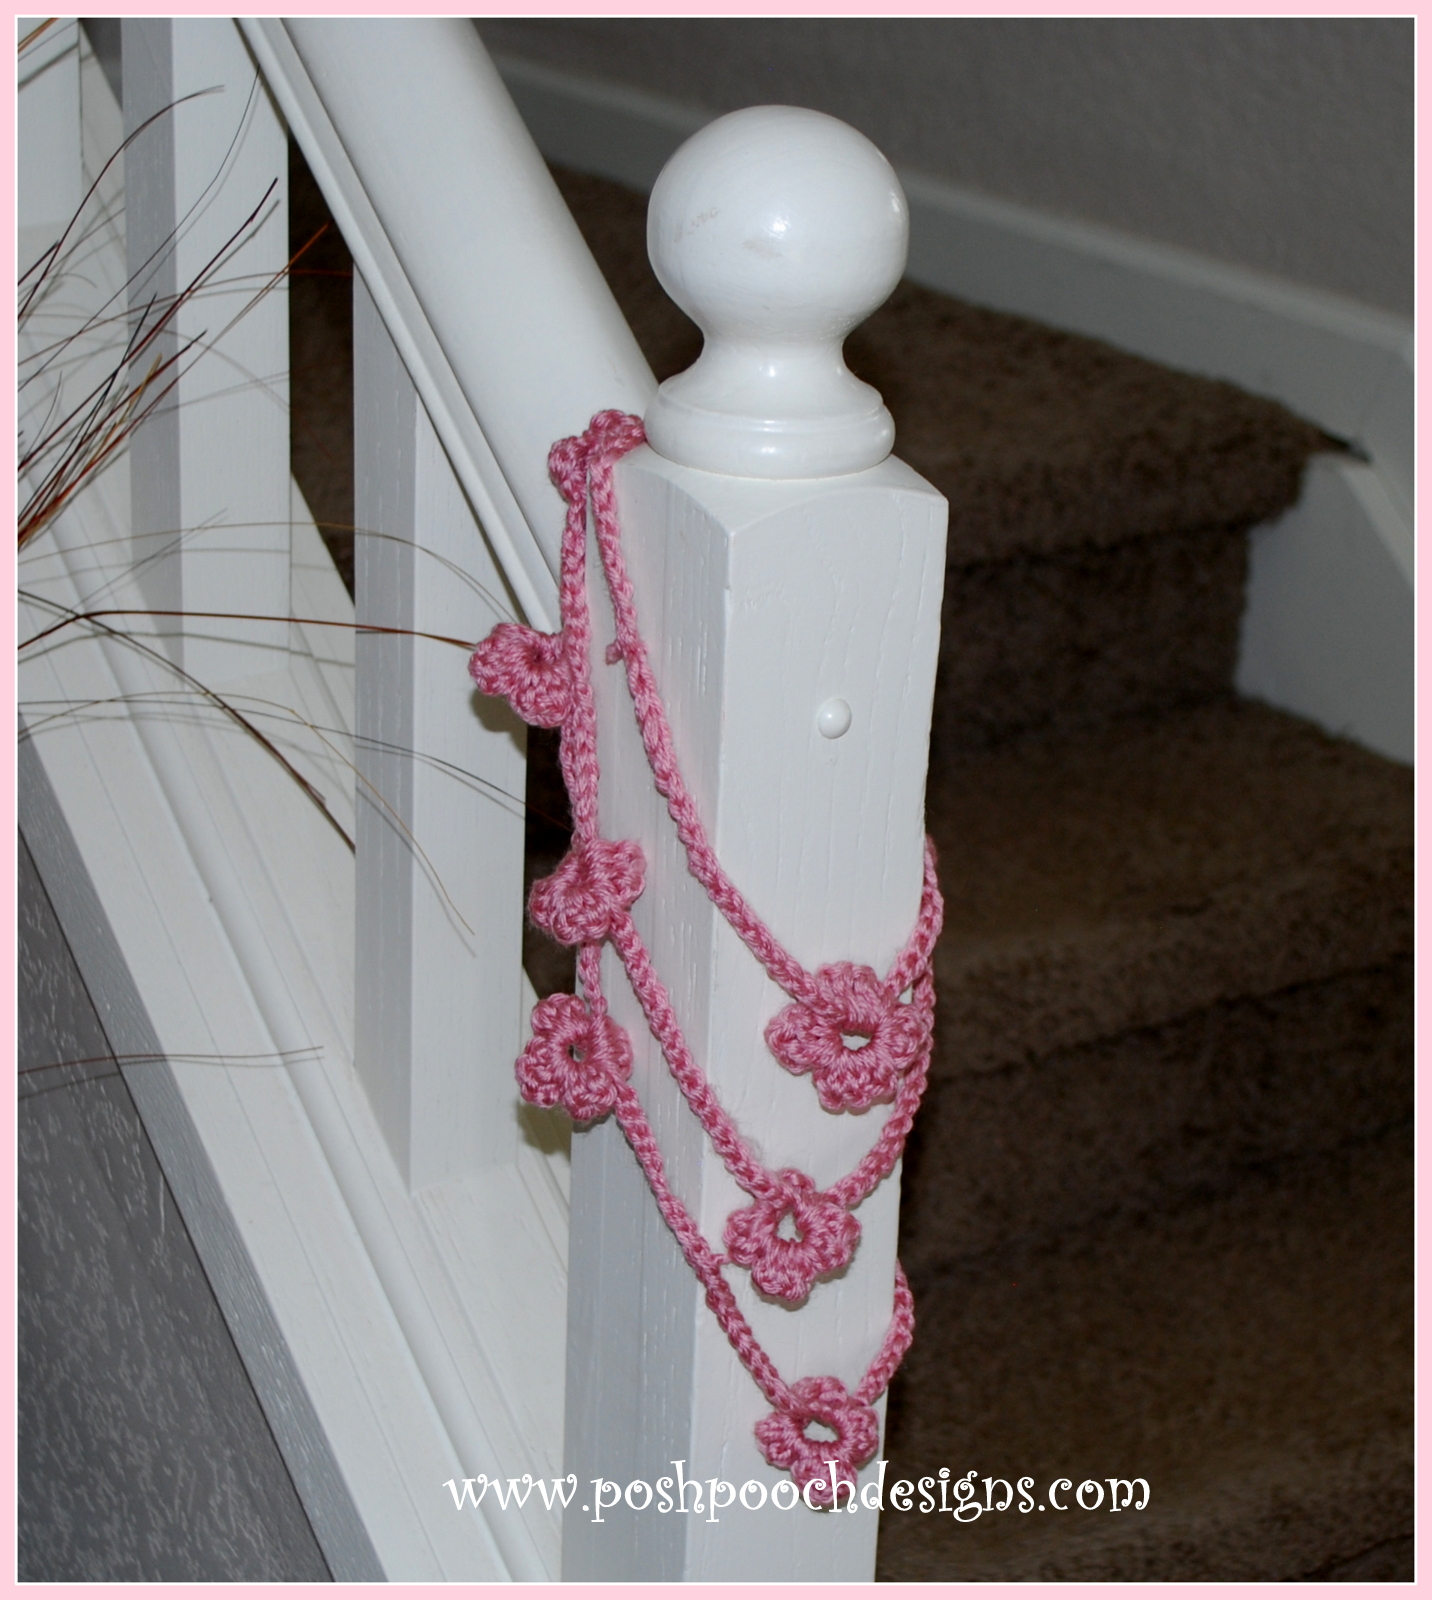
It can be a Necklace, A Belt, A Headband, 
A bracelet, A Purse handle A Decoration, 
Or anything You want to use it For.

My Favorite way to use it is as a Necklace.

See this Video on Youtube Crochet Channel at this LINK


Lazy Daisy Chain Necklace Crochet Pattern
 By Sara Sach
Please, Add This Crochet Pattern To Your Ravelry Favorites.

Skill : Super Easy 

Materials :
Small amount of ANY yarn - 
Worsted weight, Cotton, Sport weight, threads -- 
Whatever you have on hand!
Hook that corresponds with the yarn used

I used a H / 5.00  hook and Acrylic med (4)yarn.
From 1st ch to petal is 4 inches, 
If you use a different weight yarn you will get different length.

Stitches : 
Chain: (ch)
Slip Stitch ( sl st)
Double crochet ( dc)

Pattern: 
Ch 13, dc in the 4th ch from the hook, 3 dc,ch2, sl st  in the same ch,
 ( 1st petal made)

Continue to work in the same ch, *ch 2, 3 dc, ch 2, sl st *

 Repeat From * to * 2 more times, 
for a total of 4 petals made.
 ch 13 after the 4th petal, and repeat until desired length.

I just tied the 2 ends together and wore it like a necklace, 
and I got lots of complements.
You stitch more chains between flowers, if you like.

When I wore the green one, everyone 
thought it was 4 leaf clovers.


This pink one I wore with my Easter outfit!
Got a  lot of compliments, too!


Here is another one I made a few years back, for a yarn 
Bombing project. I put 6 petals on these flowers.
 I even made Maximo and Rosie one to wear to the 
Doggie Dr.
This picture cracked me up because Rosie's Ear looks like
 its missing, And Maximo spotted the cookie bag!

What colors will you make With the Lazy Daisy Chain?

Tuesday, June 10, 2014

Triple Ripple Chevron Throw Crochet Pattern

The Triple Ripple Throw Blanket
Crochet Pattern by
Sara Sach of


THIS CROCHET PATTERN HAS BEEN UPDATED WITH A PHOTO TUTORIAL,
 AND A BRAND NEW VIDEO,
YOU CAN NOW FIND IT AT THIS LINK

I bought the pillows, from Target,
 to match The blue futon on the back deck.
It is a covered deck, so I wasn't worried about 
them getting too wet.
Then I thought it sure would be nice to have a throw
 for cool mornings and evenings,
Just to toss across my legs.

I Made the Throw to match the pillows
 and futon cover.
I know they do not match perfectly, 
but I really like how they work together.

I made the throw from Red Heart Super Saver as
 I wanted to use a yarn that 
was durable, and washable.

Hint about washing  items made with
Acrylic yarns like
Red Heart Super Saver - Wash in warm water 
on gentle cycle,use a tiny bit of liquid soap
 and a fabric softener. 
Then hang to dry. 
It is an Acrylic yarn and should 
never go in the dryer.
I realize many yarn labels say it is ok to 
machine wash and dry items made with acrylic yarn,
But I want the items  l design to last as long as possible.


I chose to use Triple Crochet because
 I wanted the throw to be light and airy, not heavy

It is pooch Approved!


Monday, June 9, 2014

The Official and Not So Official Crochet Terms

Yesterday on my Facebook Fan page
I asked a few questions 
about Crochet Terms.
I found that a lot of people
are not sure about them.

I found a very good list 
of Official Crochet Terms from
This is a complete list of abbreviations 
and explanation of the abbreviations.


But What about the
"Not So Official"Crochet Terms

1. HOTH-
This is not a Star Wars term.
It actually means, "Hot Off The Hook".
A Project or item just completed.
These Dog Toys are HOTH.

2. Frogging - This is not Going Frog catching.
It refers to "ripping" out the yarn, or
 undoing a project that did not come 
out as planned. " Rip it, rip it, Ribbit, Ribbit".

3. Yarn Barf- This is not barfing up yarn.
This refers to when you pull the yarn from the
 center of the skein and a whole wad of yarn
 comes out in a big tangled mess.

4. WIP- This is "Work In Progress". 
Refers to the Project you are working on.

5. "Hooker" - is not a Street Walker.
It refers to those of us who prefer 
using a crochet hook, 
rather then  knitting Needles, 
to make our yarn projects.

Yes, I am a hooker.

6. A "Yarny" - Refers to anyone who loves
Anything  pertaining to, 
produced from, or containing yarn.

7. "Hooker Want a Be's" - Those who want to hook 
but just don't have the skills.

So there you have it. 
All the crochet Terms I know.
Feel free to comment any others 
that you know and
 I will add them to the list.

8. I just leaned a new Crochet Term - 
"PHD" - Refers to "projects half done"! 
I know I have a lot of those!
Now, get out there 
and crochet 
something fun today!