Wednesday, December 14, 2016

Peppermint Candy Doily Crochet Pattern | Posh Pooch Designs


Peppermint Candy Doily
 Crochet Pattern
By Sara Sach of Posh Pooch Designs


This festive and sweet doily can also be used as a 
washcloth  or Hot Pad, since it is can be made
 out of cotton yarn.

 It can be made out of Worsted weight yarn, 
 if it is not used near anything hot.
Makes great Placemats also!

Place mat, Doily, Hot Pad  or Dishcloth,
 It is Adorable and Sweet,
 no matter how you choose to use it!

See the Video on my Youtube Channel
 at this LINK


Peppermint Candy Doily Crochet Pattern by Sara Sach
Please add this to your Ravelry Favorites

Skill: Easy

Materials:
Crochet Hook – H / 5.0 MM
Yarn- Med (4)Acrylic, Cotton or Blend – White – C1, Red – C2 (1 oz. of each color)
Yarn needle

Stitches:
Chain (ch)
Slip Stitch (sl st)
Single Crochet (sc)
Double Crochet (dc)
Skip (sk)
Space (sp)

Special Stitch:
V Stitch (Vst) - "1dc, ch1, 1dc"

Size: Circle is 12 X 12, 11 X 16 with Candy Wrapper edges.

Notes:
You will be changing colors every row, ch3 after the color changes.
Do not cut yarn after each Round, carry yarn in the back.
Rounds are joined with a slip stitch

Pattern:

R:1 – With C1, Ch 5, join in a circle, ch3, (counts as 1 dc)
11 dc in the circle,
 join with a sl st to the top of the ch 3, (12 dc)

R: 2 – Chg to C2, slst between the 1st 2 dc, Ch 3(counts as dc) *ch2,
1 dc in the sp between the next 2 dc*
Repeat From * to * around, ch 2, join to top of ch3, (12 dc, ch2).

R: 3 – chg to C1, slst in the 1st ch2 sp, Ch 4 (counts as dc, ch1) dc in the same sp,
*ch1, Vst in the next ch2 sp* Repeat From * to * around, ch1, join to top of ch3,
(12 Vsts, 12 ch1)

R: 4 – Chg to C2, slst in the 1st V st, Ch 4 (counts as dc, ch1) dc in the same sp,
*ch1, dc in the next ch1 sp, ch1, Vst in the next Vst* Repeat From * to * around,
 ch1, join to top of ch3, (12 V sts, 12 dc,)

R: 5 – Ch to C1, slst in the 1st V st, Ch 4 (counts as dc, ch1) dc in the same sp,
*ch1, V st in the next dc, ch1, V st in the next Vst* Repeat From * to * around,
 ch1, join to the top of ch 3,
(24 Vsts, ch1)

R: 6 - Ch to C2, slst in the 1st V st, Ch 4 (counts as dc, ch1) dc in the same sp,
*ch2, V st in the next Vst* Repeat From * to * around, ch2, join to the top of ch 3,
(24 Vsts, ch2)

R: 7 - Ch to C1, slst in the 1st V st, Ch 4 (counts as dc, ch1) dc in the same sp,
*ch3, V st in the next Vst* Repeat From * to * around, ch3, join to the top of ch 3,
(24 Vsts, ch3)


R: 8 - Ch to C2, slst in the 1st V st, Ch 4 (counts as dc, ch1) dc in the same sp,
*ch4, V st in the next Vst* Repeat From * to * around, ch4, join to the top of ch 3,
Tie off Red yarn, weave in the end. (24 Vsts, ch4)

R: 9 – Chg to C1, ch1, *2 sc in next Vst, 3 sc in the next ch4 sp*
Repeat From * to * around, join to ch1,

If you do not want the candy wrapper ends, tie off and weave in your ends.


R: 10 – Ch3, 1 dc in the next 12 sc, Turn, ch 3(13dc)

R: 11 – 1 dc in the same st as the ch3, 1 dc in the next 11dc, 2 dc in the last dc, Turn, ch 3 (15dc)

R: 12 - 1 dc in the same st as the ch3, 1 dc in the next 13dc, 2 dc in the last dc, Turn, ch 1 (17dc)

R: 13 -1 sc in the 1st dc, *sk the next dc, 3 dc in the next dc, sk the next dc, sc in the next dc*
Repeat From * to * 3 more times, tie off weave in your ends.

Count over 10 V sts, Join to the 1st sc with C1, Repeat R: 9 – R: 10
Make sure Candy Wrapper Twists are evenly placed.

This Doily may need to be blocked for a nice crisp appearance.


An Ad Free PDF file is Now Available
 in my Ravelry Shop
 For $3.50 At This LINK


Tuesday, December 13, 2016

Live Video Chat With Sara Sach - Virtual Ugly Sweater Party | Posh Pooch Desgins

 Are you ready for Some Fun???

 See The Live Video Chat 
on my Youtube Channel
 at This LINK

How about Free Crochet Pattern for a Simple and fun Dog Sweater?

As a Thank you to all my Friends and Fans I have made this Crochet Pattern Free For the next couple of days!
Just Click the link - No Code Needed
Includes Sizes - XXS, XS, S and M
 for 2 to 15 lb dogs.

Today's Questions:
 1. Where did your Message tab on Facebook Go?
I turned it off till after Christmas.

2. How do we contact you?
You can contact me through Ravelry, Etsy or Craftsy or email me.
ssach@poshpoochdesigns.com

3. Where are your Free patterns located?
All my Free patterns are located on my Blog, Ravelry and on my Youtube Channel.

What's New This Week at Posh Pooch Designs:
Free Crochet Pattern and Video

3 new Crochet Patterns 
Coming this Week!

Free Crochet Pattern and Video

Peppermint Doily

Free Crochet Pattern and Video

Tuesday, December 6, 2016

Live Video Chat - Can Acrylic Yarn Projects Be Blocked? | Posh Pooch Designs

This Week On Our Live Video Chat, With Sara Sach of
We are answering the Question,
" Can Acrylic yarn projects be Blocked? and should they be?


See The Live Video Chat on my Youtube Channel at This LINK

First let's Answer the Question, '"What is Blocking"?
Blocking is basically dampening, and laying out 
your project to dry. Sometimes on a board with pins. 
It helps to shape and crisp up your projects. 
Small projects can be pinned down to a board, 
larger projects can be laid Out on a large flat surface.
You can purchase a Blocking board or use any type of sponge or foam board as long as the pins will stay in it.

I have even heard of people using cardboard, 
though I do not recommend that.


See The Video demonstration on my Youtube Channel at this LINK

But What about Projects made with Acrylic yarn?
Yes, absolutely you can block them.
But it is totally up to you if you feel they need it.
sometimes I do, and Sometimes I do not.
Depends on the project and what I am using it for.

What you will Need to Block a Small Project:
Some sort of foam Board.
Stainless Steele Straight pins (metal pins can leave rust marks)
A Clean towel
A Water Bottle filled with fresh water

I Place a towel across the board sometimes, 
depending on the size and weight of the project
 to catch the over spray.
I lay out the project, and pin the project. Making sure corners and shape are consistent.
Then, I spray the project with water,  just enough to dampen it, 
I do not soak it. It would take too long to dry.
If it is a small project I set it on top of my dryer to dry.
 if it is larger and the weather is nice I set it on the back deck,
 in the shade.
Once it is dry, remove the pins and it is good to go!

What is Happening this Week at 
Posh Pooch Designs

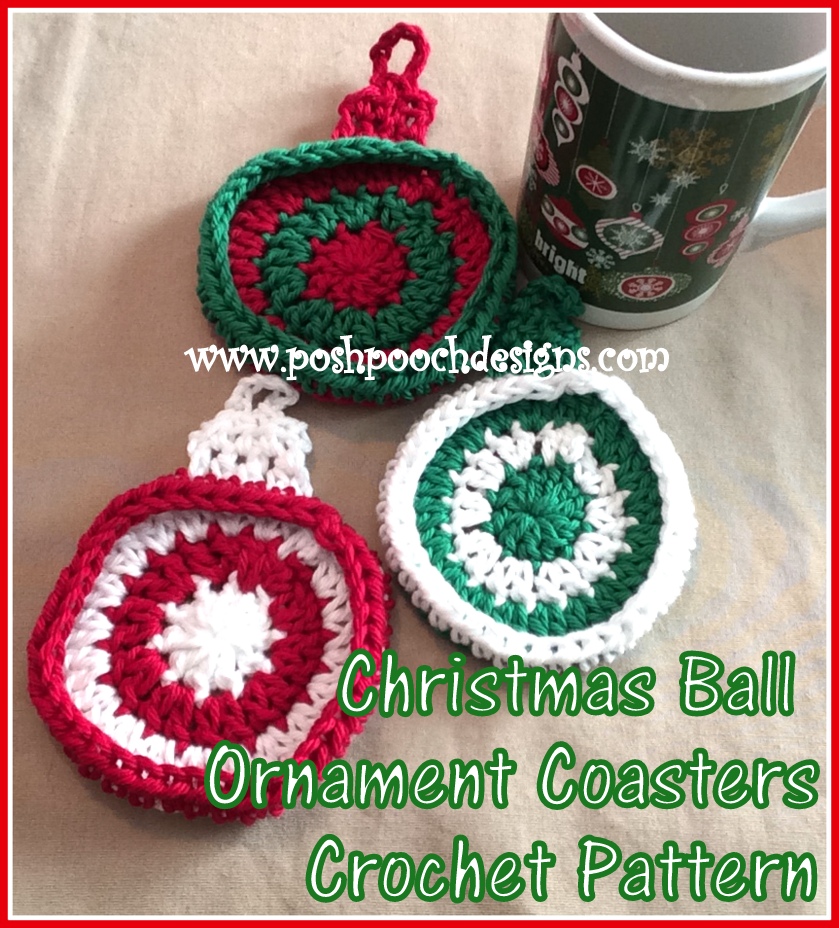
Christmas Ball ornament Coaster
Free Crochet Pattern and Video LINK


Christmas Candy Dog Bandanna 
Free Crochet Pattern and Video  LINK

Christmas Star 
Free Crochet pattern and Video LINK

By Special Request - 
The Chihuahua Head Christmas Ornament
Crochet Pattern and Video  LINK

Friday, December 2, 2016

Braided Cowl Scarf From Lace Yarns | Posh Pooch Designs

I received a Question a few weeks ago.
She asked, " I have a bunch of Lace Yarns, 
and am tired of making
 Lace Ruffle scarves, 
what else can I make?"
and 
How about making them into Braided or Chained Cowls?

You can use any type of Lace Yarns.
 They can have fur or velvet, sparkles and stripes.
They can even be thick or thin.
One color, variegated or striped.


See the Video  on my Youtube Channel at this 
LINK

How to make a Braided Cowl:
You simple chain them.
Leave about 3 feet unchained, start with a slip stitch
 and chain with your fingers, or large hook,
 the whole skein of yarn, except the last 3 feet.
Use the unchained portion to tie  bow.
If you want it to be a scarf, just don't tie the ends together.
Here is a blue one I made, but I tied the yarn around
 the knot, in place of a bow.
So go get those Lace yarns you have laying around and
 make some Braided  Cowls!

Thursday, December 1, 2016

I Love My Dog Tree Ornament Crochet Pattern | Posh Pooch Designs

I Love My Dog Tree Ornament 
Crochet Pattern by Sara Sach
of Posh Pooch Designs
Is it a Heart or a Dog?  
It’s Both


You can make them in the colors of your pooch, 
or a friends pooch for a gift tag, or place setting card.
Make 2 sew them together and place a gift card in side.
Or attach one to a Sweater, stocking, gift bag or hat!
Sew two together and make a little gift card holder.


See the Video on my Youtube Channel
 at this LINK

I Love Dog Ornaments Crochet Pattern by Sara Sach
Please add this Crochet Pattern to Your Ravelry Favorites

Skill:
Easy

Materials:
Crochet Hook – H
Yarn – Worsted Weight (4) – I used Red heart with love
            White, Brown, black, red and green
Yarn needle

Stitches:
Chain (ch)
Slip Stitch (slst)
Single Crochet (sc)
Half Double Crochet (hdc)
Double Crochet (dc)

Size: 4 X 5 inches

Notes: join are made with a slst

Pattern:
Heart –
R: 1 – With White yarn – ch 4, join in a circle, ch3, 11 dc in the circle,
Join to top of ch 3, ch 3 (12 dc)

R: 2 – 1 dc in the same st as ch 3, 2 dc in each dc around, join, ch 1
(24dc)

R : 3 – sl in the 1st st, sc in the next st, 2 hdc in the next st, 3 dc in the next st,
2dc in the next st, 2 hdc in the next st, 1 hdc in the next st, 1 sc in the next 4 sts,

2 hdc in the next st, dc, ch1, dc in the next st ( bottom point of heart)

2 hdc in the next st, 1 sc in the next 4 sc, 1 hdc in the next st, 2 hdc in the next st,
 2 dc in the next st, 3 dc in the next st, 2 hdc in the next st, sc in the next st,
Join to the slst, tie off.


Dog Ears – Make One on each side of the heart.
Now Turn your heart upside down.

R: 1  - Slst in the dc next to the ch1, on the right side,
1 sc in the next 2 sts, 1 hdc in the next 3 sts, 1 dc in the next 3 sts,
1 hdc in the next st, 1sc in the next st, ch 1 turn

R: 2 -1sc in the next st, 1 hdc in the next st, 1 dc in the next 3 sts,
1 hdc in the next 2 sts, 1 sc in the next st, slst in the next 2 sts,
 tie off and weave in your ends.

Repeat R: 1 and R: 2 on the other side of the heart.


Embroider the face on with the Black yarn.
Add a ribbon bow and yarn hanger.


A I Love My Cat Christmas Tree Ornament
Free Crochet Pattern at This LINK

Tuesday, November 29, 2016

Live Video Chat - When do I ch 3 --- Before or After the Turn? | Posh Pooch Designs

Live Video Chat with Sara of
Today we are discussing,

"When Do I ch 3, Before or after
 the turn.
and 
Do I join and ch 3 before are
 after the color change?"


See The Live Video on my Youtube Channel HERE


See a Video Demonstration here.


Lets Start with Crocheting in the Round.
When you crochet in round, 
where you join the rounds with a slip stitch, you ch 3 
and it usually counts as the 1st double crochet 
for the next round.
Yes, you join with a slip stitch and ch 3  

-- But what if you are changing colors on the next round?


If you are changing colors on the next round, 
Join with a slip stitch, 
then change colors, and Ch3 after the color change.
This Way you will have a neat and tidy color change.


Now to answer the 2nd part of the Question -
"Do I turn and Change 3, or do I ch3 and Turn?"


Both are correct.
"turn and Ch3" and "Ch3 and turn"
 are actually the very same technique. Just worded differently.
 The Designer of the pattern may have a reason for the wording order, depending on what you did before or after the turn.

The only difference is, 
if you are changing colors for the next row.
You will change colors before you ch 3.
That way the 1st dc will be the same color as the row. 
Because again, the 1st ch 3, usually, 
counts as the 1st Double Crochet.
But when in doubt check with the pattern designer
just to be sure.

This is the same if you are stitching
sc, dc, hdc, Tr, etc. in rows.

What is New This Week at Posh Pooch Designs
2 sizes - Youth and Adult


I Love My Dog Ornament Crochet Pattern and Video
Coming Soon!