Showing posts with label Parfait yarn. Show all posts

Monday, September 30, 2024

Kiwi Monster Squishy Crochet Pattern By Sara Sach

 Kiwi Monster Squishy 
Crochet Pattern 
By Sara Sach Of Posh Pooch Designs

Isn't This Kiwi Squishy Monster
 The Cutest Thing!


🥝🥝🥝🥝🥝🥝🥝🥝🥝🥝🥝🥝🥝🥝🥝🥝🥝🥝

I Just love Him so much and although it's a monster,
 it is adorably sweet, Just like a Kiwi should be.


I designed him using the Brand New Premier 
Parfait Chunky Fruit Yarn in the Kiwi Colorway. 
 It is a super bulky (6) weight yarn. It is so soft
 and squishy, but very sturdy. It will hold up to
 lots of  play time by kids, and Adults, too.


8 colors
262 yards/ 7 oz. per cake
100% polyester
Super Bulky (6)

See All 8 colors and 
coordinating colors at
 My Premier LINK


And I think any of the colors will make nice 
Squishy Monsters! And You just need one cake to
 make a monster for anyone, including you.
So Grab a Cake or two and make some 
sweet Monsters!


See The Video On My Crochet Youtube 
Channel At This LINK


Kiwi Monster Squishy Crochet Pattern

Please Add This Crochet Pattern To Your Raverly Favorites

Skill: Easy
 
Materials:
Crochet hook –J / 6 mm.
Yarn – Super Bulky (6) Premier Parfait Chunky Fruits / Kiwi – 7 oz.
Stuffing – 10 oz. Polyfiberfill
Large Yarn needle
 
Stitches:
Chain (ch)
Slip Stitch (slst)
Single Crochet (sc)
Double Crochet (dc)
2 Double Crochets together (2dctog) Descrease
 
Size:
12 inches tall, 24 inches around
 
Notes:
Ch1 Does Not Count as a st
Ch3 Counts as a Pattern
 
Pattern:
 
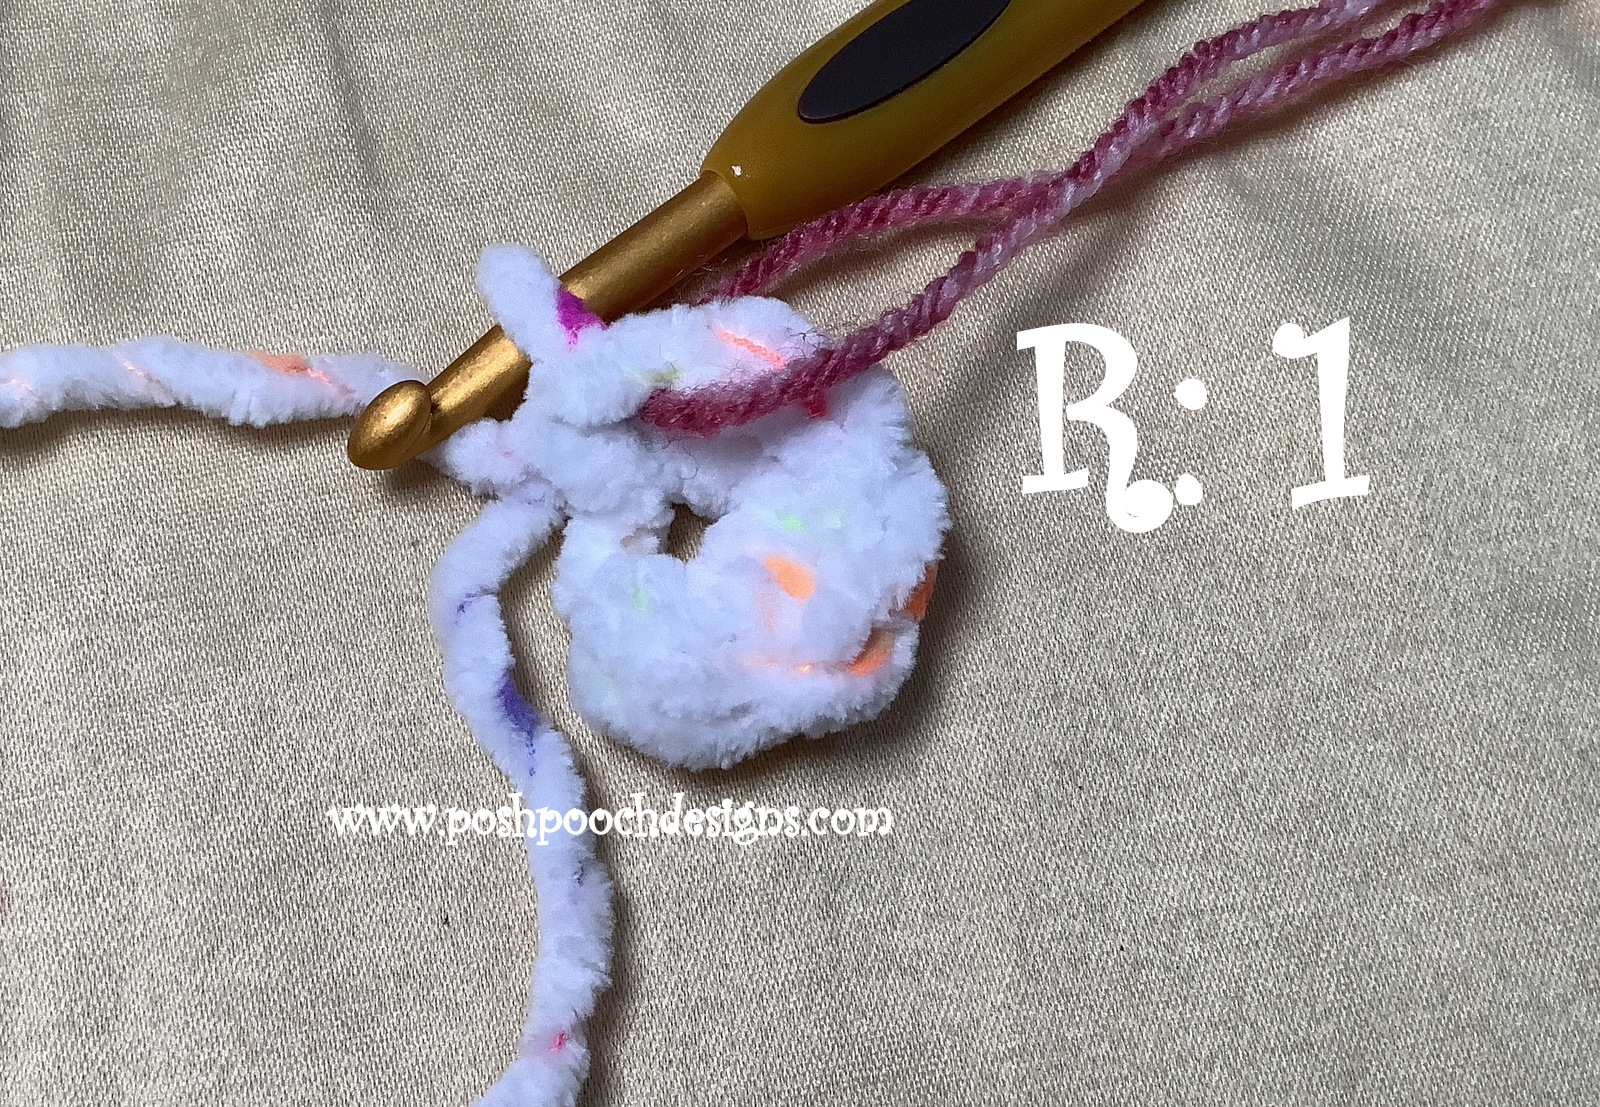
R: 1 – We are stating at the top of the monster,
Ch 5, join in a circle, ch3, 11 dc in the circle,
Join to the ch3 with a slst, ch 3 (12 dc)


R: 2 – Dc in the same st as the ch3, 2 dc in each dc around, join
Join to the ch3 with a slst, ch 3 (24 dc)


R: 3 - Dc in the same st as the ch3, 
*1 dc in each dc around,  2 dc in the next dc*
Repeat from * to * around, join
Join to the ch3 with a slst, ch 3 (36 dc)


R: 4 – Dc in the same st as the ch3,
* 2 DC in the next dc, 1 dc in the next 2 dc*
*Repeat from * to * around,
Join to the ch3 with a slst, ch 3 (48 dc)


R: 5 –  1 dc in each dc around,
Join to the ch3 with a slst, ch 3 (48 dc)
 

R: 6 – R: 10 – Repeat R: 6
 

R: 11 – 1 dc in the next dc
*Dctog the next 2 dc, 1 dc in the next dc*
Repeat From * to * around, join to the ch3 with a slst, Ch3
 
R: 12 - *Dctog the next 2 dc, 1 dc in the next 1*
Repeat From * to * around, join to the ch3 with a slst, ch1

Stuff the Monster
 

R: 13 - *Dctog the next 2 dc, *
Repeat From * to * around, join to the ch1.
Tie off, leaving a 10 inch tail of yarn.
 
Add more stuffing if needed


With Needle and Tail of yarn, gather closed the whole,
This is the bottom of the Monster.

Eye:
R: 1- With Green yarn, ch2, 6 dc in the 2nd ch from the hook,
Join to the 1st sc with a slst (6sc)
 
R: 2 - Chgto White, ch1, 2 sc in each of the 6 sc,
Join to the 1st sc with a slst (12sc)
 
R: 3 – Ch1, *1 sc in the next sc, 1 sc in the next sc*
Repeat From * to * around,
Join to the 1st sc with a slst (18 sc)
 
R: 4 – Chgto The Brown yarn,
*1 sc in the next 2 sc, 2 sc in the next sc*
Repeat From * to * around,
Join to the 1st sc with a slst (24 sc)
 
R: 5 – Slst in each sc around, join to the 1at slst,
Tie off leaving a 18 inch tail of yarn.
Place eye on the front center of the monster
and st in place using the tail of yarn and needle.
 

Antennae:
*Ch 10, 2 dc in the 2nd ch from the hook,
Slst in the next 8 chs, 

Repeat From * to *, tie off leaving 6 in tail of yarn.
Attach to the top center of the monster head.
 
Arms and Legs –

Make 2 Arms - Make 2
Starting with a 8 inch tail of yarn,
Ch 12, sdc in the 2nd ch from the hook, sc in the next 10 chs,
Tie off leaving a 8 inch tail of yarn.
 Attach arms to the side of the monster.
 
Legs:
Starting with a 8 inch tail of yarn,

*Ch 16, 
3 dc in the 2nd ch from the hook,
slst back down the 14 chs,*
Do not cute yarn,
Repeat From * to *
Tie off leaving a 8 inch tail of yarn.

Attach legs to the bottom of the monster.
 
Embroider on A silly smile  - 
We want Our Monster to be sweet like kiwi fruit.


An Ad Free PDF File is Available
 in My Raverly Shop At This LINK
 For $3.50


Friday, September 13, 2024

Little Silly Ghosts Crochet Pattern By Sara Sach

 Little Silly Ghosts 
Crochet Pattern 
By Sara Sach of Posh Pooch Designs


👻👻It's Friday Fun Day!👻👻
Lets Make Some Silly 
Halloween Ghosts

👻👻👻👻👻👻👻👻👻👻👻👻👻👻👻👻👻👻

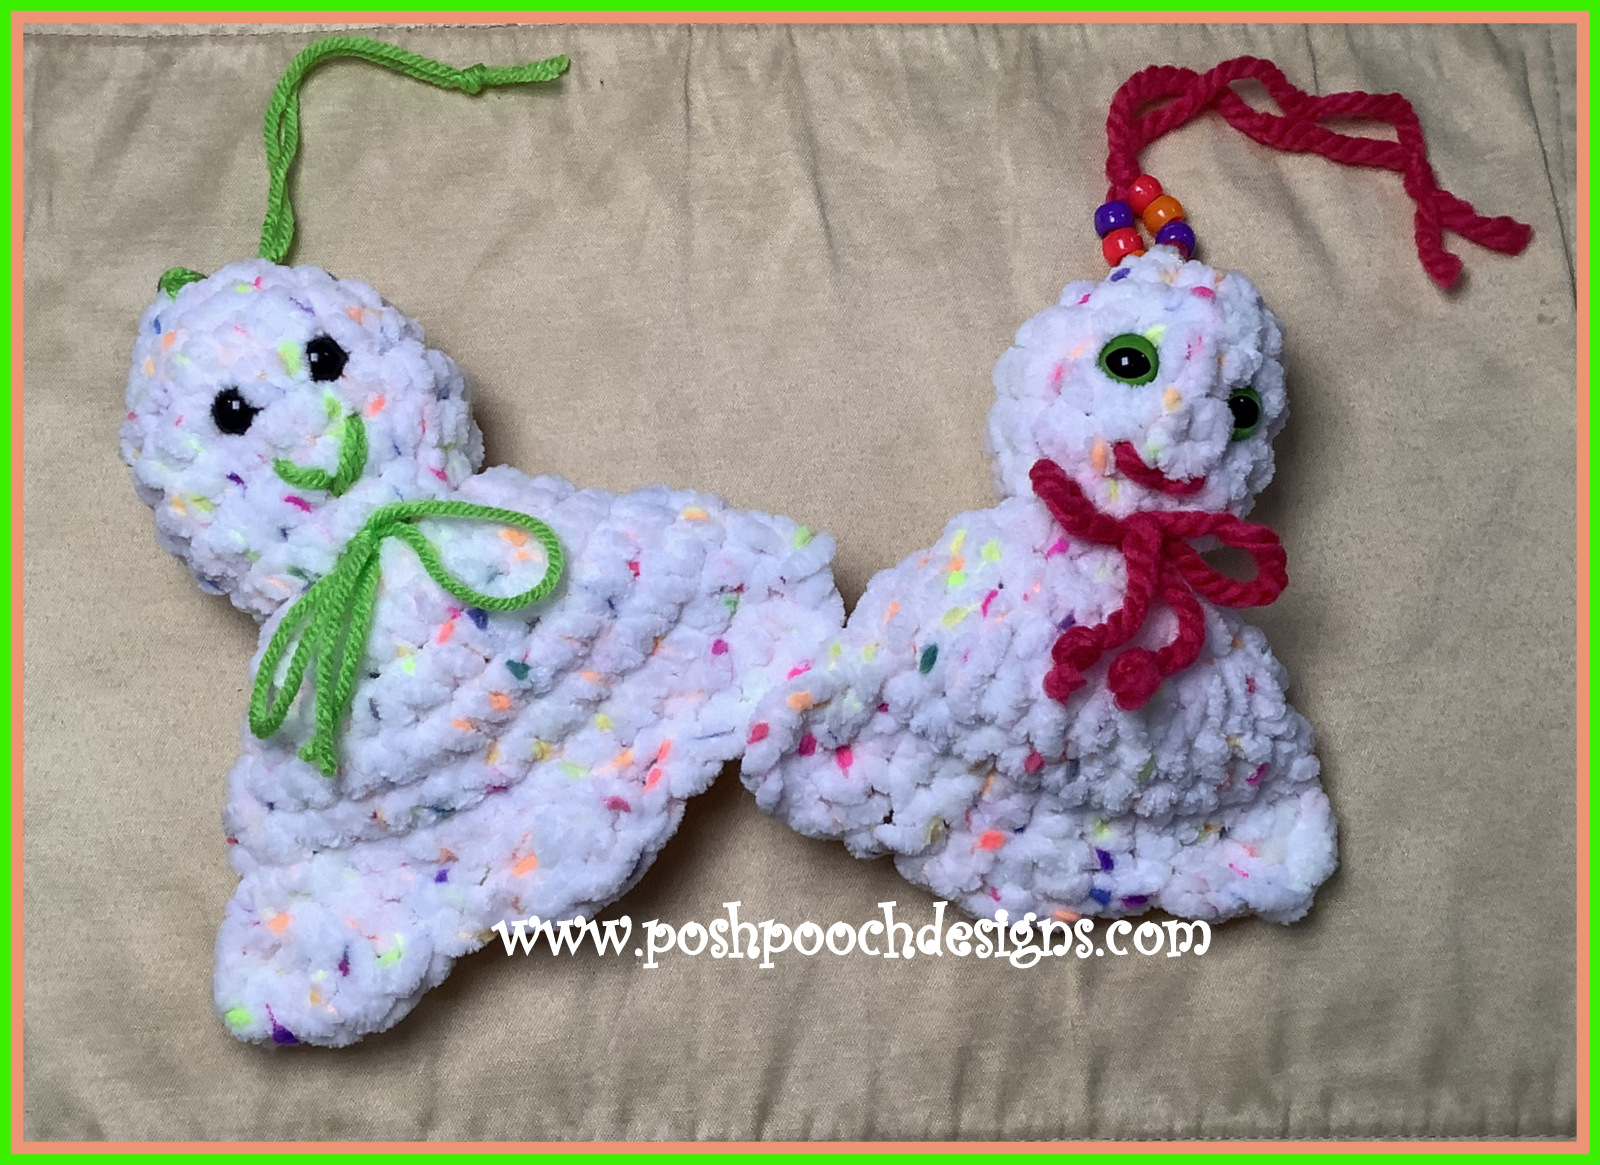
These little stuffie Ghosts are so fun and quick
 to stitch up. You can make their face sweet or scary, 
whichever you prefer. Make a bunch and make 
some of both. Everyone will love, 
from the kids to kid at heart.


I designed Mine using Super Bulky (6) weight
 yarn from Premier Yarn called Parfait Pom pom 
yarn in the Lets Glow colorway.  I absolutely love how
 the yarn stitched up for these silly and fun little ghost.
I added safety eyes but you can use French
 know if you like.


See All The Parfait Colorways At
 My Premier Yarn Link


REMEMBER 
If giving this to a small child, I recommend using
 French knots for the eyes, as safety eyes can be chewed
 or pulled out, and be a chocking hazard.


The Ghosts Measure About 6 inches tall. they are
 the perfect size for gift giving and decoration.
 They can be hung up around the house, laid on the
 tables for Halloween decorations, and party favors.


See The Video On My Crochet Youtube
 Channel At This LINK


Silly Little Ghosts Crochet Pattern

Please Add This Crochet Pattern To Your Ravelry Favorites
 
Skill: Easy
 
Materials:
Crochet Hook -K / 6.5 mm.
Yarn – Super Bulky (6) Premier Parfait Pom pom/ Lets Glow/ 1 oz.
                Small Amount of red yarn – Med (4) acrylic
Stitch Marker
Safety Eyes
6 Pony Beads
Stuffy – Polyfiberfil /about a handful
Stitch Marker
 
Stitches:
Chain (ch)
Slip Stitch (slst)
Slipstitch (slst)
Single Crochet (sc)
Double Crochet (dc)
Shell Stitch (shst) 4 dc in the same st
 
Size: 6 inches tall
 
Notes:
If giving this to a small child, I recommend using French knots for the eyes,
as safety eyes can be chewed or pulled out, and be a chocking hazard.
 
Pattern:
 
R: 1 – Ch5, join in a circle, ch 1, 6 sc, (6sc)
Mark the last st of each row with a st marker


R: 2 – 2 sc in each sc, (12 sc)

 
R: 3 - *1 sc in the 1st st, 2 sc in the next st*
 Repeat from * to * around (18 sc)


R: 4 -  1 sc in each sc, (18 sc)
 
R: 5 – R: 1 0- Repeat R: 4


If using Safety eyes attach them now.
Place then on the 4th row


R: 11 –*2 sc in the next sc, 1 sc in the next 2*
Repeat from * to * around, join to the ch3 with a slst (24 sc)


R: 12 – *2 sc in the next sc, 1 sc in the next 2*
Repeat from * to * around, join to the ch3 with a slst (32 sc)
 
R: 13 – 1 sc in each sc (32 sc)


Stuff the Ghost
 
R: 14 – Lay the ghost flat, slst to the side,
evenly st 14 sc across,
Closing the bottom of the Ghost, turn, ch1


R: 15 – sc in the 1st sc,
sk the next sc, shst in the next sc, sk the next sc,
Sc in the next  sc, sk 2 sc,  shst in the next sc, sk the next 2sc,
Sc in the next sc, shst in the next sc, sk the next sc,
Sc in the last sc, tie off weave in the ends.
 
With a 12 inch strand of yarn of your choice,
Cinch in the neck and tie a bow in the front.
 
Mouth:
With a needle and red, back or yarn colors
 of choice embroider on a smile.


Hanger:
Cut a 12 inch strand of yarn, again of your choice,
 lace it through the top of the ghost, tie securely.
 An 3 pony beads to each strand, tie a knot, 
and also tie a knot about 3 to 4 inches above that.


👻👻👻👻👻👻👻👻👻👻👻👻👻👻👻👻👻👻👻👻

An Ad Free PDF File Is Available 
In My Raverly Shop At This LINK
 For $2.50


Friday, March 22, 2024

FRIDAY FUN DAY! Little Fuzzy Bunny Bags Crochet Pattern By Sara Sach

 FRIDAY FUN DAY!
Little Fuzzy Bunny Bags 
Crochet Pattern
By Sara Sach of Posh Pooch Designs

🐇🐇 So Soft And Fuzzy!🐇🐇

🐇🐇🐇🐇🐇🐇🐇🐇🐇🐇🐇🐇🐇🐇🐇🐇

It's FRIDAY FUN DAY! 

 These Cute and Adorable Little Fuzzy Bunny Bags
 are a perfect Spring project. They are so fun to stitch up
 and just as fun to fill with goody's and give. 
Everyone will want one, from kids to adults.


Fill them with candy, goodies, toys, money, a gift card
or use as decorations. Wouldn't it be fun to have
 one for each guest who comes over for Easter Sunday
 Dinner, or for a Spring party.
And don't forget about Easter egg hunts. 
Kids will be thrilled to find one of these!

Click The Link To See All The Colors
 And Lot's Of Other Yarns As Well.
Premier Link

The Bunny bags are so soft made with the Premier
 Parfait yarn. So many mix and match colors to make
 them with.
I just love them so much, and you will too.

See The Video On Crochet Youtube 
Channel At This LINK


Little Fuzzy Bunny Bags Crochet Pattern

Please Add This Crochet Pattern To Your Ravelry Favorites


Skill: Easy
 
Materials:
Crochet Hook – J / 6.00 MM
Yarn – Bulky (6) Premier Parfait Chunky Pompom Yarn
                            (Your choice of colors) C1 – 1 oz. C2 - .5 oz.
Thin Ribbon of Choice – 18 inches long
Yarn Needle
 
Stitches:
Chain (ch)
Single Crochet (sc)
Double Crochet (dc)
Change to (chgto)
 
Size:  6.5 inches tall X 10 Inches around
 
Notes:
Ch 3 Counts as dc
Rounds are joined to the ch3 with a slst
 
Pattern:
 
R: 1 – With C1, ch5, join in a circle, ch3, 9 dc in the circle, join, ch 3 (10 dc)


R: 2 – 2 dc in each dc around, join, ch 3 (20 dc)


R: 3 – *2 dc in the next dc, 1 dc in the next dc*
Repeat from * to * around, join, ch 4 (30 dc)


R: 4 – 1 dc in each dc around, join, ch 3 (30dc)


R: 5 – R: 7 – Repeat R: 4
Do Not ch 3 after R: 7


R: 8 – Chgto C2 – Repeat R: 4, tie off weave in the ends.
 

 Bunny Ears:

Ch 16, 1 dc in the 4th ch from the hook, 1 dc in each ch across (14 dc)
Turn, working down the opposite side of the ch,
2 dc in the 1st ch, 1 dc in each st cross, join to the 1st dc, 
tie off weave in your ends.
 

Cut a piece of yarn about 10 -12 inches long.
Tie it around the center of the years and attach to the
 bunny bag inside the back of the bag.


 Pom Pom Bunny Tail:
Make Pom Pom Bunny tail. I attach it to the side, s
o it can be seen from the front of the bunny when displayed.


Ribbon – Cut a piece of ribbon 18 inches long.
Lace it through R: 8, gather closed and tie a bow at the side of the bag.

 
Optional – If you do not want to use a ribbon,
With a Med (4) matching yarn, ch a ch 18 inches long.
Lace it through R: 8, gather closed and tie a bow in the front.


Stuff is with stuffing for a stuffed toy, or add candies, 
and toys and treats for a gift bag.
 
 An Ad Free PDF File Is Available 
In My Ravelry Shop At This LINK
For $ 3.50

🐰🐰🐰🐰🐰🐰🐰🐰🐰🐰🐰🐰🐰🐰🐰🐰🐰