Thursday, March 19, 2015

Coasters Of The Month- September - March Free Crochet Patterns | Posh Pooch Designs

A few of my Fans and Friends,
were having trouble locating
 All of my 
Coasters of the month
Free Crochet Patterns
So I have made a post with all of them.

 There are more to come
 so keep checking back.
1.September - Snowman

2. October - Pumpkin

3. November - Turkey

4. December - Santa

5. January - Football

6. Extra December - 

7. February - Heart

8. March - Shamrock 

9. April - Bunny


10. May - Spring Flower Coaster 

And Coming soon!
11. June -
12. July -
13. August -

Coasters are a fun way
 to bring a personal touch
 to any party, or 
family get together.

They can be used as 
place markers,
and can be given as
 Thank-you for coming gifts.
Make a set for a Wedding,
 Christmas or birthday gift.

They take so little yarn, 
you can use up some 
of your yarn scraps!

Wednesday, March 18, 2015

Crochet Patterns To Use Up Your Yarn Scraps | Posh Pooch Designs

Crochet Patterns To Use Up Your Yarn Scraps
By Sara Sach of  Posh Pooch Designs

You you have yarn scraps
 left over from projects?
Baskets of yarn balls, bit and pieces
 that you do not want to toss or waste?
I know I do.
 Here are some fun ways
 to put those to good use.
The name of the pattern is the link, 
with the designer under the link.
1.Scrap Busters Hat
Jenna Wengate

2. YoYo Scraps
Priscilla hewitt

3. Stash Buster Beanie 
Sara Sach - Posh Pooch Designs


4. Scrap Yarn Bracelet
Jessie At Home

5. Scrappy Yarn Afghan
Elizabeth Hamm

6. Stash Busting Cup Sleeve
Oombawka Design

7. Stash Buster Leg Warmers 
Sara Sach - Posh Pooch DEsigns

8. Black Berry Salad Blanket
Moogly

9. Scrap Happy Poncho
Sara Sach - Posh Pooch Designs

10. Puffy Scrap Hot Pads
Stitch11

11. Scrap Happy Dog Poncho
Sara Sach - Posh Pooch Designs

12. Crochet Bag
Lucy of Attic 24

13. Stash Busting Monster Pouf
Kt and The Squid

2 more Fun 
Scrappy Crochet Patterns! 

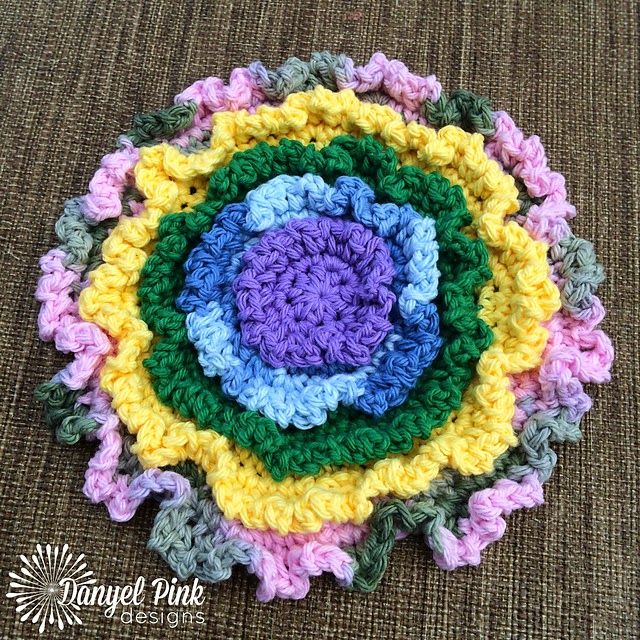
14. Scrappy Circle Scrubbies
By Danyel Pink

15. Scrappy Scoodie 
Jessie At Home


And here is a another blog filled with
Yarny Art Goodness.

So please, do not toss out
 those yarn scraps.
Keep them and make fun pretty 
and useful things!

Tuesday, March 17, 2015

Kitties In A Row Tote Bag Free Crochet Pattern | Posh Pooch Designs

Kitties In A Row Bags Crochet Pattern
By Sara Sach of Posh Pooch Designs

I Love This stitch Pattern. 
It is fun to crochet and looks really cute when it is done.
But because I have and love Chihuahuas,
 I decided to call it "Chihuahuas in a Row".
 Just kidding. 
You will see I didn't stitch my tote bag up 
in the traditional way of 
doing the "Kittens in a row" Stitch pattern..
I changed colors every 2 rows, not every 3 rows.
You know me, I like to change things up a bit.

I Love These Bright colors too!
And the yarn is Red Heart Supersaver.
So it can be washed easily.

See The Video On my Youtube Channel
 at This LINK

I really do think they look like Chihuahuas in a row!

Kitties In A Row Tote Bag Crochet Pattern
 By Sara Sach
Please, add this pattern to your Ravelry Favorites

Skill - Easy

Materials -
Crochet Hook - I / 5.50 MM
Yarn  - Worsted Weight (4) 2.5 oz of each color
I used Red Heart Super saver -
Spring Green - C1, Bright Pink  - C2,  Teal - C3
Yarn Needle

Stitches -
Chain ( ch)
Skip ( sk) 
Slip Stitch (sl st)
Single Crochet ( sc)
Double Crochet (dc)
Puff Stitch ( pf st) 


Size - Big Bag - Measures approx. 14 inches Wide X 12 inches long
           Small Bag - Measures approx. 7 inches Wide X 6 inches long
Pattern is written for the Big Bag with small bag in (parenthesis).

Note: As you change colors, do not tie off yarn,
keep yarn attached and trail it behind, on the inside of the bag
Round are joined with a slst
Ch3 counts as a dc
Ch1 does not count as sc

Pattern:
R : 1 - With C1, Ch 33(17), 1 sc in 2nd ch from the hook, and in each ch across,
(32 (16 sc)
Working down the opposite side of the ch, 1 sc in each sc,
 join with a sl st to the 1st sc, ch1 (32 +32 = 64, 16 + 16 = 32 sc)

R : 2 - 1 sc in each sc, join, ch 1 (64, 32 sc)

R : 3-4 - Repeat R : 2

R : 5 - Ch3, dc in the same st, ch1, 2 dc in the same st.
*2 dc in next sc, ch 1, 2 dc in the next sc, ch1, sk next 2 sc*
Repeat From * to * around bag, join to th ch3, 
( 16 (8)  clusters of 2dc, ch1,  2dc)

R : 6 - Sl st to the ch1 between the 1st "2dc, ch1, 2dc cluster", Then
*2dc, ch1, 2dc, ch1* in that ch1 space, Repeat from * to * in each ch1
 space around the bag. jin to ch3.(16 (8) clusters of 2dc, ch1 2dc)

R : 7 - Change to C2, Sl st to the ch1 between the 1st "2dc, ch1, 2dc cluster",
Then ch3,1dc, ch1, 2dc in that ch1 space,
St a Pfst between the cluster Stitch of the previous row.
*2dc, ch1, 2dc in the next ch1 space,
 Pfst between the cluster Stitch of the previous row*
Repeat From * to * around, join to ch 3

Repeat From * to around bag,  join to the top of the first dc, with a sl st,
( 16 clusters of 2dc, ch1,  2dc)
R : 8 - Repeat R : 6
R : 9 - change to C3, Repeat R : 7
R : 10 -Repeat R : 6
R : 11 - Change to C1, Repeat R : 7
R : 12 - Repeat R : 6

Skip to R ; 19 for the Small Bag

R : 13 -18  - Repeat R : 7 - 12

If you want your bag longer, keep repeating 
 till you get the length you want.

R : 19 - Change to C2, 1 sc in each st round, join, ch 1 ( 64 sc)
R : 20-21- Repeat R : 19

R : 22 - Forming the handles,
Change to C3, 1 sc in the 1st 14 (7) sc,
 ch 25(15), skip the next 16 (8) scs,
join to the next sc, 1 sc in the next 28 (14) sc,
ch 25(15), skip the next 19 scs, join to the next st,
1 sc in the next 14(7) sc, join,ch1

Make sure your handles are centered, and together.

R : 23 - 1 sc in each sc and in each ch around, join, ch 1

R : 24 - 1 sc in each sc, join, ch 1


Optional - R : 25 - Shell Stitch Trim -
*1 sc in the next st, sk the next st, 3 dc in the next st*
Repeat Around , join, and tie off.
Weave in all your ends.

Flower -
R : 1 - With C1, Ch 3, 10 dcs in the 2nd ch from the hook, join with a sl st.
R : 2 - Change To C3, *1 sc in the 1st dc, 3 dc in the next dc*
Repeat From * to * 4 more times, join to the 1st dc, with a sl st,
(5 petals)
R : 3 - Change to C3, *1 sc the next sc, 1 sc in the next dc,
2 dc in the next dc, 1 sc in the next sc* Repeat From * to *
 around the trim of the flower.
Place Flower on the front of the bag and
sew in place with matching yarn

This bag is the perfect size for a project bag.
It has a little stretch to it, to fit lots of extra stuff.

An Ad Free PDF File is Now Available For $4.50
In my Ravelry Shop At This LINK

Monday, March 16, 2015

Spring Colors Cowl Free Crochet Pattern | Posh Pooch Designs

The Spring Colors Cowl Crochet Pattrn
By Sara Sach of
 Posh Pooch Designs
I was looking through my Yarn Stash and saw these 4
 colors of yarn laying next to each other in a basket.
Lavender, Pink, Medium Blue and White, 
and wished I had a scarf, cowl or shawl  to wear in those colors for Spring. I usually go for Bright colors, but really loved the way these 4 colors looked together.
We have added a Shorter Version of 
the Colors Cowl and a Video

See The Video on My Youtube Crochet 
Channel At This LINK
I designed a Lacy open worked Cowl, that is perfect for Spring.
 It can be worn several ways.
Draped,     Long or
Off The Shoulders. And I added a Big Loopy Flower.

Spring Colors Cowl including the Big Loopy Flower
Crochet pattern is now available in an 
PDF file Download 
For $2.50 in my Craftsy shop

Spring Colors Cowl  Crochet Pattern
 By Sara Sach
Please add this to your Ravelry Favorites

Skill: Easy and Quick to Stitch up!

Materials :
Hook - I / 5.50
Yarn - Worsted Weight ( 4) 1 oz of each color
I used Redheart Supersaver
Lavender - C1, Pink C2,
Medium Blue - C3, White  - C4
           
Stitches:
Chain (ch)
Skip ( sk)
Slip Stitch ( sl st)
Single Crochet ( sc)
Double Crochet ( dc)
Picot Stitch ( pct st)

Measurements - Cowl -36 X 8 inches
To make the Cowl longer add chs in multiples of 3.
3chs = about 1 inch in length.
 Flower - 4 inches across


Notes:
Ch4 Counts as dc, ch1
Ch3 Counts as a dc
Rounds are joined with a slst

R: 1 - With C1, Ch 185, join in a circle,
 do not twist ch
Ch 5 ( counts as 1st dc, ch2)
*sk the next 2 chs, dc in the next ch*
Repeat From * to * around, join to 3rd ch.

R: 2 -Sl st to 1st ch 2 space, Ch3, 2dc in same ch2 space, ch2, sk next ch2 spaces,
*3 dc in next ch 2 space, ch2, sk next ch 2 space*
Repeat from * to * around, join to 1st dc.
( 60 3dc clusters)

R: 3 - Slst 2nd dc of the 1st 3dc cluster, ch4, dc, ch 2 in that same st,
*dc, ch1, dc, ch 2 in the 2nd dc of the next 3dc cluster*,
Repeat From * to * around, join to 1st dc.
(60 V  Sts)

R: 4 -  Sl st to 1st V St, ch3, 2 dc in 1st V st, ch2
*3 dc in next V st, ch2*
Repeat from * to * around, join to 1st dc.
(60 3 dc clusters)

R: 5 - Sl st in the 2nd dc of the 1st 3dc cluster, ch4, dc in that same st,ch2
*dc, ch1, dc in the 2nd dc of the next 3dc cluster, ch2*,
Repeat From * to * around, join to 1st dc.
(60 v sts)

R: 6 - Change to C3 - Repeat R: 4

R: 7 - Repeat R: 5

R: 8 - Repeat R: 4

R: 9 - Change To C4 - Repeat R: 5

R: 10 - Repeat R: 4

R : 11 - Sl st in the 2nd dc of the 1st 3dc cluster, ch3, pct st, dc, ch2 in that same st,
*dc, pct st, dc, ch 1 in the 2nd dc of the next cluster*,
Repeat From * to * around, join to 1st dc. Tie off and weave in your ends.

Large Loopy Flower -
R: 1 - With C1, ch 4, form a ring, 10sc in the ring, join with a slst,

*ch 10, slst in the FRONT LOOP of the next st*,
Repeat From * to * 9 times for 10 petals.

R: 2 -Change to C2, working in the BACK LOOPS of R: 1,
*1 sc in the next st, 2 sc in the next sc*, Repeat From * to *, join with a sl st,

*ch 10, slst in the FRONT LOOP of the next st*,
Repeat From * to * 11 times for 15 petals.

R: 3 - Change to C3, working in the BACK LOOPS of R: 2,
*1 sc in the next 2sts, 2 sc in the next sc*, Repeat From * to *, join with a sl st,

*ch 10, slst in the FRONT LOOP of the next st*,
Repeat From * to * 19 times for 20 petals

R: 4 - Change to C4, working in the BACK LOOPS of R: 3,
*1 sc in the next 3sts, 2 sc in the next sc*, Repeat From * to *, join with a sl st,

*ch 10, slst in the FRONT LOOP of the next st*,
Repeat From * to * 24 times for 25 petals.
I think this Cowl would be awesome stitched 
all in a neutral color as well.
And I really love the big Loopy flower.

Saturday, March 14, 2015

Colors Dog Snood Free Knitting Pattern | Posh Pooch Designs

I Love This New Knitting Pattern 
and I Love The colors!
They remind me of color crayons.

Snoods are perfect for when it is 
windy or stormy and you 
want to protect your Dog's ears.
And They are super easy
 to slip on for potty time.

Chihuahuas and Dogs with pointy ears
 are more susceptible to 
ear issues and infections.

I set the snoods down, 
and went to get the camera, 
Rosie jumped up on the steps, 
all ready to model.
Colors Dog Snood Knitting Pattern
 By Sara Sach

Please, add this to your Ravelry Favorites

Skill: Easy

Materials:
Straight Knitting Needles  - US10 - 6mm
Yarn - Worsted Weight (4) about 2 oz
I used Redheart Super Saver - It's Washable!
             C1 -  Top Ribbing, C2 - Center, Bottom Ribbing - C3
Yarn Needle

Stitches and Terms
Cast On (CO)
Bind Off (BO)
Knit  ( k)
Purl (p)

Gauge - 16 sts X 16 rows = 4 inch Swatch
Finished Measurement - Approx.  10 inches long X 12 inch around
The Snood is very stretchy and fits from Small To medium Dog's necks.

Note - This pattern is worked across, not in rounds.

Snood:
CO 44 sts of C1
R : 1 - 2k, 2 p  
R : 2 -  9 - Continue rib st for 7 more rows

R : 10 - Change to C2, k all sts
R : 11 - P All sts
R : 12-35 - Repeat R : 10 and R :11
 (Stockinette Stitches through the center of the snood)

This center section measure about 5 inches --
if your dog's neck is longer, add as many rows as needed.

R : 36- 2k, 2 p
R : 37- 44 -  Continue rib st for 9 rows

BO
Put the sides of the Snood, together, wrong side out,
lining up the colors.
With matching color yarns, sew the seam.
Flip right side out and slip it on your pooch
I chose to use 3 colors on each snood.
I Love Bright colors.
But, You can make them all one color
 or even 2 colors.
or how about variegated yarns?
I made these just in time.
It is really windy today!

Friday, March 13, 2015

April Coaster of The Month Crochet pattern - Bunny | Posh Pooch Designs

Easter Bunny Coaster Crochet Pattern
By Sara Sach of Posh Pooch Designs


April's Coaster of The Month Free Crochet Pattern

WeJust retested, and up dated This Crochet Pattern with lots of pictures and a Brand New Video


Since Easter is Early in the month April 5th, I wanted to get the
 Coaster Crochet pattern out early. Although, Bunnies 
are perfect for any Spring party.


See The Video on My Youtube Crochet 
Channel at This LINK


Easter Bunny Coaster Crochet Pattern
Please, add this to your Ravelry Favorites.

Skill: Easy

Materials -
Hook - H
Yarn - Any Worsted Weight yarn (4) or Cotton Yarn Lavender, pink and White
            I used Red Heart Super Saver left overs

Stitches:
 Chain (ch)
Slip Stitch (sl st)
Single Crochet (sc)
Half Double Crochet ( hdc)
Double Crochet ( dc)

Size: Bunny Measures 3.5 X 4.5 inches

Notes:
Ch3 Counts as a dc
Rounds are joined with a slst to the ch3
When changing color Ch3 after The color change.

Pattern:

R: 1 - With White yarn, ch 5, join in a Circle, ch3, 9 dc in the circle,  join.
(10dc)

R: 2 - Change to pink yarn, Ch 3, 1 dc in the same st as ch3, 2 dc in each
 st around, join. (20dc)

R: 3 - Change to purple yarn, ch 31 dc in the same st as ch3,
*1dc in next st, 2 dc in the next st*  Repeat From * to * around, join. (30dc)

R: 4  - Forming the head, Change to pink yarn,
sl st in the next st, sc in the next st, hdc in the next st,
 3 dc in the next st, hdc in the next st, sc in the next st, sl st in the next st, tie off.
(slst, sc, hdc, 3dc, hdc, sc, slst)

R: 5 - Attach purple yarn, to the st next to the 1st St of R: 4, (on the right side)
sl st  in the next 2 sts, sc in the next st, hdc in the next st, 1 dc in the next st, 3 dc in the next st,
1 dc in the next st, hdc, in the next st, sc in the next st,
 sl st in the next, then sl st in the next st on R: 4, ch1
(slst, slst, sc, hdc, dc, 3dc, dc, hdc, sc, slst, slst)

R: 6 - Ears - Turn, ch1, sl st in the next 5 sts,
ch 6, turn sl st in the 2nd ch, and in the next 5 chs,
sl st in the next 3 sts,
ch 5, turn sl st in the 2nd ch, and in the next 4 chs,
sl st in the last 4 sts, tie off, and weave in all your ends.

Tail - Count down 8 sts fron the head, on the right side, attach white yarn,
ch 3, 3 dc in the same st, ch3, join with a sl st, tie off. 

Face- I just stitched a few straight stitches, it looks good with or without the face.
To cute For Words! 


I want to make a bunch of these
 and use them for place markers at the Easter lunch table.
Make them in everyone's favorite colors
 and maybe embroider their name or first letter.
Yellow Pot Holder -

My Favorite Potholder Crochet pattern By Oombawka Design

Isn't this Bunny so cute and fun.
It would also be perfect for a applique on a 
baby blanket, sweater, hat or 
dog sweater!

An Ad Free PDF file is now Available
For $2.50 in my Ravelry Shop
 At This LINK

For All The Coaster of the Month
 Free Crochet Patterns
Click HERE
Scroll down  - They are at the bottom of that page.

Thursday, March 12, 2015

Snood Turtle Neck Dog Sweater New Crochet Pattern Release | Posh Pooch Designs

After Talking with a few of my
"Furbaby Mommies" 
who were looking for a 
Crochet Dog Sweater that was more versatile,
 I designed This Crochet Pattern
 Just for them.

 I get most of my best designs from my fans!
Thank you for your input!

This Dog Sweater  has  
a Snood and Turtleneck,
or Leave that part off
I designed it for the boys,
 but it is also great for the girls.
I mean wouldn't it be great
 in lavender or bright pink!

Where Can you find This 
New Crochet Pattern Release?
Folded Down as a Turtleneck.

Folded up as a Snood,
To keep the little ears home.
 Snood Turtleneck 
Small Dog Sweater Dogs 2-20 lbs

This is a very versatile pattern- 
it can have a snood, Turtle neck or neither.

It can be for a boy or a girl and
 has plenty of "potty space".

It is a slip on, so not buttons, Velcro or snaps
 to get caught in sensitive tummy fur.

This pattern is not a 
beginner pattern but is pretty easy.
But does have a picture and 
explanation of how to
 measure your small dog
 and adjust the pattern.
Includes lots of pictures to help you.