
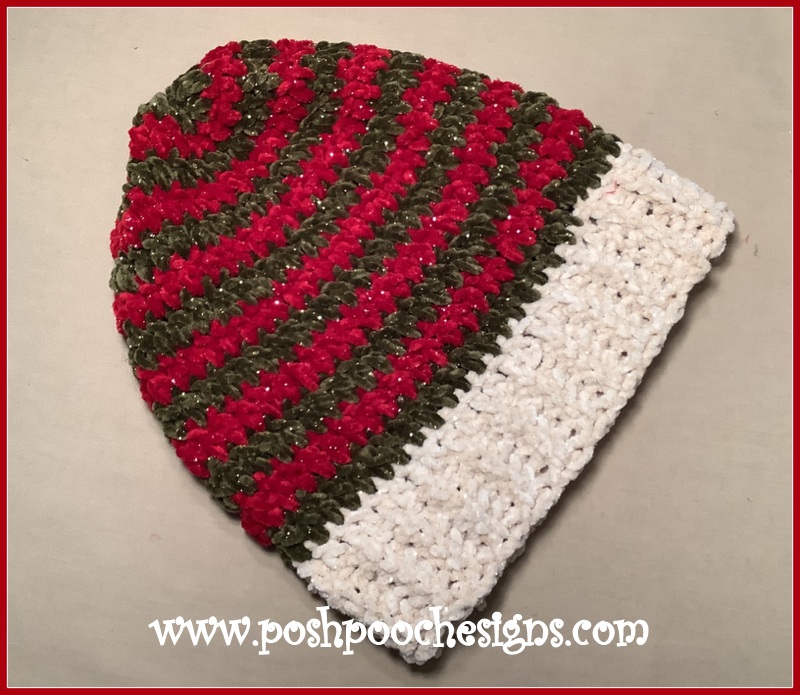
Velvet Stocking Hat Crochet Pattern
By Sara Sach of Posh Pooch Designs

The Velvet Stocking Hat is a lot of fun to stitch up.
Do not be intimidated By Velvet Yarns. The key
to working with them is to loosen your tension
up just a little.
The Pattern is easy, because it is stitched in basic stitches
but we placed it at Easy to Moderate because
of the velvet yarn.

I really like this Velvet Yarn From Hobby Lobby,
called Velvety Smooth. It is smooth and easy to crochet with,
but also it is a medium (4) so any pattern written for
medium (4) Yarns will work with this yarn.

The Pattern is Written For 22 - 24 inch heads,
but keep in mind the hat band is quite stretchy,
and may nee to adjust your hook size for a good fit.
The hat's design is a long slouchy fit.
I Love The Sparkle in the yarn and chose to use "antique"
colors for a little bit different look. Of course you can
choose any colors you prefer.
Find The Matching Cowl At This LINK

See The Video On MyCrochet Youtube
Channel At This LINK
Velvet
Stocking Hat Crochet Pattern By Sara Sach
Please Add This Crochet Pattern To Your Ravelry Favorites
Skill: Easy to Moderate
Materials:
Crochet hook – I/ 5.50 MM
Yarn – Med (4) Velvet yarn Yarn Bee/ Velvety Smooth Sparkle
C1 – Ivory – 3.5 oz./ 161 yds
C2 – Olive – 2 oz / 80 yds.
C3 – Red – 2 oz / 80 yds.
Yarn Needle
Optional – Pom pom Maker
Stitches:
Chain (ch)
Slip Stitch (slst)
Single Crochet (sc)
Half Double Crochet (hdc)
Double Crochet (dc)
Back Loop Only (BLO)
Change to (chgto)
Double Crochet together (dctog)
Size: Youth/ Adult 22 – 24
inches
Hat band - 2 Rows = 1 inch
Crochet hook – I/ 5.50 MM
Yarn – Med (4) Velvet yarn Yarn Bee/ Velvety Smooth Sparkle
C1 – Ivory – 3.5 oz./ 161 yds
C2 – Olive – 2 oz / 80 yds.
C3 – Red – 2 oz / 80 yds.
Yarn Needle
Optional – Pom pom Maker
Chain (ch)
Slip Stitch (slst)
Single Crochet (sc)
Half Double Crochet (hdc)
Double Crochet (dc)
Back Loop Only (BLO)
Change to (chgto)
Double Crochet together (dctog)
Ch1 Does Not Count as a st
Ch3 Counts as a dc
Rounds are joined to the ch3 with a Slst
When Changing Color, ch3 after the color change
Ch 8, hdc in the 2nd ch from the hook, and in each ch,
Turn, ch1 (7 hdc)

Turn, ch 1 (7hdc)


R: 53 – Stitching around the top of the Hatband, Ch3, place 1 dc in the end of each row,
Join to the ch 3, (52 dc)


R: 56 – R:
61 – Repeat R: 56 – R: 57, alternating color every other row.

R: 62 –
Chgto C2, do not tie off C3, *1 dc in the next 3 dc, dctog the next 2
dc*
Repeat From * to * around, join, (42dc)
Repeat From * to * around, join, (42dc)

Repeat From * to * around, join, (32 dc)

Repeat From * to * around, join, tie off leaving an 18 inch tail of yarn. (22 Dc)

and gather it closed securely.
I show you how I make mine in the video.


An Ad Free PDF File is Available
In My Ravelry Shop At This LINK
For $4.50


