Chicken Hat
Crochet Pattern
By Sara Sach of Posh Pooch Designs
🐔🐔🐔🐔🐔🐔🐔🐔🐔🐔🐔🐔🐔🐔🐔🐔🐔🐔
Every Year I try to design a silly hat for Halloween.
Chickens are so popular right now, and so I started
designing a chicken hat and really loved how it was
working up. I wanted it different from other ones I had
seen and went for it. And The Best part about it, is that its
easy and quick to Stitch up.
The hat base is basically a box or square hat, turned
side ways to form the body of the chicken. It's all
the details that make it so much fun.
It's a little bit silly and a lot of fun.
It's also a warm hat, so if Halloween is cold,
I got you covered! And chicken hats are not just for
Halloween, they are for every day!
I picked Super chunky yarn from my yarn stash.
the Bernat Beyond is perfect in thickness and color,
the bright pink is a super fun change from the red.
But you can use red if you prefer. You can use
whatever colors you like!
See The Video On My Crochet Youtube
Channel At This LINK
Chicken Hat Crochet Pattern
Please Add This Crochet Pattern To Your Raverly Favorites
Skill: Easy to Moderate, but not
hard
Materials:
Crochet Hook – L / 8 mm
Yarn – Bulky (6) – Bernat Beyond/ gray scale /4 oz.(C1)
Bulky (6) Pink/ 2 oz. (C2)
Med (4) Mall Amount of White, Black, Yellow (eyes and beak)
Yarn Needle
Stitches:
Chain (ch)
Slip Stitch (slst)
Single Crochet (sc)
Half Double Crochet (hdc)
Double Crochet (dc)
Back Loop Only (BLO)
Change to (chgto)
Skip (sk)
Space (sp)
Shell Stitch (shst) 3 dc in the same st)
Foundation Double Crochet (FDDC)
Front Post Double Crochet (FPDC)
Size:
Fits 22-24 inch head (it’s stretchy)
Crochet Hook – L / 8 mm
Yarn – Bulky (6) – Bernat Beyond/ gray scale /4 oz.(C1)
Bulky (6) Pink/ 2 oz. (C2)
Med (4) Mall Amount of White, Black, Yellow (eyes and beak)
Yarn Needle
Chain (ch)
Slip Stitch (slst)
Single Crochet (sc)
Half Double Crochet (hdc)
Double Crochet (dc)
Back Loop Only (BLO)
Change to (chgto)
Skip (sk)
Space (sp)
Shell Stitch (shst) 3 dc in the same st)
Foundation Double Crochet (FDDC)
Front Post Double Crochet (FPDC)
Fits 22-24 inch head (it’s stretchy)
to adjust the size add or subtract in increments of 2 sts,
at the hat band
Notes:
Ch1 Does not count as a st
Ch3 Counts as a dc
Pattern:
R: 1 – With C2,
44 FDDC, Join to the 1st st with a slst, ch3
(44FDDC)
Ch1 Does not count as a st
Ch3 Counts as a dc
(44FDDC)
Use needle and tail of yarn to close opening.
*dc in the next dc, FPDC in the next dc*
Repeat From * to * around,
Join to the ch3 with a slst (22 FPDC, 22 DC)
1 dc in each st around, join to the ch3 with a slst, ch3
(44dc)
Ch1 after R 11
Sc the hat top of the hat closed.
Tie off weave in the ends.
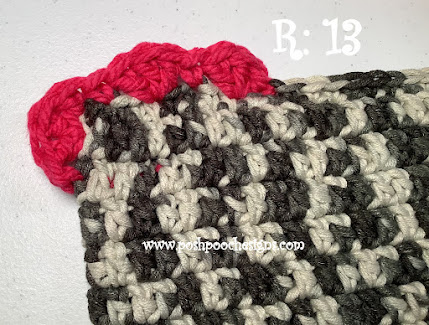
With a slst, *sc, sk the next st, shst in the next st, sk the next st, sc in the next*
Repeat From * to * 2 more times, slst in the last st, tie off weave in the end.
Beak – With 2 strands of yellow med (4) yarn,
Starting with a 6 inch tail of yarn,
Ch 6, slst in the 2nd ch from the hook, sc in the next ch,
hdc in the next ch, dc in the last 2 chs, tie off leaving a 6 inch tail.
Place and attach to the chicken hat with the tails of yarn and a needle.
Eyes: Make 2 –
R: 1 - With black yarn, ch 2, 6 sc in the 2nd ch from the hook,Join to the 1st sc, (6sc)
join to the 1st sc with a slst, ch 1 (12 sc)
tie off leaving a 12 inch tail of yarn for sewing
eye in place. (24 hdc)
Pom pom Tail Feathers –
Cut a 12 inch piece of the chunky yarnHolding the 2 Chunky yarns together,
Wrap them around your 4 fingers about 15 times.
Slide the piece of cut yarn through the loops, and tie securely.
Trim the loops, evenly and attach to the top back of the chicken hat.
🐔🐔🐔🐔🐔🐔🐔🐔🐔🐔🐔🐔🐔🐔🐔🐔🐔🐔
An AD Free PDF file is Available
In My Ravelry Shop At This LINK
for $4.50


No comments:
Post a Comment