
Friday Fun Day With Sara
Let’s Go Shoulder Bag And I Cord
Crochet Pattern
By Sara Sach of Posh Pooch Designs
By Sara Sach of Posh Pooch Designs

Today's Friday Fun Day is Part 1
We are going to stitch up a simple shoulder bag
and learn how to make an easy I cord
for a handle.
Part 2 will be next Friday, and we will learn how to
line the bag in a super simple way.
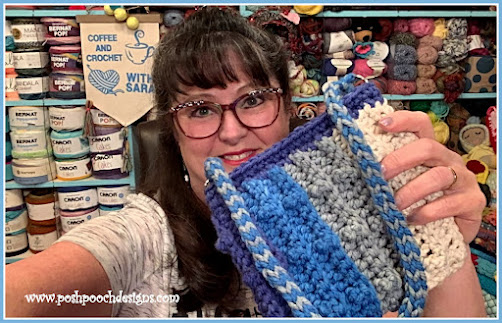
You will love this Little Chunky Bag, I know I do.

The Bag is a fun Shoulder Bag that measure about
8 X 8 inches, not including the handle. It's the perfect
size for your phone, wallet and few other things.
Just what you need when a large purse or bag
is not needed.
See The Video On My Crochet Youtube
Channel At This LINK
Let’s Go Shoulder Bag Crochet Pattern By Sara Sach
Skill: Easy
Materials:
Crochet Hook – J / 6.00 MM
Yarn - Bulky (5) 3 oz. I used left over O’Go Yarn – Overboard
Yarn Needle
2 Rings - 1 inch - Can be metal, or wood and any size you prefer.
Chain (ch)
Slip Stitch (slst)
Single Crochet (sc)
Double Crochet (dc)
Triple Crochet (tr)
Back Loop Only (BLO)
Multiples - 5 + 5 Chs
4 chs = 1 inch
2 Rows - 1 inch
Notes:
Ch1 Does not count as a st.
I separated all my colors from the O’go ‘skein’
into 5 separate balls, I only used 4 colors
Ch1 Does not count as a st.
I separated all my colors from the O’go ‘skein’
into 5 separate balls, I only used 4 colors
The Striping is up to you
When Changing color, Ch1 After The color Change
Pattern:
1 hdc in each ch across, turn, ch 1 (34 hdc)

R: 2 – BLO,
1 sc in the 1st 4 hdc,
*1 tr in the next hdc, 1 sc in the next 4 hdc*
Repeat from * to * 5 More times, turn, ch 3 (6 tr, 28 sc)

R: 3 – BLO,
1 hdc I each st across, turn, ch 1(34 hdc)

R: 4 –
Repeat R: 2

R: 5 – R: 16
– Repeat R: 3 and R: 4, alternating every other row

R: 17 – Repeat R: 3
1 hdc in each ch across, turn, ch 1 (34 hdc)
*1 tr in the next hdc, 1 sc in the next 4 hdc*
Repeat from * to * 5 More times, turn, ch 3 (6 tr, 28 sc)
R: 18 -Fold bag in half, wrong side out,
St closed the 1st side stitching slsts evenly,
St closed the 1st side stitching slsts evenly,
tie off, weave in the ends.
Attach yarn to the bottom corner of the other side,
Evenly slst closed this 2nd side,
Do not tie off.
Do not tie off.

Evenly st sc
around the top edge of the bag,
Join to the 1st sc, ch 1

R: 20 – 1 sc
in each sc around, join, and tie off
Join to the 1st sc, ch 1

Using 2 strands of yarn held together,
I like to use 2 different colors.
I tie a knot in the bottom of the 2 strands to make it easier to hold.
I untie that know when I am finished.
With 1
strand, make a slip knot, ch3,
Slip hook through each ch and pull up a loop.
(3 loops on the hook)
**Slide off
the 2nd and 3rd loop carefully,
With the 2nd strand, slst in the 1st loop,
Insert hook in the 2nd loop and pull through a loop
from the 2nd strand, and repeat on the 3rd loop**
Using the 1st
strand of yarn Repeat ** To **
Continue to
repeat from * To * Alternating the 2 strands of yarn,
Stop when the cord/ handle is as long as you want it.

Slst in the
1st loop, pull the 1st loop through the 2nd
loop,
Pull the 2nd loop through the 3rd loop, tie off and weave in your ends.
With Needle
and matching yarn, sew a ring on each side of the bag.
Sew the ends of the I cord to each ring securely.
Slip hook through each ch and pull up a loop.
(3 loops on the hook)
With the 2nd strand, slst in the 1st loop,
Insert hook in the 2nd loop and pull through a loop
from the 2nd strand, and repeat on the 3rd loop**
Stop when the cord/ handle is as long as you want it.
Pull the 2nd loop through the 3rd loop, tie off and weave in your ends.

For Next Friday
How To Line A Bag

See The Video On My Crochet Youtube
Channel At This LINK
You will Need:

2 Pieces of Cloth - 12 X 12 inches
I like to use bandannas premade because they are inexpensive.
Straight Pins - About 15
Sewing Needle
Sewing Thread - To match the cloth
Sewing Scissors
Tape Measure
Pen
1. Lay out your fabric, lay your bag on top of the fabric.
Measure an 3 inches across the top of the bag,
and mark with a pen.
And 2 inch around the sides, and the bottom of the back.
Cut the fabric.
2. Move The bag, lay the Fabric Wrong side out and pin.
Measure up 1 inch and Cut off the corner off the2 bottom corners.
Thread The needle with the thread and Measure in about 1 inch.
Starting at the left top, sew down side and bottom
and up the other side of the bag.
Fold the 2 bottom corners and sew them.
3. Fold the top of the liner twice and pin in place.
Slip into liner the bag.
With thread and needle whip stitch the liner to the bag securely.

And That's it.
You can use this method on just about any size bag.


No comments:
Post a Comment