Christmas Gnome Hat
Crochet Pattern
By Sara Sach of Posh Pooch Designs
**************************
The Christmas Gnome Hat is great for photos,
family pictures, and fun to wear to parties
and get togethers,
I Designed this hat in 3 sizes
Adult- Youth,
Child and
Toddler.
It is designed to fit loosely and be comfortable to wear.
If you like a tighter fit, you can go down a hook size.
The Christmas Gnome Hat is a very easy crochet
pattern to stitch up. It's designed using basic
stitches, and what makes
it super fun is the yarn I chose to use.
I designed the hat using Premier Basix Chenille
and Premier Parfait Chunky. These are both
super bulky(6) yarns. They are soft and comfy yarns,
And Stitch up super quick.
If you need a last minute photo prop,
we got your head covered.
Be looking for the Christmas Gnome Beard
Crochet Pattern. It is designed to go
with the Gnome Hat. It will be posted on
Friday of this week.
See The Video On My Crochet Youtube
Channel At This LINK
Gnome Christmas Hats Crochet Pattern
Please Add This Crochet Pattern To Your Ravelry Shop
Skill: Easy
Materials:
Crochet hook
– N / 9 mm.
Yarn – Super
Bulky (6) C1 – White – Premier Basix Chenille Brights – 2 oz.
C2 – Green – Premier
Parfait Chunky – 1 oz.
C3 –
Yellow – Premier Parfait chunky – 1 oz.
C4 – Red
–Premier Basix Chenille Brights - 3 – 5 oz.
Yarn Needle Large
eye needle
Embellishments
– Pom pom, buttons, ribbons of choice
Stitches:
Chain (ch)
Slip Stitch (slst)
Single
Crochet (sc)
Double
Crochet (dc)
Double
Crochet 2 together (dc2tog) decrease
Sizes: 3 Sizes
Large -Youth
– Adult – 22- 24 inches
Medium - Child
– 18 – 20-inches
Small - Toddler
– 14- 16 inches
Notes:
Demo is Stitched in the Small Size
Pattern is
written in the large size,
smaller sizes in parenthesis L (m,
s)
The Hat is
designed to fit loose,
Sizes can be adjusted by going up or
down a hook size.
Ch3 counts
as a dc
Ch1 does not
count as a stitch
Pattern:
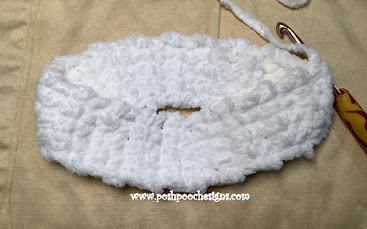
R: 1- Hat Band
– With C1, Ch 7 (6, 5) Sc in the 2nd ch from the hook,
Sc in the
next 5 (4, 3) chs, turn, ch 1 (6, 5, 4 sc)
R: 2 – 1 sc
in each sc across, turn, ch 1 (6, 5, 4 sc)
R: 3 – R: 41
(37, 33) Repeat R: 2
R: 42 (38,
34) – place the ends of the hat bad together, sc (6, 5, 4 sc)
Stitching the
together,
R: 43 (39, 35)
– Chgto C2, ch1, working across the top of the hat band,
1 sc in the ends of the rows, join to the 1st
sc with a slst, (42, 38, 34 Sc)
R: 44 (40, 36)
– Chgto C3, ch1, 1 sc in each sc around,
Join to the
1st sc with a slst, (42, 38, 34 Sc)
R: 45 (41, 37)
– Chgto C3 – ch3, 1 dc in each sc around,
Join to the
ch3 with a slst, ch3 (42, 38, 34 dc)
R: 46 (42, 38)
- 1 dc in each dc around,
Join to the
ch3 with a slst, ch3 (42, 38, 34 dc)
R: 47 (44,
39) - 1 dc in each dc around,
Join to the
ch3 with a slst, ch3 (42, 38, 34 dc)
R: 48 (45,
40) – 1 dc in the next dc,
*dc2tog with
the next 2 dc, 1 dc in the next 2 dc*
Repeat From *
to * around, join to the ch3 with a slst, ch 3
Continue to
repeat R: 48 (42, 39) until you have decrease to 4 dc,
Remember
each size will have a different number of rows,
Again, depending
on the size.
Tie off
leaving a 10 inch tail of yarn, use the tail of yarn and needle,
to gather the top of the hat closed, weave in
the ends.
Add a
pompom, buttons, ribbon and appliques as you desire.
An Ad Free PDF file is Available
In My Ravelry Shop At This LINK
For $4.50


No comments:
Post a Comment