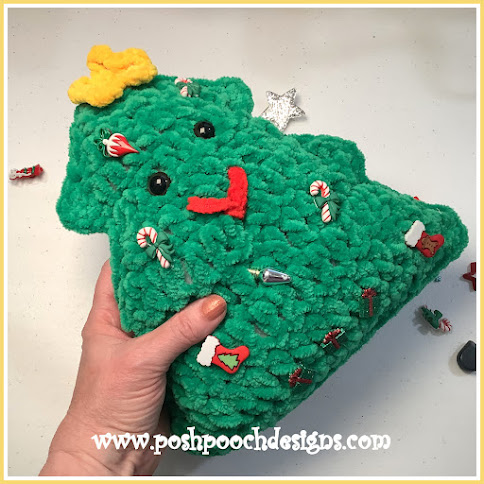
Christmas Tree Stuffie Pillow
Crochet Pattern
By Sara Sach of Posh Pooch Designs
🎄🎄🎄🎄🎄🎄🎄🎄🎄🎄🎄🎄🎄🎄🎄🎄🎄
The Christmas Tree Stuffie Pillow is so sweet and squishy!
You can make it in traditional Christmas colors and
decorations or you can give it a super fun face.
Either way you make it,
it is a fun Christmas And Holiday decoration,
as well as, a cute gift everyone will want.
I designed it using Premier Parfait Chunky Yarn
in the Seaweed Green color way.
It is a super bulky (6) weight yarn.
Click My Premier LINK to see all the colorways.
10 inches tall, so it's the perfect size to add to a stocking,
make several in different colors and put them on the
mantle, or even on the Christmas Tree.
Although, I think they are made to be played with!
Make a Christmas game of it!
🎄🎄🎄🎄🎄🎄🎄🎄🎄🎄🎄🎄🎄🎄🎄🎄
See The Video On My Crochet Youtube Channel At This LINK
Christmas Tree Stuffie Pillow
Crochet Pattern
Please Add This Crochet Pattern To Your Ravelry Favorites
Skill: Easy
Materials:
Crochet Hook – J / 6 mm.
Yarn - Super Bulky (6) Premier Parfait Chunk / Seaweed Green – 3 oz.(tree)
Summer Squash yellow – Small Amount (star)
Red / Small Amount (mouth)
Assorted Small Decorative Buttons
Safety Eyes
Stuffing - Polyfiberfil
Stitches:
Chain (ch)
Slip Stitch (slst)
Single Crochet (sc)
Double Crochet (dc)
Size: 12 X 10 Inches
Notes:
Ch1 Does not Count S a St
Ch3 counts as dc
Pattern:
Make 2 Tree (Front and Back)
R: 1 – Ch 4, 3 dc in the 4th ch from the hook,
Turn, ch 3 (4 dc)
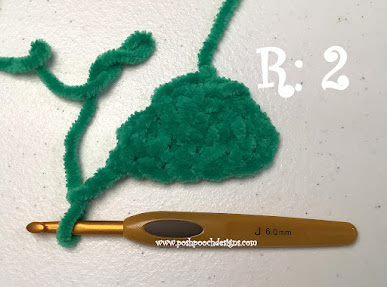
R: 2 – 1 dc in the same st as the ch3, 1 dc in the next 2 dc, 2 dc in the last dc,
Turn, ch 3 (6 dc)
Turn, ch 3 (6 dc)
R: 3 – 1 dc in the same st as the ch3, 1 dc in the next 4 dc, 2 dc in the last dc,
Turn, ch 3 (8 dc)
R: 4 - 1 dc in the same st as the ch3, 1 dc in the next 6 dc, 2 dc in the last dc,
Turn, ch 1 (10 dc)
R: 5 – Slst in the 1st 2dc,
Slst, ch3 and 2dc in the next dc,
1 dc in the next 4, 3 dc in the next dc,
Turn, ch 3 (10 dc)
R: 6 - 1 dc in the same st as the ch3, 1 dc in the next 8 dc, 2 dc in the last dc,
Turn, ch 3 (12 dc)
R: 7 - 1 dc in the same st as the ch3, 1 dc in the next 10 dc, 2 dc in the last dc,
Turn, ch 3 (14 dc)
R: 8 - 1 dc in the same st as the ch3, 1 dc in the next 12 dc, 2 dc in the last dc,
Turn, ch 1 (16 dc)
Slst, ch3 and 2 dc in the next dc,
1 dc in the next 10, 3 dc in the next dc,
Turn, ch 3 (16 dc)
R: 10 -1 dc in the same st as the ch3, 1 dc in the next 14 dc, 2 dc in the last dc,
Turn, ch 3 (18 dc)
R: 11 -1 dc in the same st as the ch3, 1 dc in the next 18 dc, 2 dc in the last dc,
Turn, ch 3 (20dc)
Tie off weave in your ends.
Place them together and evenly sc up the side to the top of the tree,
Place sc, ch1, sc in the end of each of the points,
ch 12, join to the same sc, for a loop,
Continue to sc down the other side,
Tie off weave in your ends.
Star:
With yellow yarn
Ch 2, 5 sc in the 2nd ch from the hook, join to the 1st sc, ch4,
*slst in the next sc, ch4*
Repeat from 8 to * 3 more times, for 5 loops,
join to the 1st sc with a slst, tie off leaving a 10 inch tail of yarn.
Attach to top of tree with needle and yarn tail.
An Ad Free PDF File is Available
In My Ravelry Shop At This LINK
For 4.50


No comments:
Post a Comment