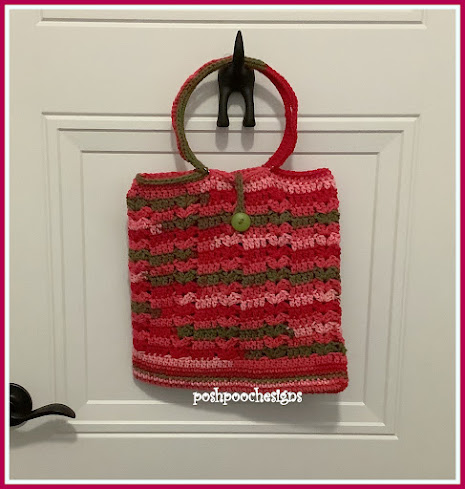
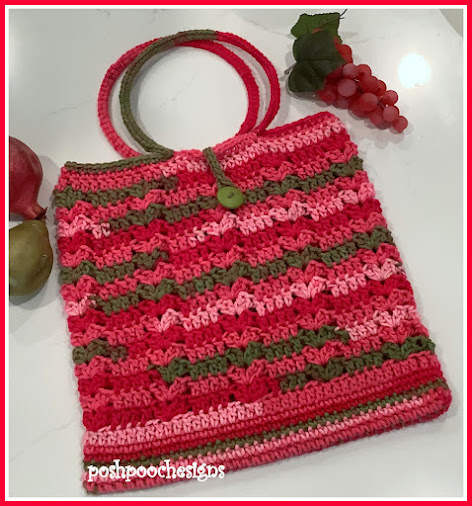
Guava Tote Bag Crochet Pattern
By Sara Sach of Posh Pooch Designs
The Guava Tote Bag Crochet Pattern was a fun
crochet pattern to design. I wanted a tote bag that
is pretty and useful. I really love all the Sweet Roll Fruits
yarn from Premier yarn. I love how bright the colors
are and how they flow throughout the cake of yarn.
The Guava Tote Bag is nice size bag. It is
the handle. It is the perfect size for carrying groceries,
veggies, books and yarn. Makes a great project bag.
I did not line mine, but you can if you would like to too.
Here is link on how to easily line a
Crochet Bag - LINK
I chose to use the Guava Sweet Roll Cake yarn.
It is a medium (4) weight yarn.
And Of The Fruit Yarns would look lovely and work
beautifully for this tote bag.
CLICK MY PREMIER LINK
AND SEE ALL
THE FUN COLORS : LINK
Any Medium (4) Weight yarn will work for this bag.
Solids, Ombres, And Variegated will work to make
a perfect tote bag. Look In Your yarn stash, I bet you
have some yarn that will look amazing.
See The Video on My Crochet Youutbe
Channel At This LINK
Guava Tote Bag Crochet Pattern
Please Add This Crochet Pattern To Your Ravelry Favorites
Skill: Easy
Materials:
Crochet hook – H / 5 mm.
Yarn – Med (4) Acrylic/ Premier Sweet Roll Fruits/ Guava 5.5 oz.
Yarn Needle
2 Metal Ring – 6 inch For Handles
Crochet hook – H / 5 mm.
Yarn – Med (4) Acrylic/ Premier Sweet Roll Fruits/ Guava 5.5 oz.
Yarn Needle
2 Metal Ring – 6 inch For Handles
Button - 1 inch
Stitches:
Chain (ch)
Slip Stitch (slst)
Single Crochet (sc)
Double Crochet (dc)
Skip (sk)
Space (sp)
Shell Stitch (shst) 2dc, ch1, 2dc
Size: 12 inches tall X 24 inches around,
not counting the handle
Notes:
Ch3 Counts as a dc
Chain (ch)
Slip Stitch (slst)
Single Crochet (sc)
Double Crochet (dc)
Skip (sk)
Space (sp)
Shell Stitch (shst) 2dc, ch1, 2dc
Ch3 Counts as a dc
Pattern:
R: 1 – Ch 42,
sc in the 2nd ch from the hook,
1 sc in each ch across, (41 sc)
Turn Working down the opposite Side of the ch,
1 sc in each ch (41 sc) join to the 1st sc with a slst
ch1 (41 + 41 – 82 sc)
* 1 dc in the next 4 dc sk 2 dc, shst in the next dc, sk 2 dc *
Repeat From
* to * Around, sk 3 dc after the last repeat
Join to the ch3 with slst, ch3
(9 sets of 4
dc, shst)
* 1 dc in the next 4 dc, shst in the next ch1 sp *
Repeat From * to * Around, Join to the ch3 with slst, ch3
(9 sets of 4 dc, shst)
R: 9 – R:
21 – Repeat R: 8
do not dc in the ch1 sp , join the ch3 with a slst, ch1 (72 dc)
sc in the next 12 working around the ring,
Sc in the next 24 dc,
sc in the next 12 working around the ring,
sc in the last 12 sc, join to the 1st sc.
(72 sc)
Place as many sc as will fir snuggly, the St Count is not important,
we want to completely cover the ring.
Sc in the next 24 sc,
sc around the top of the ring,
Place as many sc as will fir snuggly,
Sc in the last 12 sc, join to the 1st sc, tie off weave in your ends.
Ch 15, sk the next 7 sc, slst up the ch,
Tie off and st in place at the center from of the bag.
An Ad Free PDF file Is Available
In My Ravelry Shop At This LINK


No comments:
Post a Comment