Showing posts with label free pattern. Show all posts

Friday, October 25, 2024

FRIDAY FUN DAY! Bobble Ear Warmer Crochet Pattern By Sara Sach

  FRIDAY FUN DAY! 
Bobble Ear Warmer Crochet Pattern 
By Sara Sach of Posh Pooch Designs 


It Is  FRIDAY FUN DAY! 

And I have a fun and easy Crochet Pattern
 for you. It's perfect for Fall weather to
 keep you ears warm and look 
good doing it, too.

The stitch pattern has cute bobble
 stitches to added texture and a lovely 
cinched portion for style.


You will look great walking the dog, running errands
 or even playing in the snow. It's perfect for everyone,
 kids, adults, guys and girls. It also makes wonderful
 Christmas and holiday presents.


I designed the Autumn colors ear warmer and thought,
 that would look great in Christmas colors too. So I got
 in my yarn stash and found some left over 
Christmas stripe yarn. I Love both of them.
This Ear Warmer would be pretty in any colors, 
and warm too.


See The Video on My Crochet Youtube
 Channel At This LINK


Bobble Ear Warmer Crochet Pattern

Please Add This Crochet Pattern To Your Ravelry Favorites

Skill: Easy
 
Materials:
Crochet Hook – H / 5 mm.
Yarn – Med (4) Acrylic – I Love This yarn-/ Fall / 3 oz.
                                            Christmas Stripe
Yarn Needle
 
Stitched:
Chain (ch)
Single Crochet (sc)
Double Crochet (dc)
Back Loop Only (BLO)
 
Bobble Stitch (bobst)
Yo, insert hook in the next st, yo, pull the yarn through the st, yo,
pull the yarn through the 2 loops on the hook
 Repeat 2 more times – You will have 3“uncompleted dc”
 YO, pull yarn through all 3 loops on the hook
 
Size: Fits 22 – 24 inch head
 
Notes:
Ch1 Does not Count as a st
 Ch3 Counts as a dc
 
Pattern:
 
R: 1 – Ch 16, sc in the 2nd ch from the hook,
1 sc in each ch across, turn, ch 1 (15 sc)


R: 2 – Sc in the 1st 3 sc,
* bobst in the next sc, 1 sc in the next 3 sc*
Repeat from * to * 2 more times, turn, ch 1
(12 sc, 3 bobst)


R: 3 – 1 sc in each sc and bobst across,
Turn, ch 3 (15 sc)


R: 4 – dc in the next sc, dc in each sc across,
Turn, ch1 (15 dc)


R: 5 – Blo, 1 sc in each dc across, turn, ch1


R: 6 - Sc in the 1st 3 sc,
* bobst in the next sc, 1 sc in the next 3 sc*
Repeat from * to * 2 more times, turn, ch 1
(12 sc, 3 bobst)
 
R: 7 - R: 2 – 1 sc in each sc and bobst across,
Turn, ch 3 (15 sc)


R: 8 – dc in the next sc, dc in each sc across,
Turn, ch1 (15 dc)
 

Repeat R: 5 – R: 8 For 13 More Times


Place the ends together, wrong side out,
Sc them together, turn right side out,
do not tie off


Ch 30, tie off, 


Wrap the chain around and cinch it in.
Weave in securely with a needle.


An Ad Free PDF file Is Available
 In My Ravelry Shop At This LINK
For $3.50


Friday, June 21, 2024

FRIDAY FUN DAY! - Tomato Pin Cushion Crochet Pattern By Sara Sach

 FRIDAY FUN DAY!
 Tomato Pin Cushion Crochet Pattern
 By Sara Sach Of Posh Pooch Designs

🍅🍅🍅🍅🍅🍅🍅🍅🍅🍅🍅🍅🍅🍅🍅🍅🍅🍅🍅🍅


It's Friday Fun Day!
And The Tomato Pin Cushion Is A
 Perfect Pattern For Today.

Aren't these pin cushions the cutes thing!
They measure 4 X 5 inches.
They also make fun play food for the kids, 
but leave out the pins and needles!


I have been doing a lot of sewing lately and 
It reminded me of the tomato pin cushion I used have
 in my high school sewing class.
I Loved that thing and decided to crochet one.
I Love it!
I sure hope you do as well.

It's super cute, super fun to stitch up and super useful!
Just because Tomatoes are usually  red,
does not mean you have to make them red. 
Get in your yarn stash and make them any colors
 you like.
Have some fun and be creative.


See The Video On My Crochet Youtube Channel At This LINK


Tomato Pin Cushion Crochet Pattern

Please Add This Crochet Pattern To Your Ravelry Favorites

Skill: Easy
 
Materials:
Crochet Hook – H / 5 mm.
Yarn – Med (4) Acrylic C1- Red 1.5 oz, C2 – Green - .5 oz.
Yarn Needle
Stitch Marker
Felt Sticky Circle / Red
Stuffing / polyfiberfil
 
Stitches:
Chain (ch)
Slip Stitch (slst)
Single Crochet (sc)
Double Crochet (dc)
2 Single Crochet together (2scrog) decrease
 
Size: 3 X 4 inches
 
Notes:
We are Stitching in the Round for the Tomato
 
Pattern:
 
R: 1 – With C1, Ch2, 6 sc in the 2nd ch from the hook (6 sc)
Place your St Marker in the last st of each row

R: 2 – 2 sc in each sc (12 sc)


R: 3 - *2 sc in the 1st sc, 1 sc in the next sc*
Repeat from * to * around (18 sc)
 
R: 4 - *2 sc in the 1st sc, 1 sc in the next 2 sc*
Repeat from * to * around (24 sc)


R: 5 - *2 sc in the 1st sc, 1 sc in the next 3 sc*
Repeat from * to * around (30 sc)
 
R: 6 - *2 sc in the 1st sc, 1 sc in the next 4 sc*
Repeat from * to * around (36 sc)


R: 7 - *2 sc in the 1st sc, 1 sc in the next 5 sc*
Repeat from * to * around (42 sc)
 
R: 8 – 1 sc in each sc (42 sc)


R: 9 – R: 14 – Repeat R: 8


R: 15 – *2 sctog the next 2 sc, 1 sc in the next 5*
Repeat from * to * around (36 sc)
 
R: 16 - *2 sctog the next 2 sc, 1 sc in the next 4*
Repeat from * to * around (30 sc)


R: 17 -*2 sctog the next 2 sc, 1 sc in the next 3*
Repeat from * to * around (24 sc)
 
R; 18 -*2 sctog the next 2 sc, 1 sc in the next 2*
Repeat from * to * around (18 sc)


Stuff Your Tomato -


R: 19 --*2 sctog the next 2 sc, 1 sc in the next *
Repeat from * to * around (12 sc)
 
R: 20 - *2 sctog the next 2 sc*
Repeat from * to * around (6 sc)
Tie off leaving a 10 inch tail of yarn.
Use the yarn tail to sew closed the bottom of the tomato.


With C2, thread an 18 inch piece of yarn onto the needle.
Front bottom center to top center of the Tomato, stitch 6
loops around, tie off and knot at the bottom center
of the tomato.


Leaves:
 With C2, Ch 7, *sc in the 2nd, and 3rd ch from the hook, 
dc in the next 2 chs, sc in the last 2 chs, 
turn working up the other side of the ch,
sc in the next 2 chs, dc in the next 2 chs, sc in the last to chs,
Join to the 1st ch with a slst*
 ch17,
Repeat From * to * tie off weave in the ends.


Attach to the center of the Tomato with 
matching thread and needle.


Optional - Felt circle
Using adhesive felt, cut out a 2.5 inch circle.
Attach it to the bottom of the Tomato.

An Ad Free PDF File Is Available
 In My Raverly Shop At This LINK
for $3.50


Monday, December 18, 2023

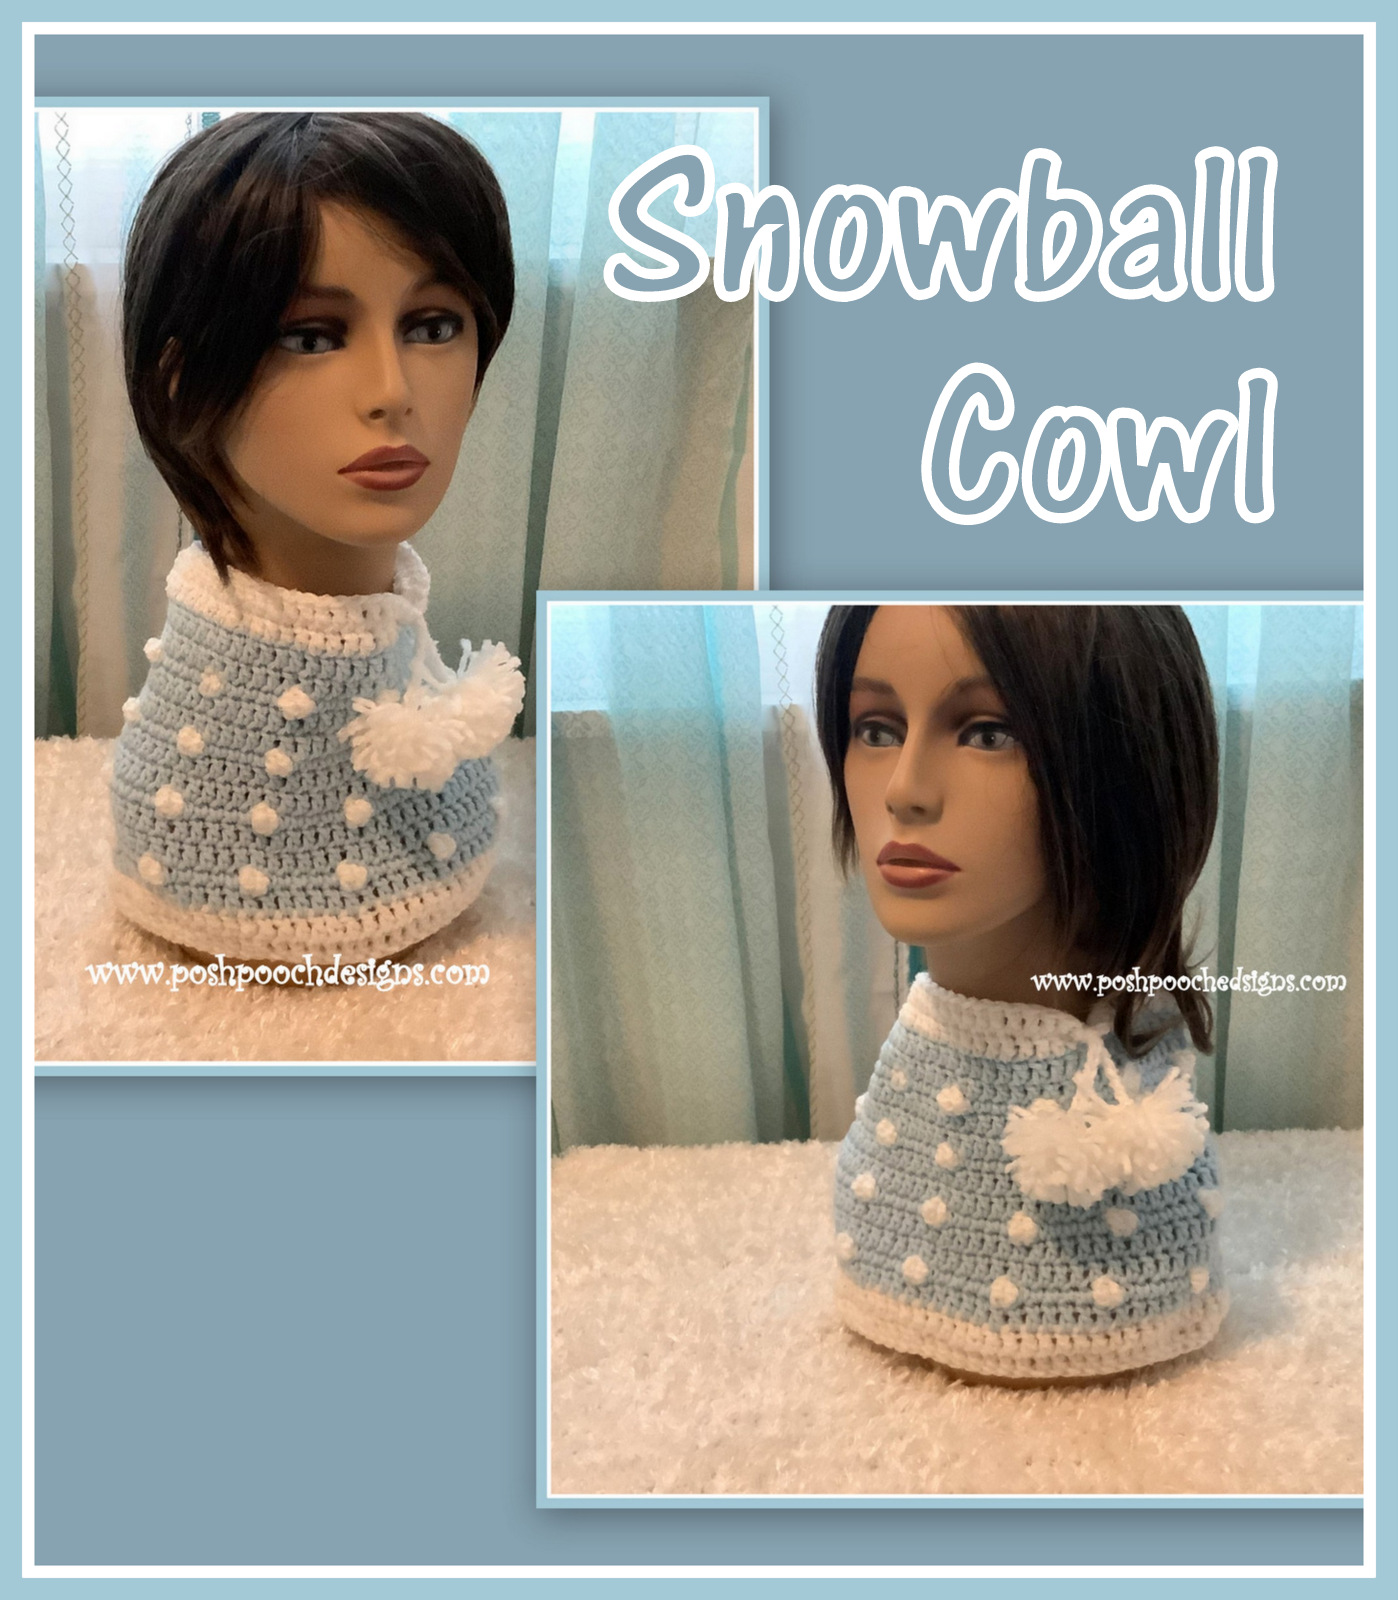
Snowball Cowl Crochet Pattern | Posh Pooch Designs


Snowball Cowl 
Crochet Pattern 
By Sara Sach of Posh Pooch Designs


The Snowball Cowl is a great last minute gift. 
This Cowl is basically a one size fits all.
us your left over yarns and stitch some up for unexpected gifts.
They are not just For Holliday gifts, they a perfect for an anytime a last minute gift is needed.

It measure 24 inches around so it will fit a child to adult.
If More length is desired, just add in multiples of 6 FDC.
It's 10 inches tall, but if you need a taller cowl,
 just add more of the repeat rows.
Adjusting This Cowl is easy peasy!


The Snowball Cowl will keep your neck warm
 and toasty on windy and cold days, and you 
will look super cute wearing it.


I Designed The Snowball Cowl using Premier Yarn
 Anti - Pilling Worsted Weight yarn in Spa Blue.
 I used Baby Bee Sweet Delight Twist in White
from Hobby Lobby For Snowball and Trim.


PREMIER YARN - 

ANTI-PILLING EVERYDAY® WORSTED


66 colors
100% Anti- Pilling
3.5 oz. / 180 yds.
Med (4) Weight 
Machine washable an dryable

CLICK THIS LINK
 TO SEE ALL THE COLORS 
AND MORE


See The Video On My Crochet Youtube 
Channel At This LINK


Snowball Cowl Crochet Pattern

Please Add This Crochet Pattern To Your Raverly Favorites
 
Skill: Easy
 
Materials:
Crochet Hook – I / 5.5 mm
Yarn – Med (4) Acrylic
            Baby Bee Sweet Delight Twist - White – C2 – White – 1.5 oz.
           Premier Anti - Pilling Everyday Worsted - C2- Spa/ light blue – 3 oz.
Yarn Needle
 
Stitches:
Chain (ch)
Slip Stitch (slst)
Single Crochet (sc)
Double Crochet (dc)
Triple Crochet (tr)
Change to (chgto)
Triple 2 Together (tr1tog) decrease
Double Crochet Foundation (FDC)
 
Size: 10 X 24 Inches
Multiples of 6 FDC 
 
Notes:
Ch1 Does not Count As A St
Ch3 Counts as a dc
When changing colors at the beginning of rows,
       ch1, ch3 after the color change
 
How To Change Colors In The middle Of the Row:

On Your last sc of the previous color, do not finish the sc,

Pull in the new color and finish the sc,


Stitch The 2 trtog, do not finish the last tr,

Pull up the next color and finish the tr2tog,

carry your yarn and stitch over the previous color.

Only carry your yarn for the sc rows, not the dc rows.

This will give you neat color changes and crisp color changes


****************************************************

Pattern:
 
R: 1- With C1, 72 FDC, join to the 1st st with a slst, ch 3,
(72 FDC)
be sure to close the gap 


 R: 2 – 1 Dc in each st around, join to the ch3 with a slst
(72dc)

R: 3 – Chgto C2, leave C1 Attached, do not tie off or st over C1.
Ch3, 1 dc in each dc around, join to the ch3 with a slst, and ch 1
(72 dc)


R: 4 – 1 sc in the 1st 5 dc, Chgto C1, do not tie off C2, tr2tog in the next dc,
*Chgto C2, leave C1 attached and st over it, 1 sc in the next 5 dc,
Tr2tog in the next st*
Repeat From * to * around, join to the ch1, ch3 (60 sc, 12 2tr2tog=72sts)


R: 5 – Chgto C2, leave C1 attached, But do not carry the yarn,
1 dc in each st around,
 join to the ch3 with a slst and ch3 (72 dc)


R: 6 – 1 dc in each c around, join to the ch3 with a slst, ch1 (72dc)


R: 7 – R: 15 – Repeat R: 4 – R: 6 For 3 more times


R: 16 – Chgto C1, tie off C2, 1 dc in each dc around,
Join to the ch3 with a slst, ch3

 R: 17 - 1 dc in each dc around,
Join to the ch3 with a slst, tie off and weave in your ends.


With C1 ch 25, tie off each end. Attached to cowl at R: 16 / 17


Make 2 pompoms, attach one to each end of the ch.


An Free PDF file is Available
 In My Raverly Shop At This LINK
 For $3.50