Friday, November 18, 2022

Ribbon Basket Crochet Pattern | Posh Pooch Designs

Friday Fun Day
 Ribbon Basket Crochet Pattern 
By Sara Sach of  Posh Pooch Designs

Today is Friday Fun Day With Sara
We are going to crochet a simple basket with a ribbon.
 I chose to use  Michael's Charisma Yarn, 
Loops And Thread yarn in a brown variegated color way.
 I think it's perfect for the baskets.


It's a simple basket to stitch up. Adding ribbon and
 decorative buttons gives it  charm and personality.
Any color or print ribbon can be used, and any 
decorative buttons. Change them out for the
 Holidays and seasons.


The Basket is the perfect size for nuts, candies or treats.
 If you are using unwrapped candies, slide a coffee filter inside.
 It will keep the sticky candy from messing up the basket.


You can also use a cereal bow inside the basket.
And use it as bowl warmer for gravy or dips.
The Basket is washable, so don't panic if it gets dirty.

Do Not Put Candles In These Baskets.
Acrylic Yarn will melt and burn.
 If you want a candle, use a battery 
powered Tea Light.

See The Video On My Crochet Youtube
 Channel A This LINK


Ribbon Basket Crochet Pattern

Skill: Easy
 
Materials:
Crochet Hook – K / 6.50 MM
Yarn – Bulky (5) 2 oz.  Charisma / Loop And Thread / Michaels
Yarn needle
Ribbon – ¼  Inch Thick, 24 inches long – Your color choice
1 - 2 – Decorative buttons
 
Stitches:
Chain (ch)
Slip stitch (slst)
Single Crochet (sc)
Double Crochet (dc)
Back Loop Only (BLO)
Skip (sk)
Space (sp)
 
Size:  6 X 3 inches
 
Notes:
Ch counts as a dc
Rounds are joined to the ch3 with a slst
 
Pattern:

R: 1- Ch 5, join in a circle, ch3, 9 dc in the circle, join, Ch 3 (10 dc)
 
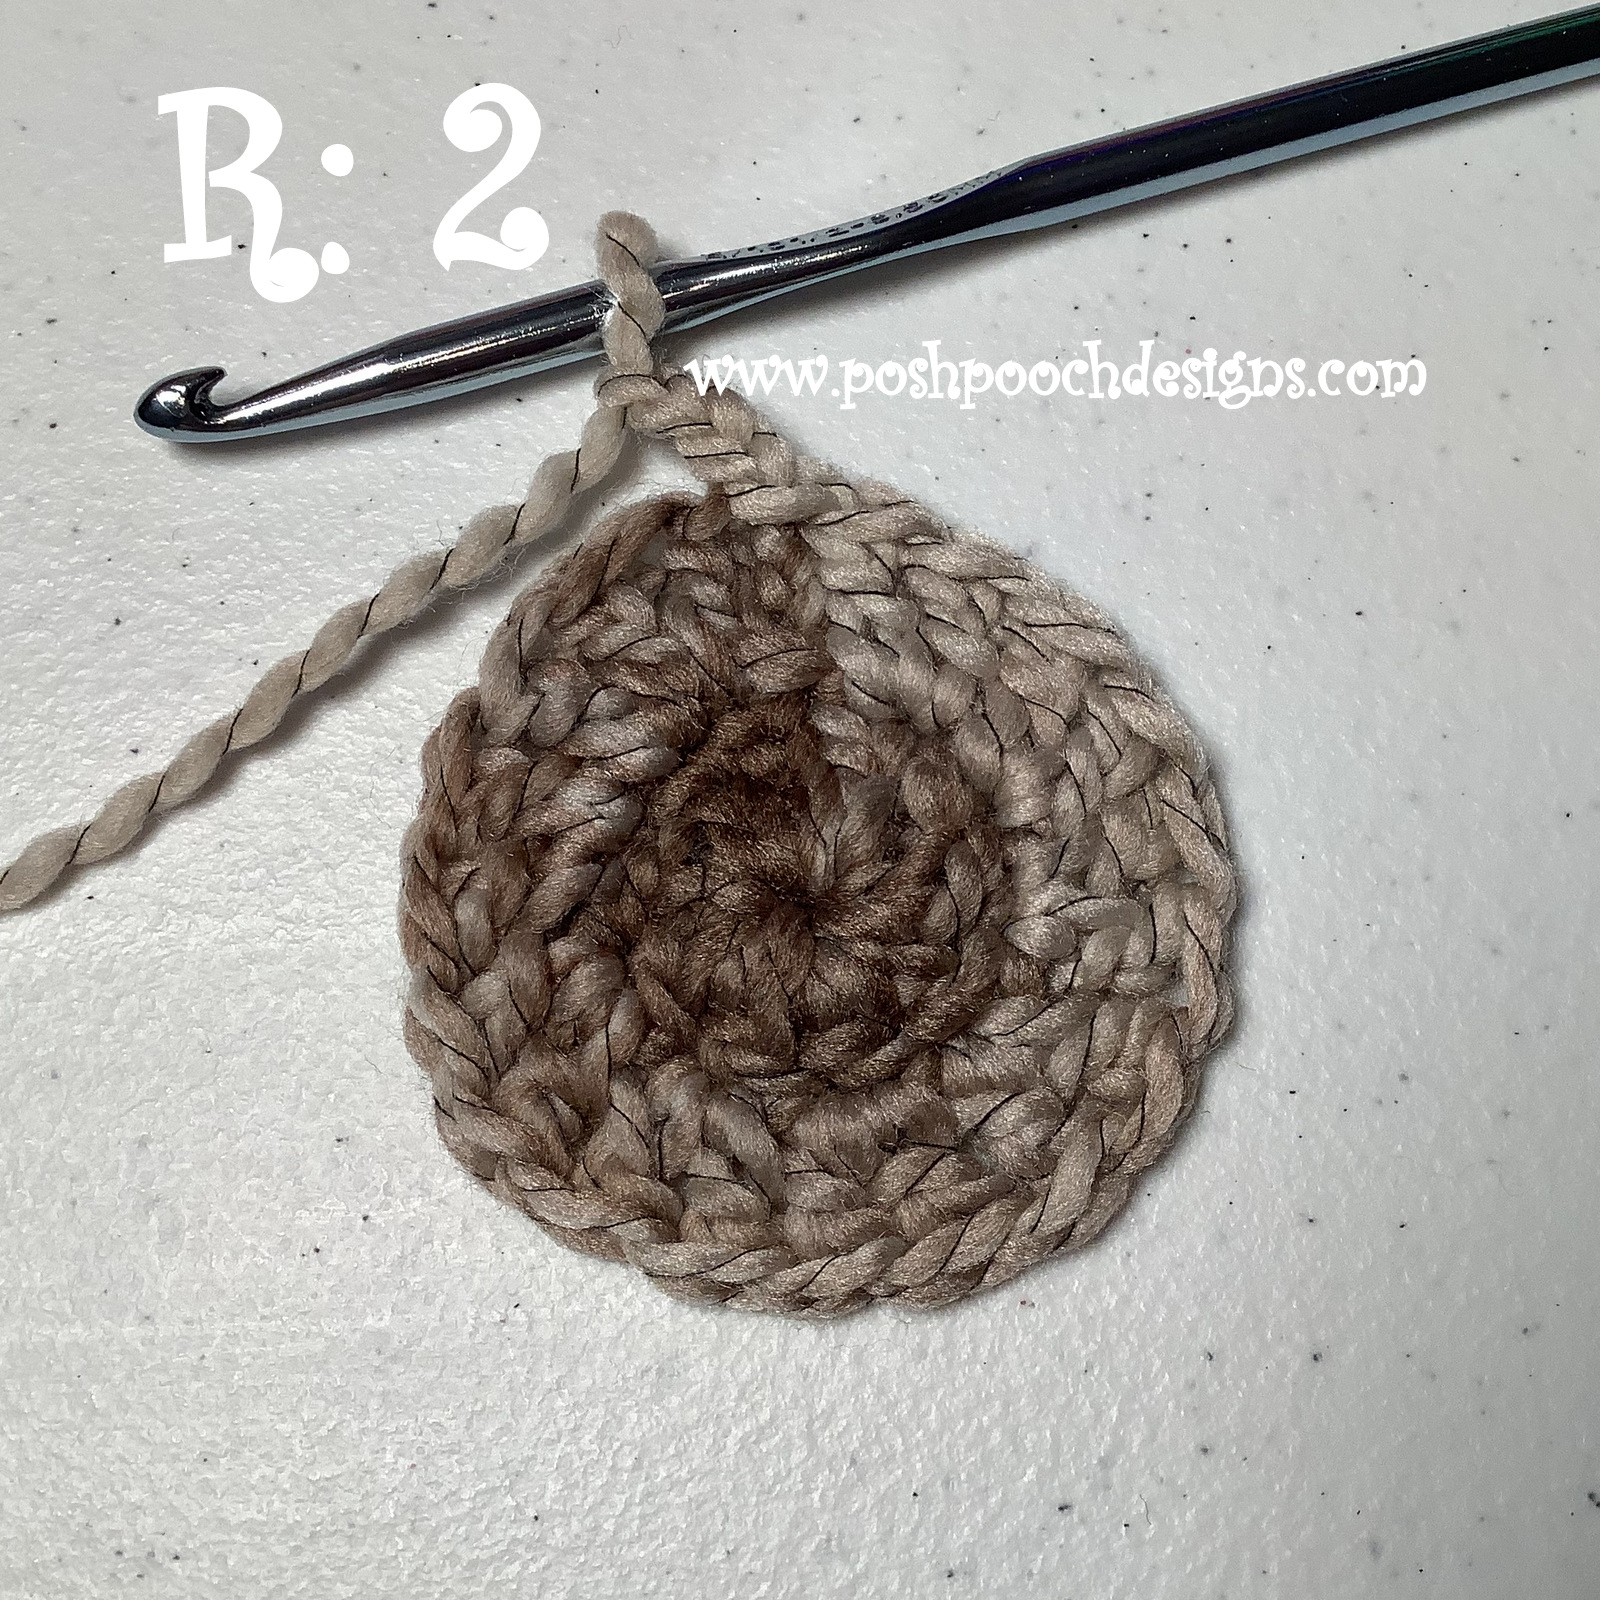
R: 2 – Dc in the same st as the ch3, 2 dc in each dc around,
 join, ch 3 (20 dc)


R: 3 - Dc in the same st as the ch3, 2 dc in each dc around,
 join, ch 3 (40 dc)
 
R: 4 - Dc in the same st as the ch3,
*1 dc in the next 3 dc, 2 dc in the next dc*
Repeat From * to * around, join, ch 3 (50 dc)


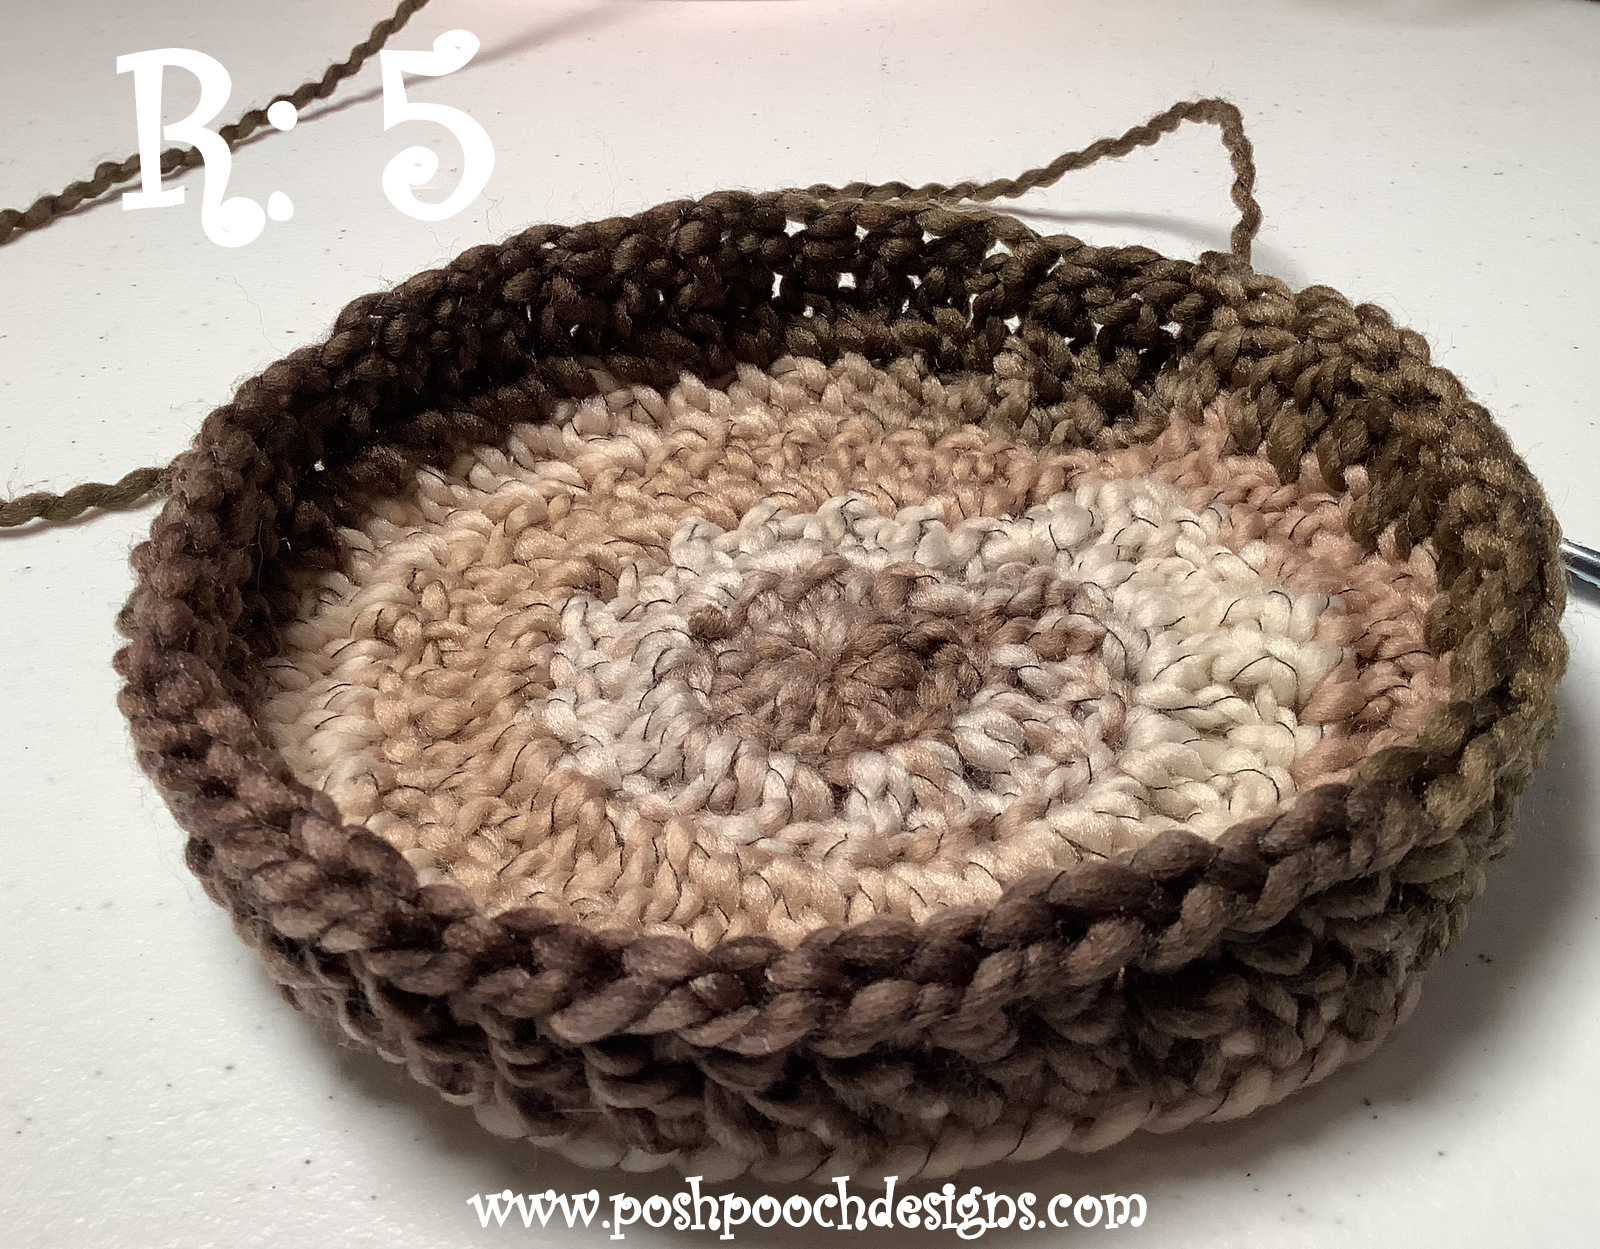
R: 5 – BLO, 1 dc in each dc, join, ch 3 (BLO 50 dc)


R: 6 – BLO, 1 dc in each dc, join, ch 3 (BLO 50 dc)
 
R: 7 – BLO, 1 dc in each dc, join (BLO 50 dc)


R: 8 – Ch 4 *Sk the next dc, dc in the next dc, ch 1*
Repeat From * to * around, join to the 3rd ch of the ch 4, ch 1
 ( 50 sts)


R: 9 – Sc in each dc and in each ch1 sp, join to the 1st sc, 
tie off weave in your end. (50 sc)


Lace ribbon 24 - 30 Inch, through the ch1 sps of R: 8.
 Tie a bow.
 
With matching yarn and a needle sew a button, or 2
 to the center of the bow.


Thursday, November 17, 2022

Turkey Lurky Pillow Crochet Pattern | Posh Pooch Designs

 Turkey Lurky Pillow
 Crochet Pattern 
By Sara Sach of Posh Pooch Designs

The Turkey Lurky Pillow Crochet Pattern is a easy
 and fun Crochet Pattern.
It's fun to decorate with, as well as, play with.
Kids and Adults will love this little pillow. 
It makes a silly centerpiece for the table that will
 make everyone smile.


Pass him around the table as each person tells 
what they are thankful for. Having a silly turkey to hold
 will help everyone get over their shyness to talk.
And before long I bet everyone will smiling 
and telling stories.


I chose traditional colors for my Turkey Lurky, 
but you can chose any colors of yarn from
 your yarn stash. Have been and don't be afraid 
to be creative.

See The Video On My Crochet Youtube
Channel At This LINK


Turkey Lurky Pillow Crochet Pattern

Please Add This Crochet Pattern To Your Ravelry Favorites
 
Skill: Easy
 
Materials:
Crochet Hook – H / 5.00 MM
Yarn – Med (4) Acrylic – Red heart Super Saver
             Med Brown. 2 oz.
             .5 oz. of each - orange, red, yellow, white, Black, Dark Brown
Yarn Needle
Stuffing – Polyfiberfil 6 oz.
5 straight pins
Optional – ¾ inch buttons for eyes
 
Stitches:
Chain (ch)
Slip Stitch (slst)
Single Crochet (sc)
Half Double Crochet (hdc)
Double Crochet (dc)
Front Loop Only (FLO)
Back Loop Only (BLO)
 
Size: 12 inches
 
Notes:
Ch1 Does Not count as a st
CH3 Counts as a Dc
Rounds are joined to the ch3 with a slst
 
Pattern:
Turkey Body Make 2 circles
 
R: 1 – Ch 5, join in a circle, ch3, 9 dc in the circle,
Join, Ch 3. (10dc)
 
R: 2 - 1 dc in same st as ch3, 2 sc in each sc around, join,
 ch3 (20 dc)


R: 3 - 1 dc in same st as ch3, 2 dc in each dc around, join,
ch3 (40 dc)
 
R: 4 - 1 dc in the next 2 sts,
*2 dc in the next st, 1 dc in the next 3 sts*,
Repeat from *to* around, join, ch3 (50 dc)


R: 5 - 1 dc in the next 3 sts,
*2 dc in the next st, 1 dc in the next 4 sts*,
Repeat from *to* around, join, ch3 (60 dc)
 
R: 6 –1 dc in the next 4 sts, 
*2 dc in the next st, 1 dc in the next 5 sts*,
Repeat from *to* around, join, ch3. (70 dc)
Tie off, weave in your ends.


Repeat R: 1 – R:  6, tie off, leave attached to the yarn, and set a side.


Turkey Feathers – Make 5 in 5 different colors 
(red, yellow, orange, brown, dark brown)
 
R: 1 – Ch 10, sc in the 2nd ch, sc in the next 7chs, 2sc in the next ch, (11chs)
Turn Working down the opposite side of the ch,
2 sc in the 1st ch, 1 sc in the next 8 chs, turn, ch 1 (11 + 11 = 22chs)
 
R: 2 – 1 sc in the next 9 sc, 2 sc in the next 3 sc, 1 sc in the next 10 sc,
Tie off, weave in the ends.
 

Stuffing:
Lay the 5 feathers across with the edges, right side up,
The feathers facing down, pin the feathers in place.
Place the 2nd circle wrong facing out,


 Join yarn to the lower right side of the turkey circles, 
sc around the circle,
sewing them together, when you reach the feather,
Stitching through the bottoms of the feather continue to sc around,


leaving a 6 inch opening, Flip right side out, and stuff your turkey, 
Whip Stitch the opening closed with needle and yarn.
Tie off and weave in the ends.


Eyes: Make 2
Note: If This Being made for a small child who might 
swallow a button.
Do not put the buttons on.  It could be a choking hazard.
 
R: 1 – With black yarn, Ch5, join in a circle, ch1, 8 sc in the circle,
Join to the 1st sc with a slst, ch1 (8 sc)
 
R: 2 – Chgto white yarn 2 sc in each sc around, 
join to the 1st sc with a slst (16 sc)
 
R: 3 – Sc in the 1st 2 sc,
*2 sc in the next sc, 1 sc in the next sc*
Repeat From * to * around, join to the 1st sc with a slst,
Tie off leaving a 12 inch tail of yarn for sewing
 the eye onto the turkey.


Beak:
R: 1 - With yellow yarn, ch 3, 2 sc in the 2nd ch
 from the hook, ch1, turn (2sc)
 
R: 2 - 2 sc in the each sc, ch 1, turn (4 sc)
 
R: 3 - 2 sc in the 1st sc, 1 sc in the next 2 sc, 
2 sc in the last sc, ch1, turn (6sc)
 
R: 4 – 1 sc in each sc across, sc evenly
 down the side of the beak,
 
2 sc in the point of the beak, sc evenly up the side of the beak,
 Join to the 1st sc, tie off leaving a 12 inch tail of yarn.
Weave in your ends and sew the beak onto the turkey.

Gobble:
Ch10, sc, ch1, sc in the 2nd ch from the hook.
sc, ch1, sc in each ch across, tie off leaving  
enough yarn to attach to turkey face.


Turkey Feet:
Join yellow yarn to center bottom of the pillow,
*Ch 6, slst in the 2nd ch from the hook, slst in the next ch,
Ch 3, slst in the 2nd and 3rd ch,
Ch3, slst in the 2nd and 3rd ch,
Slst in the last 3 chs of the beginning ch,*
Slst in the next sc, and repeat from * to *
Join to the same sc, tie off and weave in your ends.


An Ad Free PDF File Is Available 
In My Raverly Shop At This LINK
 For $3.50


Tuesday, November 15, 2022

Coffee And Crochet Podcast - November Give Away Winner | Posh Pooch Designs

 Coffee And Crochet Podcast - 
November Give Away Winner 
and Some Fun New Yarn
With Sara Sach of Posh Pooch Designs


That's Right!
 I Announced The Winner of 
The November Give Away!

The Year - Around Gnomes
Crochet Book From Annie's

Was it You?

Watch The Video On My Crochet Youtube Channel At This LINK


**********************************************

We also talked about a new fun
 yarn I found.
Bernat Blanket Yarn / Tie Dye- ish

**********************************************


What's New This Week At 

Winter Mystery Crochet Along
Santa Owl Squishy
Crochet Pattern And Videos - LINK


Denim And Lace Cowl
Crochet Pattern And Video - LINK


Thanks So Much For Stopping By!

Hope To See Ya next Week!


Monday, November 14, 2022

Denim And Lace Cowl Crochet Pattern | Posh Pooch Designs

 Denim And Lace Cowl 
Crochet Pattern
By Sara Sach Of  Posh Pooch Designs


The Denim And Lace Cowl is a very unique design.
It is stitched in 2 layers, 
 placed together for lace over denim Effect. 
It is so pretty and so warm.

I love how it looks great with jeans for day wear, 
or dresses for evening wear. A wonderful addition 
to a dressy or casual outfit.


Both pieces are simple to stitch up, no fancy stitches
 or techniques, but look fancy and technical.
It also makes a Wonderful Christmas or Birthday gift.
It's so lovely, they won't believe it's handmade.

See The Video On My Crochet Youtube 
Channel at At This Link


Denim And Lace Cowl Crochet Pattern
 
Please Add This Crochet Pattern To Your Ravelry Favorites

Skill: Easy
 
Materials:
Crochet hook – I / 5.50 mm
Yarn – Layer 1 - Med (4) Acrylic - 
                            Bernate pop / Foggy Notion – 2.5 oz.
             Layer 2 - Med (4) – Acrylic – I love This Yarn/ 
                            Stonewash / Denim - 2 .5 oz.
Yarn Needle
 
Stitches:
Chain (ch)
Slip Stitch (slst)
Single Crochet (sc)
Double Crochet (dc)
Skip (sk)
Space (sp)
Shell Stitch (shst) 2dc, ch2, 2dc I the same ch or sp)
Foundation Double Crochet (FDC)
 
Size: 8.5 t.  X 24 w. inches
5 FDC =2 inches
3 Rows = 2 inches
Multiples: 6 FDC
 
Note:
The Cowl is Stitched in 2 layers, then stitched together.
Ch3 Counts as dc
Rounds are joined to the ch3 with a slst
 
Pattern:

Layer 1: Lace

R: 1 – 72 FDC, join in a circle, ch3
(72 FDC)
 
With needle and yarn tail close the gap at the join.


R: 2 – Dc, ch2, 2 dc in the same st as the ch3,
*ch3, sk 5 sts, shst in the next st*
Repeat From * to * 10 more times, join,
Slst in the next dc, slst in the ch2 sp, ch3
(12 shsts, ch3)


R: 3 - Dc, ch2, 2 dc in the same ch2 sp as the ch3,
*ch3, shst in the next ch2 sp*
Repeat From * to * 10 more times, join,
Slst in the next dc, slst in the ch2 sp, ch3
(12 shsts, ch3)


R: 4 – R: 11 – Repeat R: 3
After R: 11 - join to the ch3, and ch3

 
R: 12 – 1 dc in each dc, 2 dc in each ch3 sp, around,
 join, and tie off. (72 dc)
 

Layer 2 – Denim
 
R: 1 – 72 FDC, join in a circle, ch3
(72 FDC)

With needle and yarn tail close the gap at the join.


R: 2 – 1 dc in each dc around, join, ch 3


R: 3 – R: 13 - Continue To repeat R: 2
Join, 
After R: 13 - only ch1. Do not tie off.


You need A Outside layer - Lace And An inside layer - Denim

Slide layer 2 inside layer one, with the front facing out.


 Line up the edges, and sc layer 1 and lay 2 together, 
join to the 1st sc,
Tie off and weave I your ends.
 
Join yarn to the other side and sc the ends together.


An Ad Free PDF file is Available
 in my Ravelry Shop At This LINK
For $4.50


I Love This So Much, I think I am going to keep it for myself.