Showing posts with label Friday fun With Sara. Show all posts

Friday, November 18, 2022

Ribbon Basket Crochet Pattern | Posh Pooch Designs

Friday Fun Day
 Ribbon Basket Crochet Pattern 
By Sara Sach of  Posh Pooch Designs

Today is Friday Fun Day With Sara
We are going to crochet a simple basket with a ribbon.
 I chose to use  Michael's Charisma Yarn, 
Loops And Thread yarn in a brown variegated color way.
 I think it's perfect for the baskets.


It's a simple basket to stitch up. Adding ribbon and
 decorative buttons gives it  charm and personality.
Any color or print ribbon can be used, and any 
decorative buttons. Change them out for the
 Holidays and seasons.


The Basket is the perfect size for nuts, candies or treats.
 If you are using unwrapped candies, slide a coffee filter inside.
 It will keep the sticky candy from messing up the basket.


You can also use a cereal bow inside the basket.
And use it as bowl warmer for gravy or dips.
The Basket is washable, so don't panic if it gets dirty.

Do Not Put Candles In These Baskets.
Acrylic Yarn will melt and burn.
 If you want a candle, use a battery 
powered Tea Light.

See The Video On My Crochet Youtube
 Channel A This LINK


Ribbon Basket Crochet Pattern

Skill: Easy
 
Materials:
Crochet Hook – K / 6.50 MM
Yarn – Bulky (5) 2 oz.  Charisma / Loop And Thread / Michaels
Yarn needle
Ribbon – ¼  Inch Thick, 24 inches long – Your color choice
1 - 2 – Decorative buttons
 
Stitches:
Chain (ch)
Slip stitch (slst)
Single Crochet (sc)
Double Crochet (dc)
Back Loop Only (BLO)
Skip (sk)
Space (sp)
 
Size:  6 X 3 inches
 
Notes:
Ch counts as a dc
Rounds are joined to the ch3 with a slst
 
Pattern:

R: 1- Ch 5, join in a circle, ch3, 9 dc in the circle, join, Ch 3 (10 dc)
 
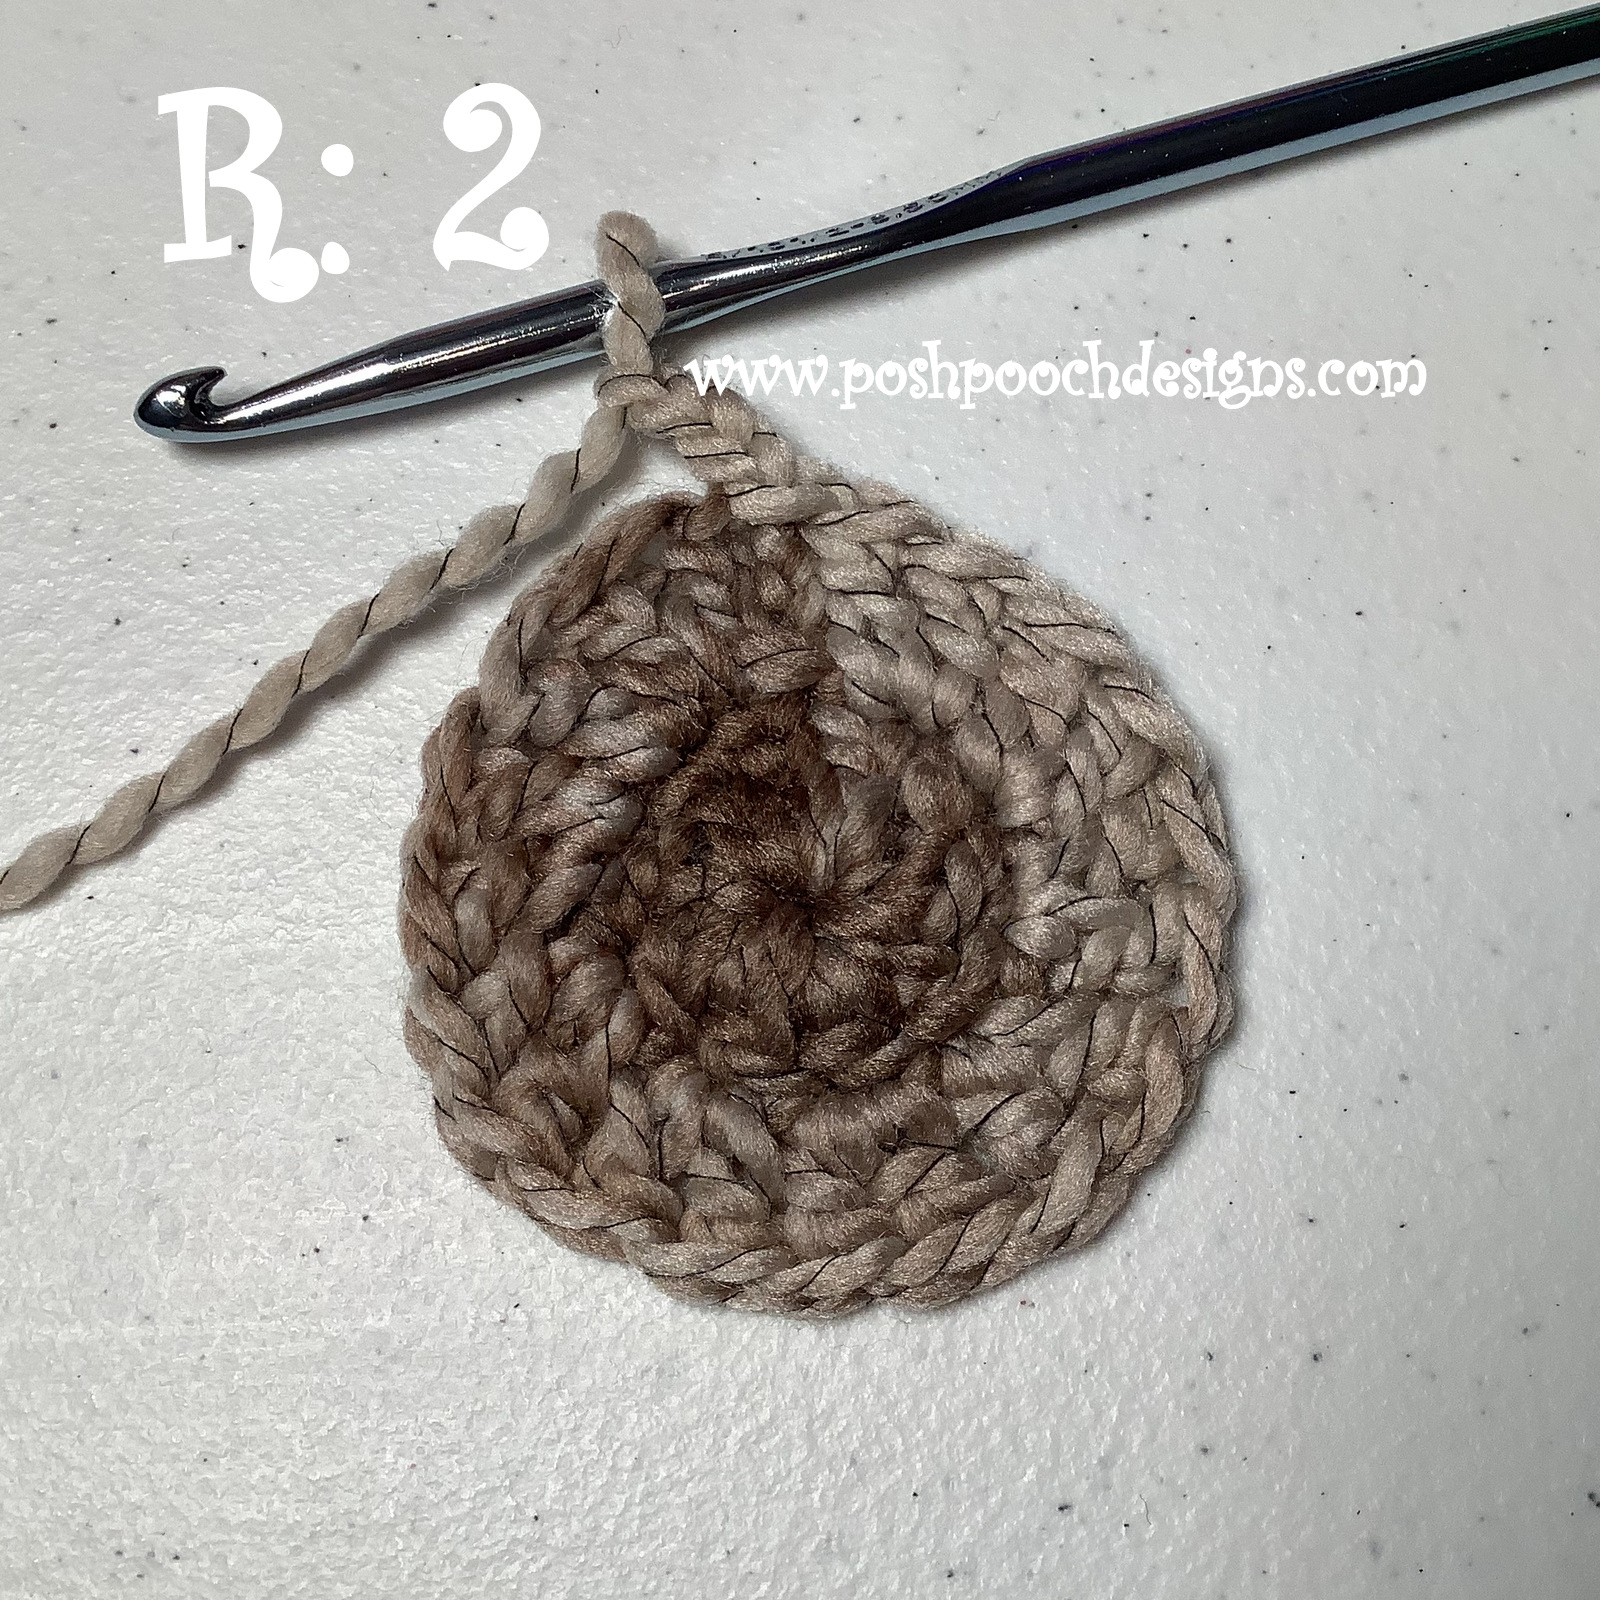
R: 2 – Dc in the same st as the ch3, 2 dc in each dc around,
 join, ch 3 (20 dc)


R: 3 - Dc in the same st as the ch3, 2 dc in each dc around,
 join, ch 3 (40 dc)
 
R: 4 - Dc in the same st as the ch3,
*1 dc in the next 3 dc, 2 dc in the next dc*
Repeat From * to * around, join, ch 3 (50 dc)


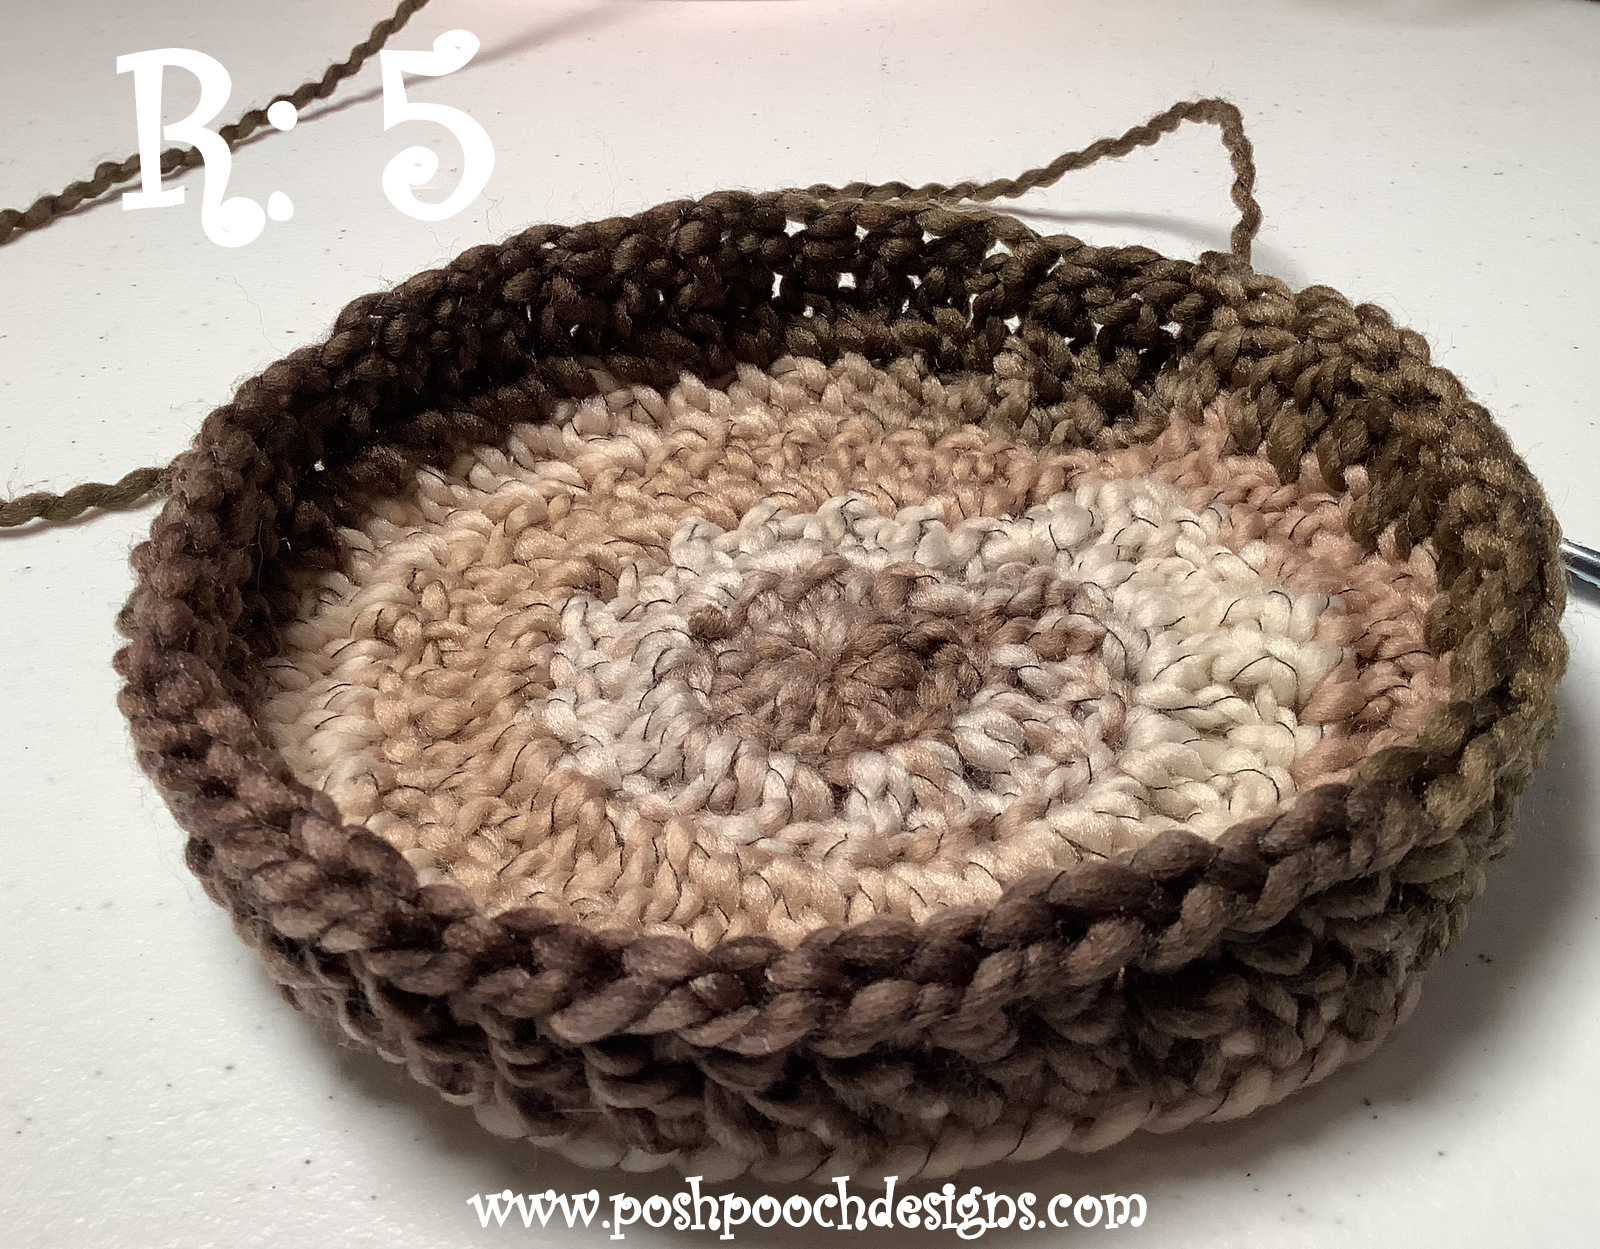
R: 5 – BLO, 1 dc in each dc, join, ch 3 (BLO 50 dc)


R: 6 – BLO, 1 dc in each dc, join, ch 3 (BLO 50 dc)
 
R: 7 – BLO, 1 dc in each dc, join (BLO 50 dc)


R: 8 – Ch 4 *Sk the next dc, dc in the next dc, ch 1*
Repeat From * to * around, join to the 3rd ch of the ch 4, ch 1
 ( 50 sts)


R: 9 – Sc in each dc and in each ch1 sp, join to the 1st sc, 
tie off weave in your end. (50 sc)


Lace ribbon 24 - 30 Inch, through the ch1 sps of R: 8.
 Tie a bow.
 
With matching yarn and a needle sew a button, or 2
 to the center of the bow.


Friday, February 4, 2022

Be Happy Bee Key Ring Crochet Pattern - Friday Fun With Sara | Posh Pooch Designs

Friday Fun With Sara 
Be Happy Bee Key Ring
 Crochet Pattern
 By Sara Sach Of Posh Pooch Designs


It's  Friday Fun Day With Sara!
I Am So Excited about Today's Crochet Pattern And Video.
We are stitching up an Adorable Bee.
 her Name is Flower and She's A Bee Happy Bee.
She works hard all day, and loves what she does,
 And she is always happy buzzing around the flowers.

Here She is in Tradition Bee Colors.
She is so cute!


 I jazzed her up in some Spring bee colors.
And she is so cute in these colors also.


I Chose to stitch her up in bulky (5) yarn and 
a K / 6.5 MM crochet hook, because I wanted her
 to about 5 inches. She is the perfect size.


She is Cute, She is Happy, 
I Love Her So Much!

See The Video on My Crochet Youtube
 Channel At This LINK


Be Happy Bee Key Ring Crochet Pattern
 
Skill: Easy
 
Materials:
Crochet Hook - K / 6.50 MM
Yarn- Bulky (5) Small Amount of C1-Yellow, C2- Black, C3 -White
Yarn needle
Key Ring, Bag tag, Hook/ Clip of Choice
Small amount of stuffing
Button - Small decorative Flower or button of Choice
 
Stitches:
Chain (ch)
Slip Stitch (slst)
Single crochet (sc)
Change to (chgto)
Single Crochet Together (sctog)
 
Size: 5 inches
 
Notes:
Ch1 Does not count as a st
Rounds are joined to sc, with a slst, Not the ch1
Do Not cut yarn when changing colors, trail the yarn up inside the bee
 
Pattern:

R: 1 – With C1, Starting with a 10 in tail of yarn 
(we will need this tail of yarn later for the stinger)
Ch3 3, 6 sc in the 2nd ch from the hook, join in a circle (6 sc)
 

R: 2 – Chgto C2, ch1, Sc in the 1st 2 sc, 2 sc in the next sc,
2 sc in the next 2 sc, 2 sc in the next, join (8 sc)


R: 3 – Chgto C1, Ch1, *1 sc in the sc, 2 sc in the next dc*,
Repeat From * to * 3 more times, join (12 sc)


R: 4 – Chgto C2, Ch1, *1 sc in the next 2 sc, 2 sc in the next Sc*
Repeat From * to * 3 more times, join (16 sc)


R: 5 – Chgto C1, 1 sc in each sc, join (16 sc)
 
R: 6 – Chgto C2, 1 sc in each sc, join, (16 sc)


R: 7 – Repeat R: 6

R: 8 Sctog the 1st 2 sc, sc in the next 6 sc,
Sctog the next 2 sc, sc in the next 6 sc, join, ch1 (14 sc)


R: 9 – Sctog the 1st 2 sc, 1 sc in the next 5 sc,
Sctog the next 2 sc, 1 sc in the next 5 sc, join, ch1 (12 sc)
 
R: 10 – Sctog the 1st 2 sc, sc in the next 4 sc,
Sctog the next 2 sc, 1 sc in the next 4 sc, join,
Tie off leaving a 12 inch tail of yarn. (10sc)
 
Stuff the bee body, gather  closed the top of the
 bee body with the tail of yarn.


Stinger:
Using the Beginning tail of yarn and needle, 
close up the hole at the bottom of the bee
ch 4, turn, slst in next 3 chs,  3 chs, tie off, weave in your end.
 
Wings: Make 2
With C3, Ch 6, slst in the 5th ch,
ch6 and slst in the 5th ch to form the wing.
Attach a wing to each side of the bee,
with needle and tail of yarn.


Antennae - With Black yarn, Ch 4, slst in the 2nd ch, and in the next 2 chs,
Ch4, slst in the 2nd ch and in the next 2 chs, tie off.
 leave enough tai of yarn to attach to the bee head.

Face: With Black yarn and needle, Make a French Knot for the eyes, 
and a cute smile, as shown in the picture.

Button - Sew on a cute Flower button of Choice.

 Isn't Flower the cutest bee you have ever seen? 


Both Bees are super sweet!

Friday, January 28, 2022

Friday Fun With Sara - Let's Crochet Some Roses | Posh Pooch Designs

 Friday Fun With Sara
Let's Crochet Some Roses
With Sara Sach of Posh Pooch Designs


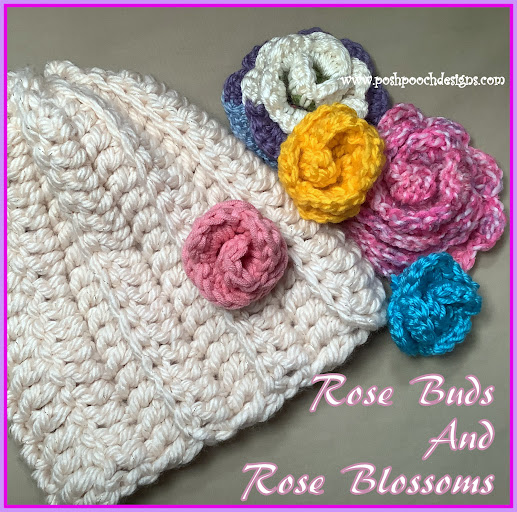
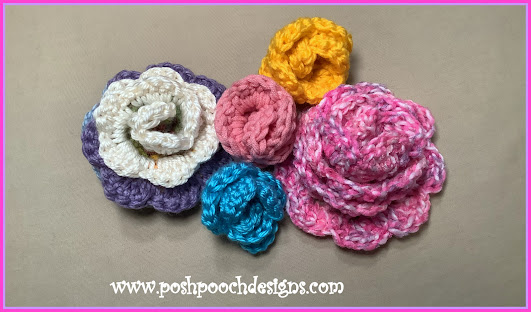
Today we are going to stitch up some Beautiful Roses.
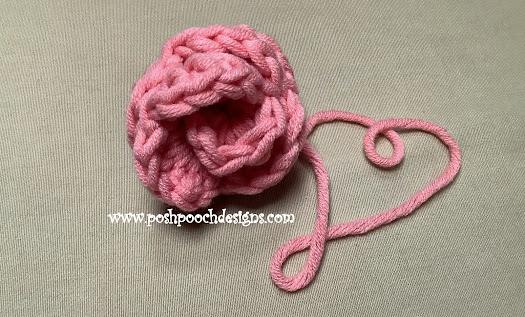
 This Crochet Pattern Can be made as a Rosebud
 or a Rose Blossom.

We are using a Bulky (5) yarn and a J / 6.00 Mm Crochet hook, so they will stitch up quickly and look big a lovely.
And are a great way to use up some left over scrap yarn
in your yarn stash.


If you would like your roses to be a little smaller, 
you can use medium (4) yarn and
 H/ 5.00 MM crochet hook.


They are perfect for adding to any bag, hat, scarf and
 decoration. And look lovely made as pins to attach
 to a sweater or jacket.


🌹🌹🌹🌹🌹🌹🌹🌹🌹🌹🌹🌹🌹🌹🌹🌹🌹🌹🌹🌹🌹🌹🌹🌹
Roses Are Red,
 Violets are Blue
 The Dog is my Favorite,
But You're Okay too!
🐕🐕🐕🐕🐕🐕🐕🐕🐕🐕🐕🐕🐕🐕🐕🐕🐕

See The Video On My Crochet Youtube 
Channel At This Link


Roses Crochet Pattern By Sara Sach

 Skill: Easy

 Materials:

Crochet hook – J/ 6.00 MM
Yarn - Chunky (5) yarn
Yarn Needle

 Stitches:

Chain (ch)
Slip stitch (slst)
Single Crochet (sc)
Double Crochet (dc)
Skip (sk)
Space (sp)
V Stitch (Vst)

 Size: 2 Sizes - 

Rose Buds - 2.5 inches
Rose Blooms - 6 inches
Multiples - 2 + 1

 Notes:

Demo is stitched with 16 chs/ Rose Bud
Ch4 Counts as a dc, ch1

Patterns:

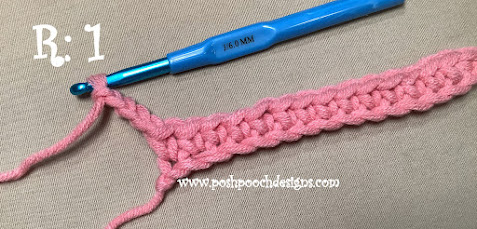
R: 1 –  Rosebud – Ch 16,  Rose Bloom - Ch 46

Sc in the 2nd ch and in each ch across, turn, ch 4
(15, 45sc)

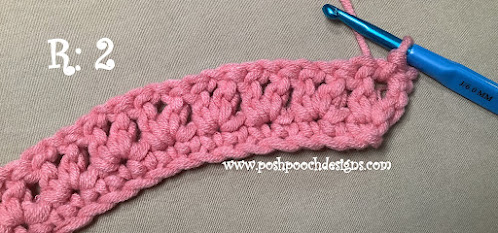
 R: 2 – Dc in the same st as the ch4,
*sk the next sc, Vst in the next dc*
Repeat From *to * across Row, turn,
Slst in the ch1 sp of the 1st Vst, ch3
(8, 23 Vsts)


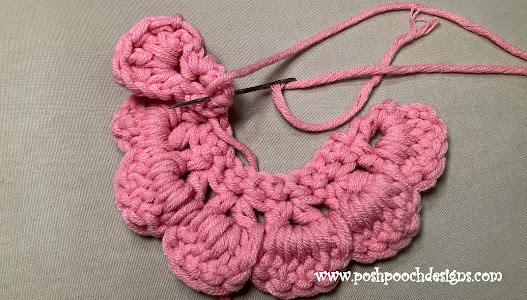
 R: 3 – 4 dc in the same the 1st ch1 sp,

*Slst between the next 2 V sts, 5 dc in the next ch1 sp*
Repeat From * to * across row,
4 dc in the last ch1 sp, ch3, slst in the ch1 sp, 
slst in the 1st sc from the previous row, 
Tie off leaving a 12 inch tail of yarn.
(8, 23 Rose Petals)


Thread the tail of yarn onto the needle,
Roll up the 1st “petal and st securely,


Continue to roll up the rose petals, stitching them securely.


Now Get In Your Yarn Stash And 
See What Lovely Roses You Can 
Stitch Up!


Friday, October 29, 2021

Friday Fun With Sara – Turkey Butt Crochet Pattern | Posh Pooch Designs

 Friday Fun With Sara – 
Turkey Butt Crochet Pattern
  With Sara Sach Of Posh Pooch Designs


It's  time for a little fun, which I think we all can use.
Today On Friday Fun With Sara we made Turkey Butts!
You read That right, Turkey Butts.


They are big enough to use as a coaster or 
add a magnet and put them on your refrigerator.
Make one for every guest who comes for Thanksgiving
 Dinner, as a reminder of how much fun they had 
at your get together. Or just make them for fun!
Everyone will get a good laugh out of them,
Especially when they see how fun a silly they are. 


These silly Turkeys are quick, easy and a great way to
 use of some left over yarns. You do not have to make 
them in traditional colors, just have some fun and 
see what fun Turkeys you make.


See The Video On my Crochet Youtube Channel At This LINK


Friday Fun With Sara –
 Turkey Butt Coaster And Magnets Crochet Pattern
 
Skill: Easy
 
Materials:
Crochet Hook H / 5.00 MM
Yarn – Med (4) Acrylic – Small amount of 
              White – C1, Light Brown – C2,
              Variegated - C3, Yellow – C4
Yarn Needle
Magnets
Glue - E 6000 or Hot Glue
Stitch Marker
 
Stitches:
Chain (ch)
Slip stitch (slst)
Single Crochet (sc)
Double Crochet (dc)
Triple Crochet (tr)
Change to (chgto)
 
Size: 3.5 X 5 inches
 
Notes:
Turkey Body is stitched in the round, no joining
 
Pattern:
 
R: 1 –With C1, ch2, 6 sc in the 2nd ch from the hook (6 sc)
 
R: 2 – Chgto C2, 2sc in each sc, (12 sc)
 
R: 3 – 2 Sc in each sc (24 sc)
 
R: 4 – 1 sc in next 3 sc, 1 sc in the next sc,
Repeat around, slst in the next 2 sc (30 sc)

R: 5 - 1 sc in next 4 sc, 1 sc in the next sc,
Repeat around,  (36 sc, 2 slst)
 
Tail Feathers - Chgto C3,
ch2, hdc in the 1st sc, ch2, slst in the same sc, slst in the next sc,
ch3, dc in the same sc, ch3, slst in the same sc, slst in the next sc,
ch4, tr in the same sc, ch4, slst in the same sc, slst in the next sc,
ch3, dc in the same sc, ch3, slst in the same sc, slst in the next sc,
ch2, hdc in the 1st sc, ch2, slst in the same sc, slst in the next sc,
tie off weave in your ends.
 
Turkey Feet – Count down 15 sc from the last tail feather on the left, Join C4,
*Ch 6, slst in the 2nd ch from the hook, slst in the next ch,
Ch 3, slst in the 2nd and 3rd ch,
Ch3, slst in the 2nd and 3rd ch,
Slst in the last 3 chs of the beginning ch,*
Slst in the next sc, and repeat from * to *
Join to the same sc, tie off and weave in your ends.
 
Attach a magnet to the back of the Turkey but with your choice of Glue.


If your Turkey Butt is not laying flat, or not round enough.
you can dampen it and lay it out to dry. or pit it to a blocking board. 

See You next Friday For Friday Fun With Sara


Friday, September 24, 2021

Friday Fun With Sara Let's Make a Lace Pumpkin Topper Crochet Pattern

 Friday Fun With Sara
Let's Make a Lace Pumpkin Topper Crochet Pattern
With Sara Sach of Posh Pooch Designs
or "Pumkins" As My Grand Daughter Calls them.
(say it with a little Southern accent) 
🎃🎃🎃🎃🎃🎃🎃🎃🎃🎃🎃🎃🎃🎃🎃🎃🎃🎃🎃🎃🎃🎃🎃🎃


On Today's Friday Fun With Sara We Crocheted Lace
 Toppers For Our pumpkins.  They are fun to crochet, 
and can be used year after year. Also a great way to use
 up your left over yarn.


We also talked about What to do With Our left
 over Pumpkins, real pumpkins,  after Halloween.
Scroll down to the bottom of the Blog,
 For the  Ideas and Recipes I like.


See The Video On my Youtube Crochet 
Channel At This LINK


Lace Pumpkin Topper Crochet Pattern By Sara Sach
 
Skill: Easy
 
Materials:
Crochet Hook – J / 6.00 mm
Yarn - Bulky (5) I used Red Heart Reflective yarn (any colors)
                   Any bulky (5) yarn will work
Yarn Needle
A Fun Halloween Button
 
Stitches:
Chain (ch)
Single Crochet (sc)
Double Crochet (dc)
V Stitch ( V St)
 Skip (sk)
Space (sp)
 
Size: 5 X 5 inches
 
Notes:
Ch3 Counts as dc
 
Pattern:

R: 1 - Ch 10, starting with a 12 inch tail of yarn,
Join in a circle, ch3, dc, ch1 in the circle,
Make sure you st over the beginning tail of yarn.
*2dc, ch1* Repeat 6 more times, join, to the ch3 with a slst,
Slst between the 1st 2 d, ch4.
 (8 sets of 2dc, ch1)

R: 2 – Dc in the same sp as the ch4, ch2,
*Dc, ch1, dc, ch2 in between the next 2 dc*
Repeat From * to * 6 more times, join to the ch3 with slst,
Slst in the ch2 sp, ch3.
 (8 sets of Vst, ch2)

To Make The Topper larger for bigger pumpkins, repeat R: 2,
 adding an addition ch between V sts.
Each Row will have 8 Vsts, and an addition ch per row, between the V Sts.

R: 3 – Dc, ch1, 2 dc in the same ch 1 sp as the ch3,
*Sc in the next ch2 sp, 2dc, ch1, 2dc in the next ch 1 sp*
Repeat From * to * 6 More times, sc in the last ch2 sp,
Join to the ch3 with a slst, tie off and weave in your ends.
(8 sets of Shell st, sc)

If you made your topper larger, add an additional sc between the shell sts, per row.


Gently pull the beginning tail of yarn and almost close the hole,
Slide the Lace topper on your pumpkin to make 
sure the stem will fit through the hole.
You want it snug but not too tight.
Weave in the tail of yarn securely with a needle.
 
Cut a 10 inch piece of yarn, and tie a bow on the front of the lace topper.
Sew on a fun button if desired. 


After Your Pumpkins Are Done Doing Their Halloween Job, 
Don't just throw it out in the trash.
You can put them out for The animals like deer, squirrels, raccoons, 
fox and birds.
But before you do: Wash the pumpkins  with plain warm water
 to remove any soap, paint
 or was residue. Those can be toxic for animals. 
Slice up your pumpkin into "hand" size pieces. 
This is Helpful for smaller animals.


I Actually Save My Pumpkins, And Make Pumpkin
 Puree For my Dogs.
You can also use this Puree For Pies, Bread and other Recipes 
That call For Pumpkin Puree.

It's super easy. Remove the stems, and slice up the pumpkin into small chunks.

Leaving the skins on, put them in your crockpot. 
a Pot on the stove will work also, if you do not have a crock pot.
Do not add water, salt or any seasoning.
Add as much pumpkins chunks as will fit into the pot and cook them until mushy.

Once the pumpkin is mushy, I remove the lid, let as much water as
 possible cook off. Stirring about every 15 minutes.

Let The "mush" cool. Then you can can it, or freeze it.
I like to freeze it into small freezer bags. I pull one out and put it into 
a bowl with a lid for use.

I give my dogs a teaspoon of pumpkin twice a day. 
It helps with tummy and gland issues and they love it. 

The Puree Can Also be used in breads, cookies, cakes and pies. 


And Don't Forget About The Pumpkins Seeds!

How To Roast Pumpkin Seeds: LINK

I Love This Easy Recipe!


🎃🎃🎃🎃🎃🎃🎃🎃🎃🎃🎃🎃🎃🎃🎃🎃🎃🎃🎃🎃🎃🎃🎃🎃


Have Fun and enjoy Your Pumpkins!