
FRIDAY FUN DAY!
Fuzzy Peppermint Pillow
Crochet Pattern
By Sara Sach of Posh Pooch Designs

.jpg)
The Fuzzy Peppermint Pillow is the perfect
Project for A Sweet And Festive
Friday Funday!
It is designed using Bernat super bulky (6) weight
blanket yarn, so it stitches up super quick. And,
It only uses a few ounces of yarn
You can make it in just a couple of hours.
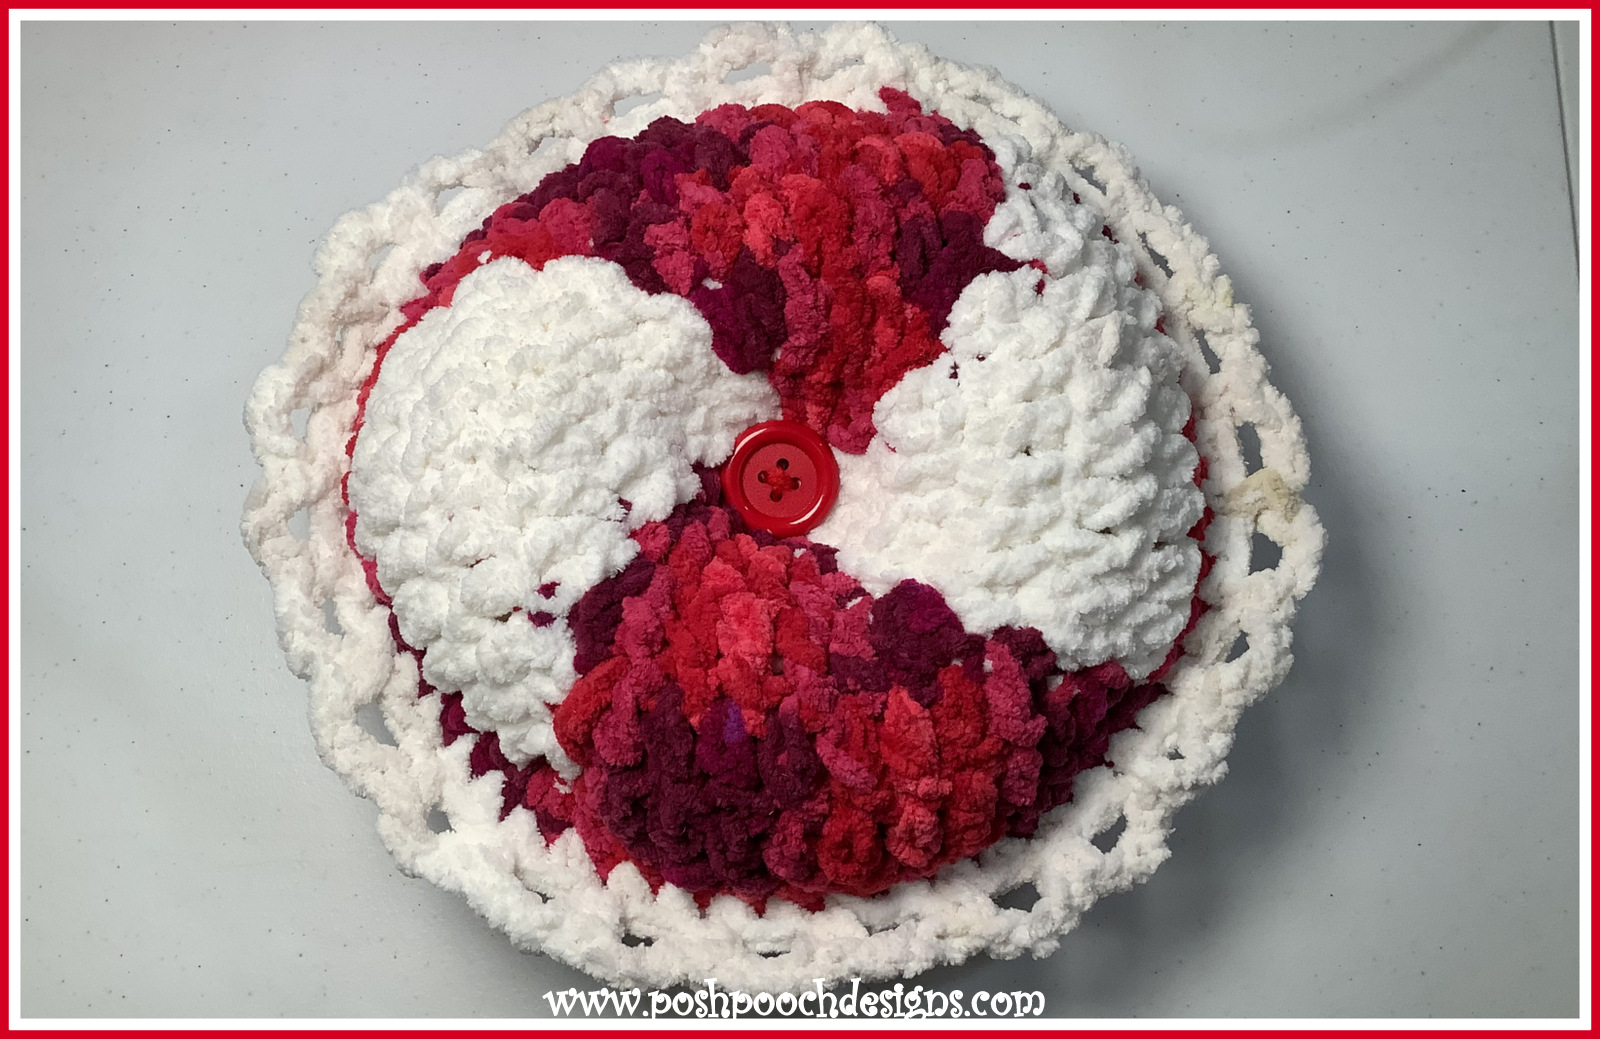
It Measure 12 X 12 inches and it's a nice addition
to your Christmas and Holiday decorations.
It is also so soft and squishy, that everyone will
want one.
You do not have to make it in traditional Christmas
Colors, just use your imagination and look through
your yarn stash and see what fun color combinations
you can come up with.

I just know you will enjoy stitching up some of these.
I know I did. They are so fun to make, decorate with
and give to others.
See The Video on My Crochet Youtube
Channel At This LINK
Fuzzy Peppermint Pillow Crochet Pattern
Please Add This Crochet Pattern To Your Ravelry Favorites
Skill: Easy
Materials:
Crochet Hook – N / 9 mm.
Yarn- Super Bulky (6) Bernat Blanket Yarn –
C1- Red – Cranberry Variegated- 4 oz.
C2- Wispy Whites – 4 oz.
Yarn Needle
Stuffing - Polyfiberfil- 10 -12 oz.
2 Buttons- 1 – 1.5 inches
Stitches:
Chain (ch)
Slip Stitches (slst)
Single Crochet (sc)
Double Crochet (dc)
Change to (chgto)
Shell Stitch (shst) 3 dc in the same sc
Size - 12 inches
Notes:
Ch3 Counts as a dc
When Changing colors do not cut your yarn,
Carry it across the back of the circle.
Crochet Hook – N / 9 mm.
Yarn- Super Bulky (6) Bernat Blanket Yarn –
C1- Red – Cranberry Variegated- 4 oz.
C2- Wispy Whites – 4 oz.
Yarn Needle
Stuffing - Polyfiberfil- 10 -12 oz.
2 Buttons- 1 – 1.5 inches
Chain (ch)
Slip Stitches (slst)
Single Crochet (sc)
Double Crochet (dc)
Change to (chgto)
Shell Stitch (shst) 3 dc in the same sc
Ch3 Counts as a dc
When Changing colors do not cut your yarn,
Carry it across the back of the circle.
How To Change Colors:
A.-You will change Colors
every 4th dc
yo, pull through the 1st 2
loops,

Yo with C2 and pull through the 2 loops

This gives you a neat and tidy color change.

Pattern:
Chgto C2, leave c1 attached, 4 dc,
Chgto C1, leave c1 attached, 4 dc,
Chgto C2, leave c2 attached, 4 dc,
Join to the ch3, slst in the next dc,
(8 C1 dc, 8 C2 dc = 16 dc)

When
Changing colors leave yarn attached,
Carry across the back of the circle.
R: 2- Chgto
to C1, slst in the next dc,
2 dc in this dc, 1 dc in the next 2 dc, 2 dc in the next dc,
Chgto C2, 2 dc in the next dc, 1 dc in the next 2 dc, 2 dc in the next dc,
Chgto C1, 2 dc in this dc, 1 dc in the next 2 dc, 2 dc in the next dc,
Chgto C2, 2 dc in this dc, 1 dc in the next 2 dc, 2 dc in the next dc,
Join to the ch3, slst in the next dc,
(12 C1, 12 C2 = 24 dc)
Chgto C2, leave c1 attached, 4 dc,
Chgto C1, leave c1 attached, 4 dc,
Chgto C2, leave c2 attached, 4 dc,
Join to the ch3, slst in the next dc,
(8 C1 dc, 8 C2 dc = 16 dc)

Carry across the back of the circle.
2 dc in this dc, 1 dc in the next 2 dc, 2 dc in the next dc,
Chgto C2, 2 dc in the next dc, 1 dc in the next 2 dc, 2 dc in the next dc,
Chgto C1, 2 dc in this dc, 1 dc in the next 2 dc, 2 dc in the next dc,
Chgto C2, 2 dc in this dc, 1 dc in the next 2 dc, 2 dc in the next dc,
Join to the ch3, slst in the next dc,
(12 C1, 12 C2 = 24 dc)

2 dc in this dc, 1 dc in the next 4 dc, 2 dc in the next dc,
Chgto C2, 2 dc in the next dc, 1 dc in the next 4 dc, 2 dc in the next dc,
Chgto C1, 2 dc in this dc, 1 dc in the next 4 dc, 2 dc in the next dc,
Chgto C2, 2 dc in this dc, 1 dc in the next 4 dc, 2 dc in the next dc,
Join to the ch3, slst in the next dc,
(16 C1, 16 C2 = 32 dc)

2 dc in this dc, 1 dc in the next 6 dc, 2 dc in the next dc,
Chgto C2, 2 dc in the next dc, 1 dc in the next 6 dc, 2 dc in the next dc,
Chgto C1, 2 dc in this dc, 1 dc in the next 6 dc, 2 dc in the next dc,
Chgto C2, 2 dc in this dc, 1 dc in the next 6 dc, 2 dc in the next dc,
Join to the ch3, slst in the next dc,
(20 C1, 20 C2 = 40 dc)

2 dc in this dc, 1 dc in the next 8 dc, 2 dc in the next dc,
Chgto C2, 2 dc in the next dc, 1 dc in the next 8 dc, 2 dc in the next dc,
Chgto C1, 2 dc in this dc, 1 dc in the next 8 dc, 2 dc in the next dc,
Chgto C2, 2 dc in this dc, 1 dc in the next 8 dc, 2 dc in the next dc,
Join to the ch3, slst in the next dc,
(24 C1, 24 C2 = 48 dc)

*2 sc in the 1st dc, 1 sc in the next 10 sc, 2 sc in the next sc*
Repeat from * to * 3 more times,
Join to the sc with a slst, tie off weave in the ends.


Chgto C2, Sc them together, leaving a opening for stuffing.
Stuff and sc closed the hole, join to the 1st sc


An Ad Free PDF file is Available
In My Ravelry Shop A This LINK
For $4.50


