Showing posts with label Crochet roses. Show all posts

Friday, January 28, 2022

Friday Fun With Sara - Let's Crochet Some Roses | Posh Pooch Designs

 Friday Fun With Sara
Let's Crochet Some Roses
With Sara Sach of Posh Pooch Designs


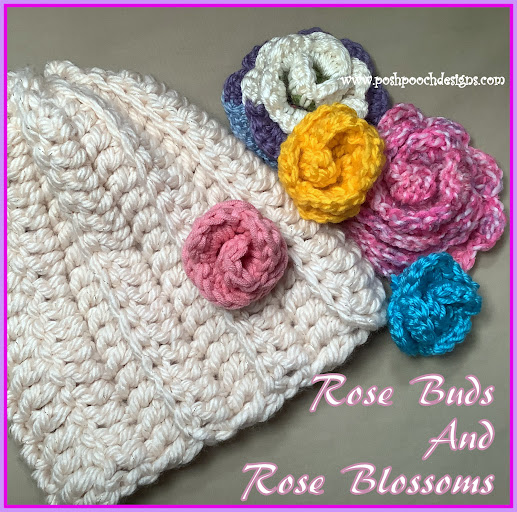
Today we are going to stitch up some Beautiful Roses.
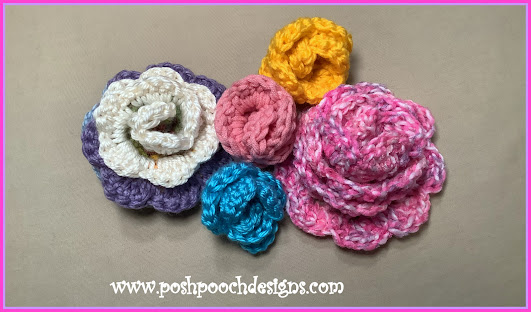
 This Crochet Pattern Can be made as a Rosebud
 or a Rose Blossom.

We are using a Bulky (5) yarn and a J / 6.00 Mm Crochet hook, so they will stitch up quickly and look big a lovely.
And are a great way to use up some left over scrap yarn
in your yarn stash.


If you would like your roses to be a little smaller, 
you can use medium (4) yarn and
 H/ 5.00 MM crochet hook.


They are perfect for adding to any bag, hat, scarf and
 decoration. And look lovely made as pins to attach
 to a sweater or jacket.


🌹🌹🌹🌹🌹🌹🌹🌹🌹🌹🌹🌹🌹🌹🌹🌹🌹🌹🌹🌹🌹🌹🌹🌹
Roses Are Red,
 Violets are Blue
 The Dog is my Favorite,
But You're Okay too!
🐕🐕🐕🐕🐕🐕🐕🐕🐕🐕🐕🐕🐕🐕🐕🐕🐕

See The Video On My Crochet Youtube 
Channel At This Link


Roses Crochet Pattern By Sara Sach

 Skill: Easy

 Materials:

Crochet hook – J/ 6.00 MM
Yarn - Chunky (5) yarn
Yarn Needle

 Stitches:

Chain (ch)
Slip stitch (slst)
Single Crochet (sc)
Double Crochet (dc)
Skip (sk)
Space (sp)
V Stitch (Vst)

 Size: 2 Sizes - 

Rose Buds - 2.5 inches
Rose Blooms - 6 inches
Multiples - 2 + 1

 Notes:

Demo is stitched with 16 chs/ Rose Bud
Ch4 Counts as a dc, ch1

Patterns:

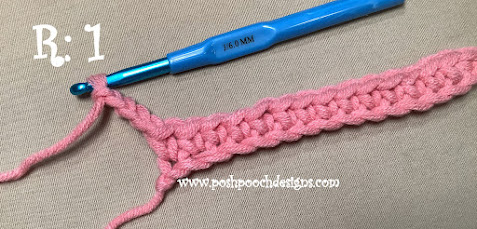
R: 1 –  Rosebud – Ch 16,  Rose Bloom - Ch 46

Sc in the 2nd ch and in each ch across, turn, ch 4
(15, 45sc)
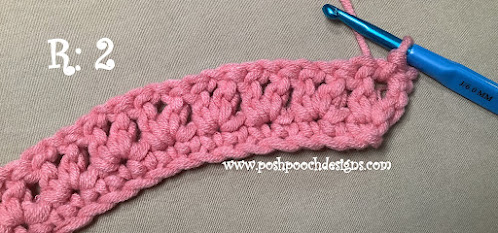
 R: 2 – Dc in the same st as the ch4,
*sk the next sc, Vst in the next dc*
Repeat From *to * across Row, turn,
Slst in the ch1 sp of the 1st Vst, ch3
(8, 23 Vsts)

 R: 3 – 4 dc in the same the 1st ch1 sp,

*Slst between the next 2 V sts, 5 dc in the next ch1 sp*
Repeat From * to * across row,
4 dc in the last ch1 sp, ch3, slst in the ch1 sp, 
slst in the 1st sc from the previous row, 
Tie off leaving a 12 inch tail of yarn.
(8, 23 Rose Petals)


Thread the tail of yarn onto the needle,
Roll up the 1st “petal and st securely,
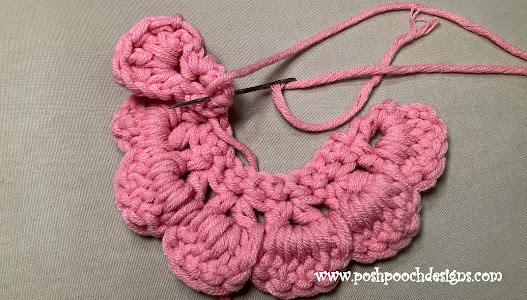


Continue to roll up the rose petals, stitching them securely.
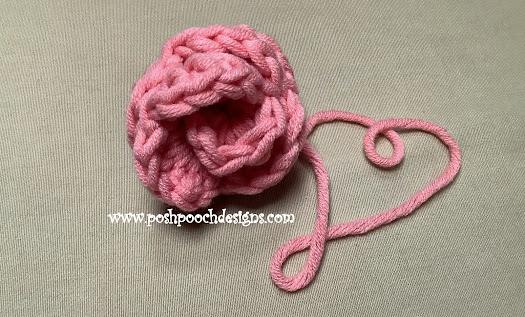


Now Get In Your Yarn Stash And 
See What Lovely Roses You Can 
Stitch Up!


Wednesday, May 23, 2018

How To Make A Crochet Flower Picture | Posh Pooch Designs

How To Make A Crochet Flower Picture
By Sara Sach of
Posh Pooch Designs

I think it would be fun to make one for each season.
Summer - Sunflowers or Marigolds
Fall - Fall Leaves
Winter - Pine Trees or Poinsettias
Spring - Spring Flowers
I guess I better get some more frames.
I had this Frame from  a previous project.
 The glass had broken out, so it works great for this project.
Any 8 X 10 Frame will work.
This was such a fun project, I can hardly wait to get the other seasons done.
🌹🌹🌹🌹🌹🌹🌹🌹🌹🌹🌹🌹🌹🌹🌹🌹🌹🌹🌹🌹🌹🌹🌹🌹🌹🌹🌹🌹🌹

What You Need:
8 X 10 Frame With the glass removed
Hot Glue Gun and Hot Glue 
Crochet Hook - H/ 5.00 MM
Yarn - Worsted Weight (4) Your colors of Choice
Yarn needle
Scissors

Stitches:
Chain (ch)
Slip Stitch (slst)
Single Crochet (sc)
Half Double Crochet (hdc)
Double Crochet (dc)

Roses: Make 3
The Roses are from this the free pattern on this blog
 - Let's Crochet A Rose - LINK

Rose Leaf Crochet Pattern
Make 4 or more from green yarn
Size: 2 inches

What you need:
Crochet Hook - H/ 5.00mm
Yarn- Green Worsted Weight (4)
Yarn Needle
 Scissors

Stitches:
Chain (ch)
Slip Stitch (slst)
Single Crochet (sc)
Double Crochet (dc)

Ch 9, slst in the 2nd ch from the hook, 
sc in the next 2 chs, dc in the next 3 chs, 
sc in the next  ch, slst in the last ch,

O   O   O   O   O   O   O   O   O
       slst sc sc dc dc dc sc  slst

Turn, working down the opposite side of the ch,
slst in the 1st ch, sc in the next  ch, 
dc in the next 3 chs, sc in the next 2 chs, 
slst in the last ch,

O   O   O   O   O   O   O   O   O

slst s sc dc dc dc sc sc slst (join)

Join to the 1st slst with a slst. 
Tie off weave in your end.
Use the beginning tail of yarn to sew
 leaf to the rose, or stem.
Weave it in if you are gluing it on.


Stems:

Make 3
Size: 6 inches

With Green yarn,Ch 21, slst in the 2nd ch from the hook, sl st in each ch, tie off weave in your ends.

Flower Pot:
Size: 4 inches tall

Notes: Ch 3 counts as a dc
I used Gold but you can use your choice of color.

R: 1 - Ch 10, dc in the 4th ch from the hook,

dc in each ch across, turn ch3 (8dc)

R: 2 - 1 dc in each dc, turn, ch 3 (8dc)


R: 3 - 1 dc in the same st as ch3, 1 dc in next 6 dc, 

2 dc in the last dc, turn, ch 3 (10dc)

R: 4 - 1 dc in the same st as ch3, 1 dc in next 8 dc,

2 dc in the last dc, turn, ch 3 (12dc)

R: 5 - 1 dc in the same st as ch3, 1 dc in next 10 dc,

2 dc in the last dc, turn, ch 3 (14dc)

R: 6 - 1 dc in the same st as ch3, 1 dc in next 12 dc,

2 dc in the last dc, turn, ch 1 (16dc)

R: 7 - 1 sc in each dc across, 2 sc in the 1st corner,

sc evenly around the 3 sides of the flower pot, 
stitching 2 sc in each corner,
 join to 1 1st sc with a slst, tie off, weave in your ends. 

Thread the needle with a different color of yarn,

lace it through the last Row of dc, and tie a bow.
Secure ends to the back of the pot.

To Assemble Your Picture:

Plug in your Glue gun so its ready.
Arrange the stems, roses and leaves as you like, similar to the picture.
Place the flower pot on top of the stems.
When you are happy with how everything is arranged.
Hot Glue in place.

I already have plans for a Summer Flower picture.
I am thinking sunflowers!
🌻🌻🌻