
Live With Sara of


Today's Topic is
"What Is the Best Yarn For Dishcloths and Washcloths?"
See The Video on my Youtube Channel at This LINK
See The Video on my Youtube Channel at This LINK
Before you yell "Cotton", Let's talk about it.
What are you going to use it For?
What you use it for can determine which yarn is best.
1. Washing your skin? or baby's skin.
I would only use cotton, and try to use a soft cotton.
Like I love This Cotton from Hobby Lobby.
 The nice thing about cotton yarn is it get softer
and more absorbent each time you wash it.
2. Washing The Dishes?
For Washing dishes I like to use cotton. Sometimes cotton
is too absorbent and can absorb the smell,
and mildew easily. Make sure you rinse them out
and wash them often.


3. As A Placemat or Table Runner? I think if you are not
going to place anything hot on them, and use them as
just a table protector, that acrylic yarn is fine.
And if they get dirty you can toss them in the wash.

4. Hot Pads for use and For Decoration?
If you are using them as actual hot pads,
do not use acrylic yarn, it was melt, and burn.
And it can burn you.
If you are going to use using them fore decoration,
acrylic yarn is fine. Make sure those who use your
Kitchen know the difference.
 The Bottom line is use what works best for the use of the item.

#####################################################
What's new This Week on Posh Pooch Designs
October Rose Quartz Crochet Square
Free Crochet Pattern, Photo Tutorial and Video - LINK

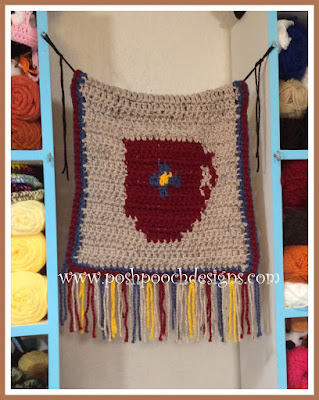
A Cup Of Coffee Banner Free Crochet Pattern - LINK
Leaf Jumper Hat Free Crochet Pattern
And Video - LINK
 Thanks For Being a Friend and Fan
of Posh Pooch Designs.
YOU make what I do,
Worth doing it!
What are you going to use it For?
What you use it for can determine which yarn is best.
1. Washing your skin? or baby's skin.
I would only use cotton, and try to use a soft cotton.
Like I love This Cotton from Hobby Lobby.

and more absorbent each time you wash it.
2. Washing The Dishes?
For Washing dishes I like to use cotton. Sometimes cotton
is too absorbent and can absorb the smell,
and mildew easily. Make sure you rinse them out
and wash them often.

My favorite choice for dishes is the new Scrubby yarns.
I like to combine cotton and scrubby yarn together.
You get the best of both, Cotton and the scrubby yarn
work well together and wash up nicely.

3. As A Placemat or Table Runner? I think if you are not
going to place anything hot on them, and use them as
just a table protector, that acrylic yarn is fine.
And if they get dirty you can toss them in the wash.

4. Hot Pads for use and For Decoration?
If you are using them as actual hot pads,
do not use acrylic yarn, it was melt, and burn.
And it can burn you.
If you are going to use using them fore decoration,
acrylic yarn is fine. Make sure those who use your
Kitchen know the difference.


October is Breast Cancer Awareness Month-
Get checked and "Save The Ta Tas"!
#####################################################
What's new This Week on Posh Pooch Designs
October Rose Quartz Crochet Square
Free Crochet Pattern, Photo Tutorial and Video - LINK

A Cup Of Coffee Banner Free Crochet Pattern - LINK

Leaf Jumper Hat Free Crochet Pattern
And Video - LINK

of Posh Pooch Designs.
YOU make what I do,
Worth doing it!


