Instant Download PDF file of the complete Crochet Pattern
including the Graph Pattern, Bag Pattern and Lining tutorial.
is available in my Ravelry Shop
for $3.50 at this LINK
Nautical Bag With Lining Tutorial Crochet Pattern
By Sara Sach
By Sara Sach
Please add this crochet pattern to Your Ravelry Favorites
Skill:
Easy
to moderate
Materials:
Crochet
Hook – I/9 5.5MM
Yarn
– Cotton Yarn, Peaches and Cream – 7 balls (17.5 oz.)
2 Red-C1, 2 Navy – C2, 2 White –
C3, 1 yellow - C4
Yarn
Needle
2
bandannas – 22 X 22 inches
Or 2 pieces of 22 X 22 inch cotton cloth
Zipper
– Nylon 18 inch – color to match bag
2
D Rings - 1 inch
2
Buttons with anchors on them – ½ inch
Needle
and Thread –red to match top of bag
Size
:
Bag -16 X 18 inches
Pocket - 5 X 6 inches
Strap - 1.5 X 28-34 inches
Stitches:
Chain
(ch)
Single
Crochet (sc)
Half
Double Crochet (hdc)
Double
Crochet (dc)
Slip
Stitch (slst)
This Crochet Pattern is written
in 3 steps:
1. The Anchor Pocket Graph
Pattern
2. The Bag Pattern
3. Lining the Bag
Step 1 – The Anchor Graph
Pattern –
Use C1 and C4
You can find the Anchor graph Crochet Pattern at this Link:
Anchor Graph Pattern
Anchor Graph Pattern
Step 2: The Bag – starting at the bottom of the
bag
When
changing colors, ch after the colors change.
R
: 1 – With C1 – Ch 43, 2 sc in the 2nd ch from the hook,
1 sc in the
next 40 chs, 2
sc in the last ch,
Turn working down
the opposite side of the ch,
2
sc in the 1st ch, 1 sc in the next 40 chs,
2 sc in the last ch, join
to 1st sc with a slst,
Ch1
(counts as 1st sc)
(88 sts – the number of sts is the same for the all rows of the bag)
R
: 2 – 1 sc in each sc around, join, ch1
R
: 3 – R : 9 – Repeat R : 2
R
: 10 – Change to C4, 1 hdc in each sc around, join, ch 2
R
: 11 – 1 hdc in each hdc, join
R
: 12 – Change to C2, ch 3, 1 dc in each hdc, join, ch 3
R
: 13 – 1 dc in each dc, join, ch 3
R
: 14 – Repeat R : 13
R
: 15 – Change to C1, 1 dc in each dc, join, ch 3
R
: 16 – 1 dc in each dc, join, ch3
R
: 17 – Repeat R : 16
R
: 18 – R : 29 – Repeat R : 12-R : 17 2 more times
R
: 30- Change to C4, 1 hdc in each sc around, join, ch 2
R
: 31 – 1 hdc in each hdc, join
R
: 32 – change to C1, 1 sc in each hdc, join, ch1
R
: 33 – 1 sc in each sc, join, ch1
R : 34 - R : 36 – Repeat R : 33
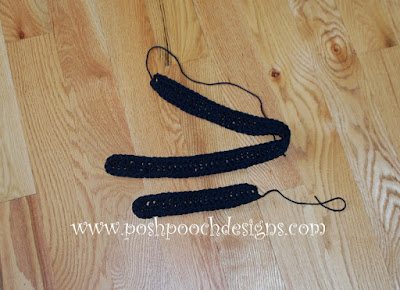
The Handles :
Short Handle -With
C2, ch 25, 1 dc in the 2nc ch from the hook,
and in each ch, turn
Sc
in each dc, 3 dc in the end of the 1st dc,
then working down the
Opposite
side of the dc row, 1 sc in each dc, tie off leaving
a 12 inch tail of yarn for
sewing onto bag.
Long Handle – Ch 50, and repeat the instructions for the short handle.
Attach
the 2 d rings to the end of the long handle by
folding the end of the handle
over the rings and sew in place.
If you are not adding the lining sew each
handle on the side
of the top of bag. Then Sew the Anchor Pocket on the front
of the back. Also sew on the anchor buttons as seen in photo below.
If
you are making a bag lining, set these aside till needed.
We will attach them
after the liner is in place.
Step 3 – The Lining
Lay the 2 bandanna out flat on a flat surface.
Lay the Bag on top of the bandannas.
Measure out 1 inch on all 4 sides of the bandanna, and cut them.
Lay the Sewn edge of the Bandanna on the 1st side zipper,
With the zipper facing up and sew in place.
I used a zig zag stitch so it would have a little stretch.
You
can use a sewing machine or hand sew.
Place
the other bandanna, on the other side of the zipper and sew it in place.
Then
sew across the bottom of the zipper.
If
the zipper is too long, cut off the end of the zipper.
Fold the 2 bandanna down, wrong side out.
Unzip the zipper before you sew it closed or
you
won’t be able to get it open.
Flip to the right side.
Sew over the corners a couple of time to
re-enforce them.
Your Lining should look like a pillow ready to
be stuffed.
Ok, let’s slip it into our bag.
Slide the lining into the bag. Push the corners
into place.
Line up the edge of the zipper with the first
row of crochet.
I was going to use white to match my lining,
But I changed to red to match the top of my bag.
Make sure you test that your zipper can moved
easily
And not get caught in the fabric, zipper or
yarn.
Sew the Pocket in place on the center front of
the bag.
Sew your handles in place.
Add your D rings as
stated in the handles section.
Sew on your anchor buttons.
And that is it.


No comments:
Post a Comment