
May's Scrap Happy
Crochet Pattern
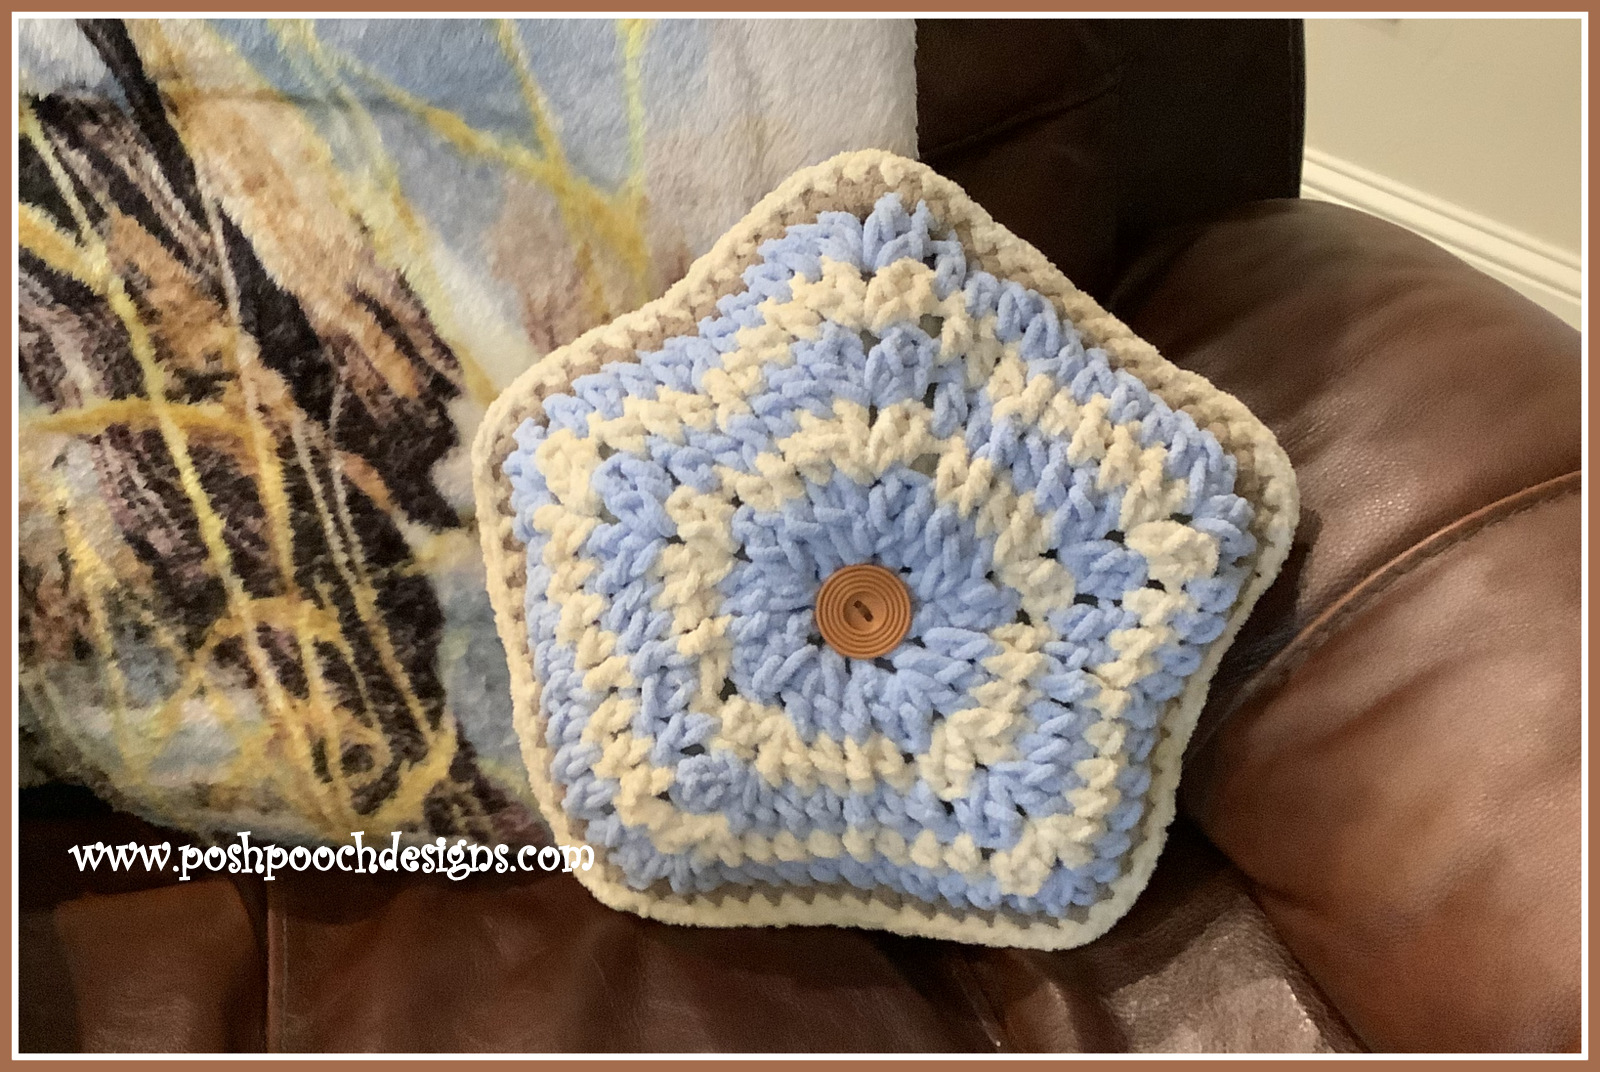
Is The Fuzzy Pillow
By Sara Sach of Posh Pooch Designs

The Fuzzy Pillow is a fun project.
It Stitches up Quickly and uses up left over
Super Bulky (6) Blanket Yarns.
Pillows are great way to do this, putting colors together
and having fun, you just might love what
you come up with.
Did You Make some Blankets With the Bulky (6) Blanket
yarn and have some left over? Make a matching pillow,
or make some fun assorted color pillows.
I mean we can never have too many pillows.
And These Pillows are so soft and Squishy!

I designed mine using some solids and some variegated
color ways and I love how the colors worked up together.
I attached a button to the center to cinch it in and add
a little touch of fun to the pillow.
See The Video On My Crochet Youtube
Channel At This LINK
Scrap Happy Fuzzy Pillow Crochet Pattern
Please Add This Crochet Pattern To Your Ravelry Favorites
Skill: Easy
Materials:
Crochet Hook – L /8 MM
Yarn – Bulky 6 Blanket Yarn/ 8 .5 oz.
Crochet Hook – L /8 MM
Yarn – Bulky 6 Blanket Yarn/ 8 .5 oz.
Small Amount of matching yarn for sewing button on, med. ( 4)
Stuffing – 10 – 12 oz. Polyfiberfil
Yarn Needle
Stuffing – 10 – 12 oz. Polyfiberfil
Yarn Needle
Button - 1.5 - 2 inch button
Stitches:
Chain (ch)
Slip Stitch (slst)
Single Crochet (sc)
Double Crochet (dc)
Front post Double Crochet (FPDC)
Front Post Single Crochet (FPSC)
Space (sp)
Size: 15 X 15 Inches
Notes:
Color Changes are not indicated in the Pattern
When changing colors, ch 1/ ch3 after the color change
Ch1 Does not Count s a st.
Ch3 Counts as a Dc
Ch4 Counts as a Dc, ch1
Pattern: Make 2- A Front And A Back
Ch4, 9 dc, ch1 in the circle, join to the ch3 with a slst,
Slst in the 1st ch1 sp, ch 3
(10 dc, ch1)
Chain (ch)
Slip Stitch (slst)
Single Crochet (sc)
Double Crochet (dc)
Front post Double Crochet (FPDC)
Front Post Single Crochet (FPSC)
Space (sp)
Color Changes are not indicated in the Pattern
When changing colors, ch 1/ ch3 after the color change
Ch1 Does not Count s a st.
Ch3 Counts as a Dc
Ch4 Counts as a Dc, ch1
Ch4, 9 dc, ch1 in the circle, join to the ch3 with a slst,
Slst in the 1st ch1 sp, ch 3
(10 dc, ch1)

Dc in the next ch1 sp,
*2Dc, ch1, 2dc in the next ch1 sp, dc in the next ch1 sp, *
Repeat From
* to * 3 More times,
Join to the ch3 with a slst, slst in the next ch1 sp, ch 3
(5 sets of dc, ch1, dc, dc)
Join to the ch3 with a slst, slst in the next ch1 sp, ch 3
(5 sets of dc, ch1, dc, dc)

Sk the next dc, dc in the next dc, FPDC in the next dc,
dc in the next dc, sk the next dc,
Sk the next dc, dc in the next dc, FPDC in the next dc,
dc in the next dc, sk the next dc*
Repeat From * to * 3 More times,
Join to the ch3 with a slst, slst in the next ch1 sp, ch 3
(5 sets of 2dc, ch1, 2dc, dc, FPDC, dc)

1 dc in the 2next dc, FPDC in the next dc, dc in the next 2dc,
*2 dc, ch1, 2 dc in the next ch1 sp, sk the next dc
1 dc in the next 2 dc, FPDC in the next dc, dc in the next 2 dc,*
Repeat From * to * 3 More times,
Join to the ch3 with a slst, slst in the next ch1 sp, ch 3
(5 sets of 2dc, ch1, 2dc, 2 dc, FPDC, 2 dc)

Sk next dc, 1 dc in the next 3 dc, FPDC in the next FPDC,
dc in the next 3 dc, sk the next dc
*2 dc, ch1, 2 dc in the next ch1 sp, sk the next dc,
1 dc in the next 3 dc, FPDC in the next FPDC,
dc in the next 4 dc, sk the next dc*
Repeat From * to * 3 More times,
Join to the ch3 with a slst, slst in the next ch1 sp, ch 3
(5 sets of 2dc, ch1, 2dc, 3dc, FPDC, 3dc)

Sk next dc, 1 dc in the next 4 dc, FPDC in the next FPDC,
dc in the next 4 dc, sk the next dc
*2 dc, ch1, 2 dc in the next ch1 sp, sk the next dc,
1 dc in the next 4 dc, FPDC in the next FPDC,
dc in the next 4 dc, sk the next dc*
Repeat From * to * 3 More times,
Join to the ch3 with a slst, slst to the next ch1 sp, ch 1
(5 sets of 2dc, ch1, 2dc, 4dc, FPDC, 4dc)

1 sc in the next 6 dc,
*2 sc in the ch1 sp, 1 sc in next 6 dc, FPSC in the FPDC,
*2 sc in the ch1 sp, 1 sc in next 6 dc, FPSC in the FPDC,
1 sc in the next 6 dc*
Repeat From * to * 4 More times,
Join to the 1st sc, tie off and weave in the ends.
Repeat From * to * 4 More times,
Join to the 1st sc, tie off and weave in the ends.

Do Not tie off after the 2 piece.

Sing crochet the front and back together, leave a 5-6 inches opening,
stuff, and sc the remaining stitches.

Sew the button to the center of the pillow with needle and matching yarn.

You do not have to add the button if you prefer not to.

An AD Free PDF file is available in
My Raverly Shop At This LINK
For $4.50

No comments:
Post a Comment