Showing posts with label hood. Show all posts

Friday, October 6, 2023

FRIDAY FUN DAY! The Pretty In Pink Cowl Crochet Pattern | Posh Pooch Designs

 FRIDAY FUN DAY!
 The Pretty In Pink Cowl 
Crochet Pattern 
By Sara Sach of  Posh Pooch Designs


October is Breast Cancer Awareness Month.
I decided it was time to up date my Pink Cowl
 and film a new video. It was originally written in 2018
 and called The DTR Cowl. I didn't like the name.

I renamed it "The Pretty In Pink Cowl" 
and used The Redheart Pink Ombre
 in the Jazzy colorway .
I Love it so much more, and I hope you do too. 


This cowl can also be worn over your head like a hood.
 This is important for covering the head in cool
 weather, as well as, in air conditioned places.
I added a simple Satin ribbon to the cowl.


I love the cowl stitched up in pink Ombre, 
And the cowl will also look lovely in any colorway. 
The Pattern is quick and easy. It makes a nice gift, 
for any one going through chemo, cancer or an illness,
as well as, anyone you need a last minute gift for.


Don't feel bad if you want to just stitch one up for
 yourself. It's a wonderful accessory for any outfit.

See The Video On My Crochet Youtube
 Channel At This LINK


The Pretty In Pink Cowl Crochet Pattern


Please Add This Crochet Pattern To Your Ravelry Favorites


Materials: 

Crochet Hook - H/ 5.00mm

Yarn – Med (4) Acrylic 3 oz. Redheart Ombre / Jazzy

Yarn Needle

Stitch Markers


Stitches:

Chain (ch)

Single Crochet (sc)

Foundation single Crochet (FDSC)


Special Stitch:

Double Triple Stitch (DTR)

Yo over 3 times, Insert hook in the next ch/st,


Yo and pull up a loop, 5 loops on my hook,


Yo, pull through 2 loops, 4 loops on your hook,

Yo, pull through 2 loops, 3 loops on your hook,

Yo, pull through 2 loops, 2 loops on your hook,

Yo, pull through 2 loops, 1 loop on your hook,


1 Double Trouble Stitch made.


Size: 14X 33 inches

3 FDSC = 1 inch

2 rows (1 repeat) = 2 inches


Notes:

Ch1 does not count as a st.

Ch 5 at beginning of Row counts as your 1st DTR st.


Pattern:


R: 1 – 99 FDSC, join in a circle, ch1 (99 FDSC)

Use Stitch Markers to mark your stitches to keep count.


Use the needle and yarn tail to close the gap at the join.

Be careful not to twist it.


R: 2 - 1 sc in each FDSC around, join to 1st sc with a slst, 

ch 5.(99 sc)


R: 3 - 1 DTR in each sc around, join to Ch5 with a slst,

 ch 1 (99 DTR)


R: 4 - 1 sc in each st around, join, ch 5 (99 sc)


R: 5 - R: 16 - Repeat R: 3 and R: 4 alternating Rows.


If a long cowl is desired Continue to Repeat R: 3 And R: 4


R: 17 - 1 sc in each st around, join to the ch1 with a slst

Tie off and weave in your ends.


I added a simple Satin ribbon to the cowl.


An Ad Free PDF File is Available

In My Raverly Shop At This LINK

For $3.50


Friday, February 19, 2021

Hooded Wrap Blanket Crochet Pattern | Posh Pooch Designs

Hooded Wrap Blanket Crochet Pattern  
By Sara Sach Of Posh Pooch Designs


I was so excited when I saw the
Anniversary Cakes By Caron/ Yarnspirations.
It is a Bulky (6) striping yarn


I knew it was the perfect yarn to update my 
Crochet Pattern The Hooded Wrap Blanket.
I originally wrote this Pattern in October 2015.


I Thought it was due for an update. 
We re-rested and updated the Crochet pattern with
 New Pictures, and A Brand New Video.


I Absolutely love How it stitched up with this yarn.
 It's called Spice Soiree With Shades of beiges, 
browns, yellows and cream.
It's Soft and Squishy and stitches up super fast.


See The Video On my Crochet Youtube 
Channel At This LINK


Hooded Wrap Blanket Crochet Pattern  

Please Add This Crochet Pattern To Your Raverly Favorites

Skill: Easy
 
Materials:
Crochet Hook – L/ 8.00 MM
Yarn – Bulky Weight (6) 40 oz.
       I used Caron/ Yarnspirations Anniversary cake/ Spice Soiree
Yarn Needle
 
Stitches:
Chain (ch)
Slip Stitch (slst)
Single Crochet (sc)
Double Crochet (dc)
Front Post Double Crochet (FPDC)
Skip (sk)
 
Size/Measurements - 60 inches wide X 42 inches long,
Not counting the hood.
Hood measures – 26 X 32
1 Row = 1 inch - adjust in in 2 row increments
2 FDC = 1 inch - adjust in in 2 ch increments
 
Notes:
 Ch3 at ends of Rows Does Count as a Dc.
 
Pattern:
Starting with the Blanket Wrap –
 
R: 1 - Ch 87, 1 dc in the 4th ch from the hook,
1 dc in the each ch across, ch 3 turn.

(85 sts - You will have the same number
 of sts throughout the blanket)
 

R: 2 – 1 dc in the next dc, sk the next dc,
*1 dc in the next dc, ch 1, sk next dc*
Repeat From * to * Across Row,
 1 dc in the last 2 dc, ch 3 turn
 

 R: 3 – 1 dc in each dc and ch across, Ch 3 turn
 

R: 4 – Repeat R: 2
 

R: 5 –  Repeat R: 3
 

R: - 6 – R: 61 – Continue to Repeat R: 2 – R: 3,
Alternating Rows
 
If you want your Blanker wider,
add more rows in 2 row increments
 
R: 62 – With C3, dc evenly across the
bottom edge of the blanket,
 ch 3, turn
You will need 101 dc.
 

R: 63 – 1 dc in the 1st dc, *
1 FPDC in the next dc, 1 dc in the next dc*
Repeat From * to * across Row, 1 dc in the last dc.


R: 64 - 1 dc in the 1st dc, *
1 BPDC in the next dc, 1 dc in the next dc*
Repeat From * to * across Row, 1 dc in the last dc.
 Tie off, weave in the end.


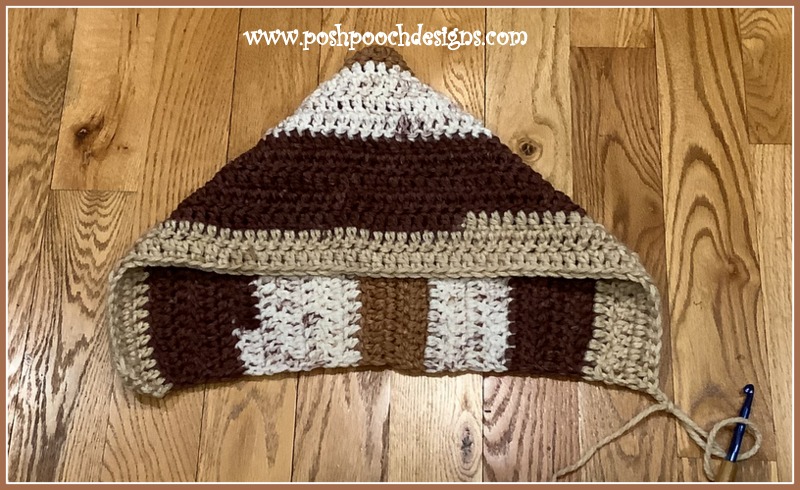
The Hood Section:
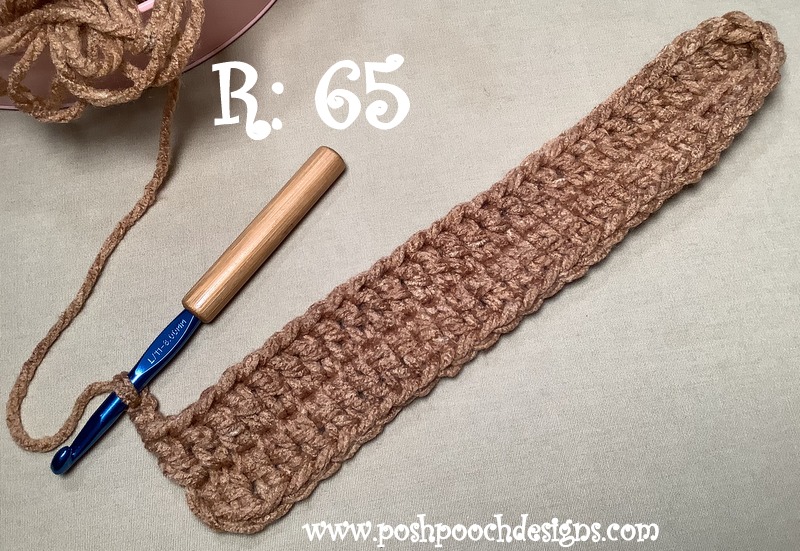
R: 65 – With C3, ch 31, 1 dc in the 4th ch from the hook,
 1 dc in each ch across,  2 dc in the last ch, turn, (30 dc)
 
Working down the opposite side of the ch,
2 dc in the 1st ch, 1 dc in each ch across,  ch 3, turn (30 dc)
(30 dc + 30 dc + 60 dc)
 

R: 66 – 1 dc in each dc, ch 3, turn
 

R: 67 - R: 78 – Repeat R: 66


R: 79 -1 dc in the 1st dc, *
1 BPDC in the next dc, 1 dc in the next dc*
Repeat From * to * across Row, 1 dc in the last dc.
 

R: 80 - 1 dc in the 1st dc, *
1 FPDC in the next dc, 1 dc in the next dc*
Repeat From * to * across Row, 1 dc in the last dc.
Leave yarn attached


Center the hood in the center of the top of the Blanket
Sew Hood to Blanket using sc sts.


R: 81 – Attach yarn to bottom left corner, right side up, 
evenly sc up the side of the blanket, 2sc in the corner,
evenly sc across the top of the blanket, around the hood opening, 
and across the top of the other side of the blanket, 2 sc in the corner,
Lastly sc evenly down the side of the blanket, 
when you reach the corner, tie off and weave in your ends.


This is the perfect Blanket for a Football game,
Campfire or snuggling on the couch.


An Ad Free PDF Is Available
In My Ravelry Shop At This LINK
For $4.50

Wednesday, January 6, 2021

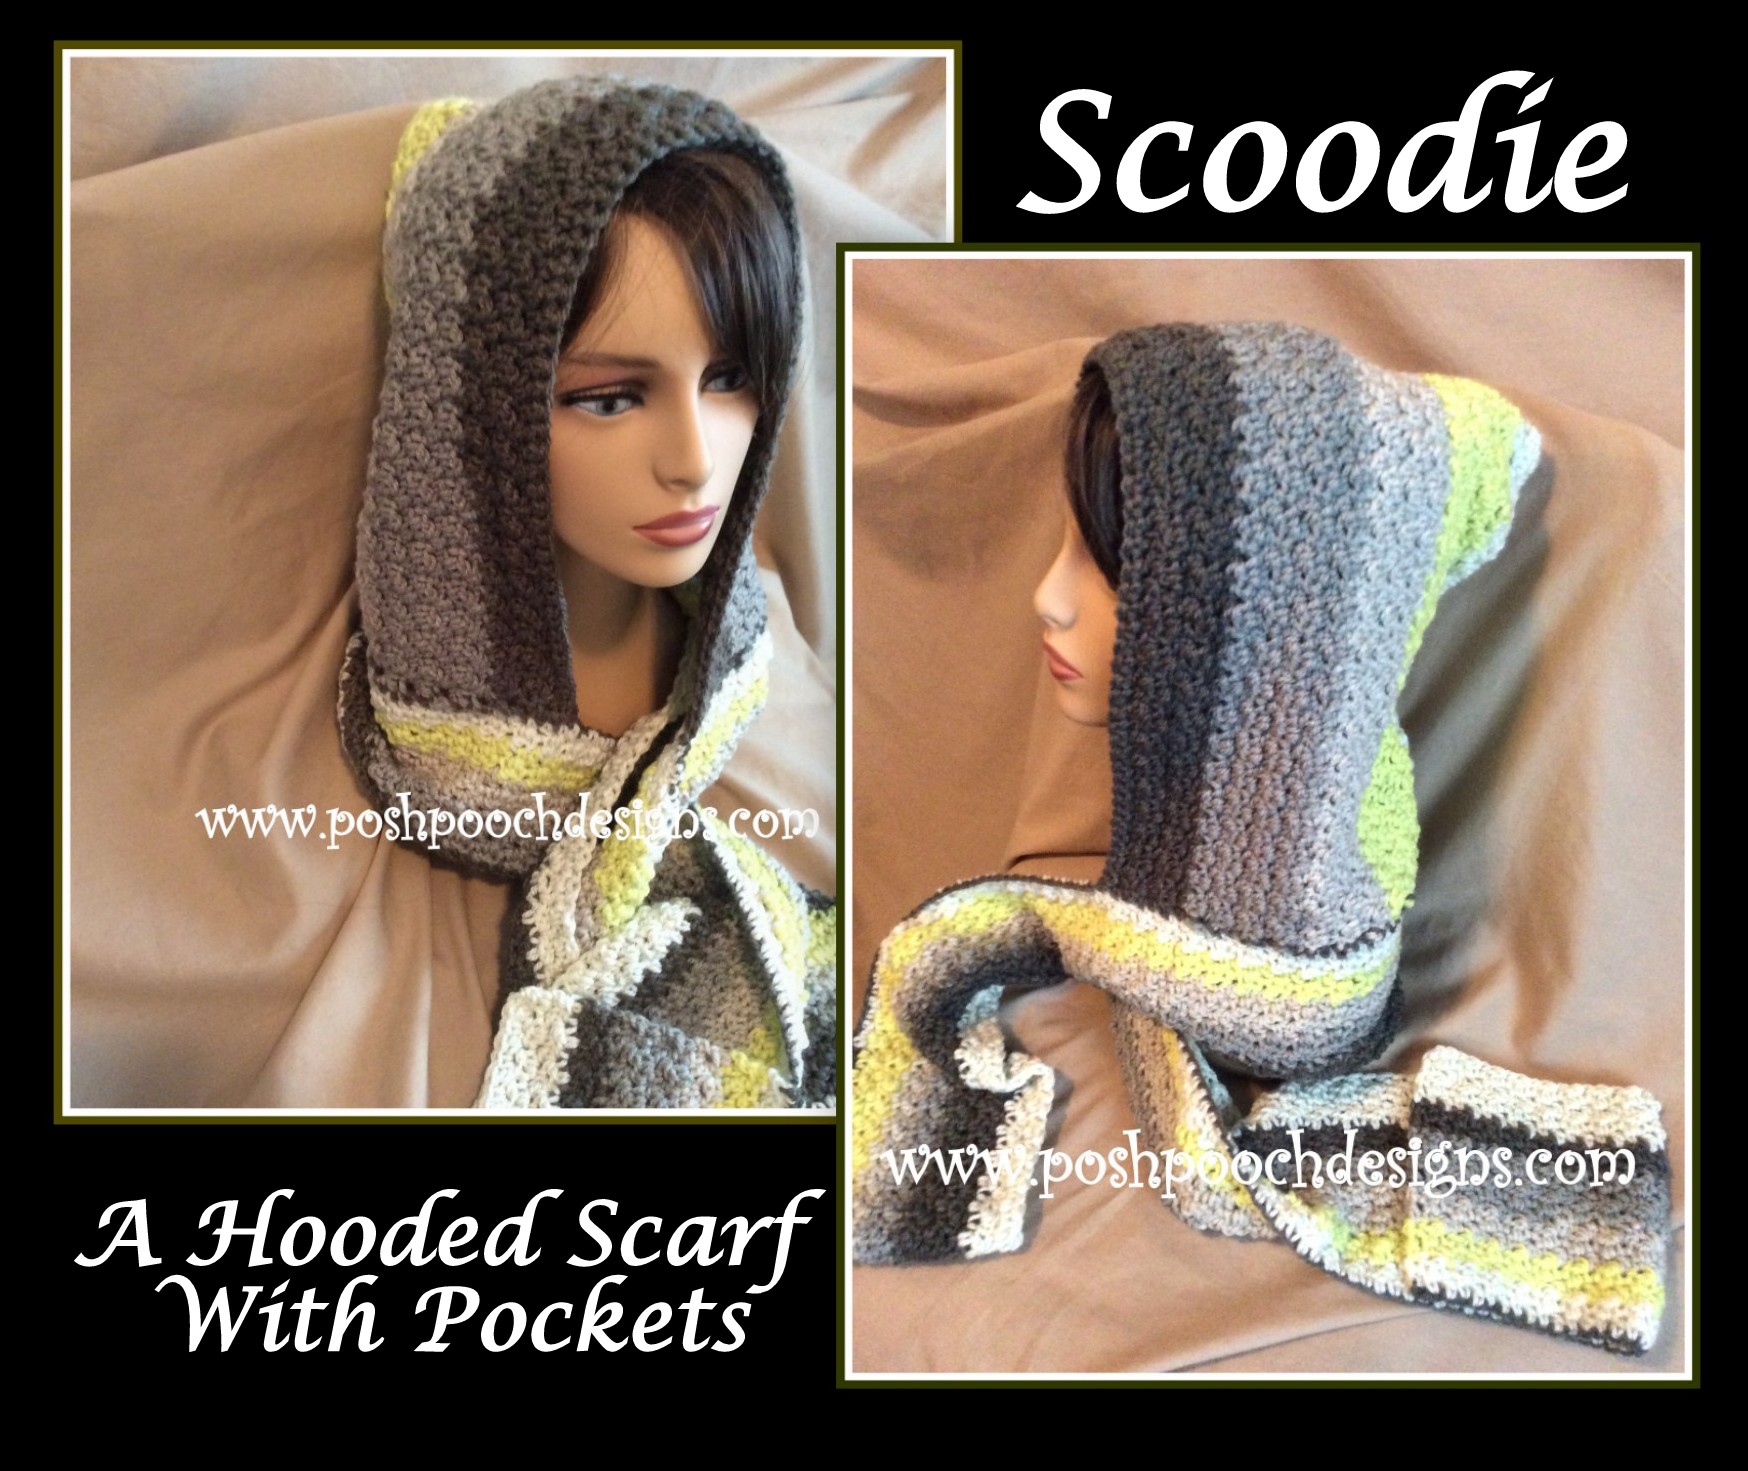
Scoodie - Hooded Scarf With Pockets | Posh Pooch Designs

Scoodie - Hooded Scarf With Pockets 
Crochet Pattern
By Sara Sach of Posh Pooch Designs


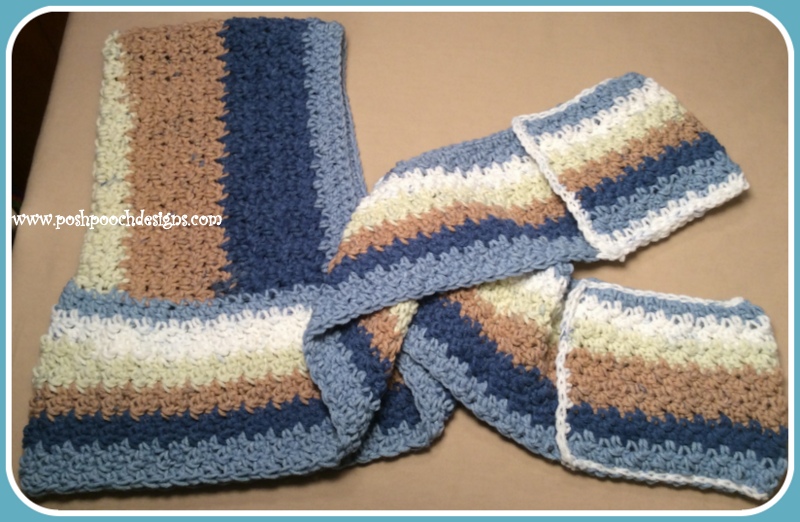
I designed and wrote this pattern
June, 2015 - 
I designed this Scoodie Pattern for me-- I wanted to be able to throw this on,  and slide my hands in the pocket, without having to mess with gloves or mittens.


We just retested and updated this Crochet Pattern 
with lots of new pictures, and it now has 3 sizes - 
Small, Medium and Large.

We decided to Update the Video in 2 Parts:

Part 1. The Hood - It can be added to a scarf, 
but also a wrap, blanket, poncho and cowl.

Part 1 Youtube Video LINK


Part 2. The Scarf With Pockets.

Part 2 Youtube Video LINK


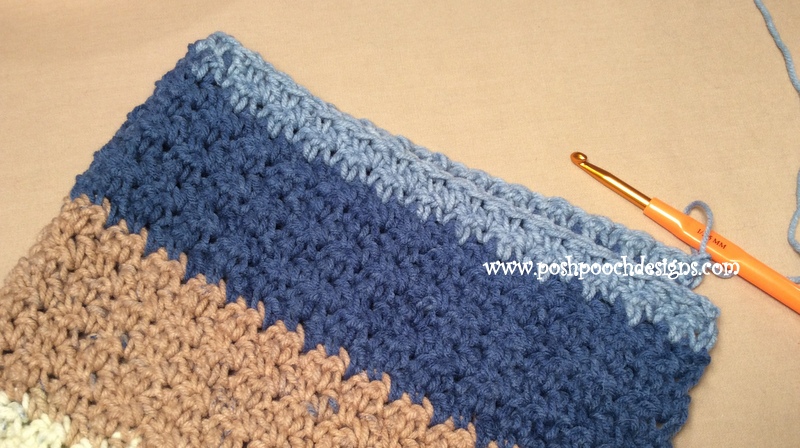
I used Caron Big cakes/ Yarnspirations
Blue Scones to Update the Pattern and Video.
It is a striping yarn is works perfect for this pattern.
Any Med (4) yarn will work for this pattern.


Scoodie - Hooded Scarf With Pockets
Add This Crochet Pattern to Your Raverly Favorites

Skill: Easy
 
Materials:
Crochet Hook - I / 5.50 MM
Yarn - Medium Yarn(4) –  9  - 12 oz. depending on size
           Yarnspirations / Big Cakes Blueberry Scones
Yarn Needle

Stitches:
Chain (ch)
Single Crochet (sc)
Half Double Crochet (hdc)
Double Crochet (dc0
Slip Stitch (sl st)

Sizes:
Small - 16 - 18 Inches (Child)
Medium -19-20 Inches (Youth)
Large - 22-24 Inches (Adult)
Pattern is written in the Small (with medium and large in parenthesis)
 
Notes: Ch1 does not count as stitch.
 
Pattern:

 Part 1 - The Hood

R: 1 - Starting with the hood, 
Ch 17 (27, 37) 1 hdc in the 2nd ch
 from the hook, 1 hdc in each of the chs across, 2 hdc in the last ch,
 turning working down the opposite side of the ch, 
2 hdc in the 1st ch, 1 hdc in each ch across, ch 1 turn. (34, 54, 74 hdc)
 

R: 2 - 1dc in the 1st st, 1sc in the next st,
 * 1dc in the next st, 1 sc in the next st, * repeat from * 
up and down both sides of the hood, ch 1, turn (34, 54, 74 sts)
 

R: 3 - Follow the pattern (1 dc in each sc, and
 1 sc in each dc) on both sides of the hood, ch1 turn (34, 54, 74 sts)

R: 4 - Repeat R: 3


R: 5 - R: 15 (Small)
R: 5 - R: 25 (Medium) 
R: 5 - R: 35 (Large)
Add or Subtract rows here if needed

R: 16 (26, 36) Repeat R: 3 (34, 54, 74 sts) 
 

R: 17 (26,36) - 1 sc in each st, tie off (34, 54, 74 sts)
 

You can decide which side you prefer for the out side of your Hood. 


 Part 2 - the Scarf And Pockets

Making and Attaching the Scarf:
R: 18 (28, 38) - Ch 50(60,70) attach ch to the right side of the bottom of the hood,


 1 sc in each row across bottom of hood,


 then ch 50(60, 70) ch1, turn.
 

R: 19 (29, 39) - 1 dc in the 1st st, 1 sc in the next st,
 *1dc in the next st, 1 sc in the next st, Repeat from * across the
 length of the scarf, ch 1, turn


R: 20 - Repeat R: 19


R: 21 (31, 41)  Continue to Repeat  R: 19
 Small - 12 More Times
 Medium - 14 More Times
 Large - 16 More Times


Forming the Pockets:
Fold up the end of the scarf 4 (6,8) inches, join yarn to the bottom right of the pocket,
slst up the side stitching the sides together securely, ch1, 
sc across the top of the pocket, ch1,
slst down the side stitching the sides together securely,  
tie off and weave in ends. Repeat on the other end of the scarf,
for two pockets. 


Ad Ad Free PDF File is Available 
In My Raverly Shop At This LINK
For $4.50


Medium And Large Scoodies