FRIDAY FUN DAY!
Cozy Granny Spring Scarf
Crochet Pattern
By Sara Sach of Posh Pooch Designs

The Cozy Granny Spring Scarf is designed to match
The Cozy Granny Spring Beanie Hat. It is designed
with the same granny style stitch pattern and also
the same yarn. Premier Puzzle yarn in the
Hopscotch color.

Crochet Pattern And Video LINK
As with The Cozy Granny Spring Beanie, the pattern
is quite simple. It alternates Rows of Double Crochet
and Rows of Granny stitches.
It makes a such a comfy cozy hat, as well as,
the blanket. I also designed a scarf to go with it,
and a few other items, coming soon.

I love how they look together.
Perfect for Spring mornings and fall evenings.
And The colors are just perfect to add a touch of
Spring color to your outfits. The Scarf can be a
regular straight scarf, and the ends can be stitched
together for a infinity scarf.

I designed the Cozy Crazy Granny Blanket
in 2020. I loved it so much I designed a beanie hat
and scarf using the same style Pattern.

See The Video On my Crochet Youutbe
Channel At This LINK
Cozy Granny Spring Scarf Crochet Pattern
Add This Crochet Pattern To Your Ravelry Favorites
Materials:
Crochet Hook – J / 6.mm
Yarn - Bulky (5) Acrylic - 4.5 oz. Premier Puzzle Yarn / Hopscotch
Yarn Needle
Stitches:
Chain (ch)
Slip Stitch (slst)
Single Crochet (sc)
Double Crochet (dc)
Skip (sk)
Space (sp)
Size: 8 X 48
Crochet Hook – J / 6.mm
Yarn - Bulky (5) Acrylic - 4.5 oz. Premier Puzzle Yarn / Hopscotch
Yarn Needle
Stitches:
Chain (ch)
Slip Stitch (slst)
Single Crochet (sc)
Double Crochet (dc)
Skip (sk)
Space (sp)
1 Repeat - 10 Rows = 8 inches
Notes:
Ch1 does not count as a st
Ch3 Counts as a dc
Pattern:
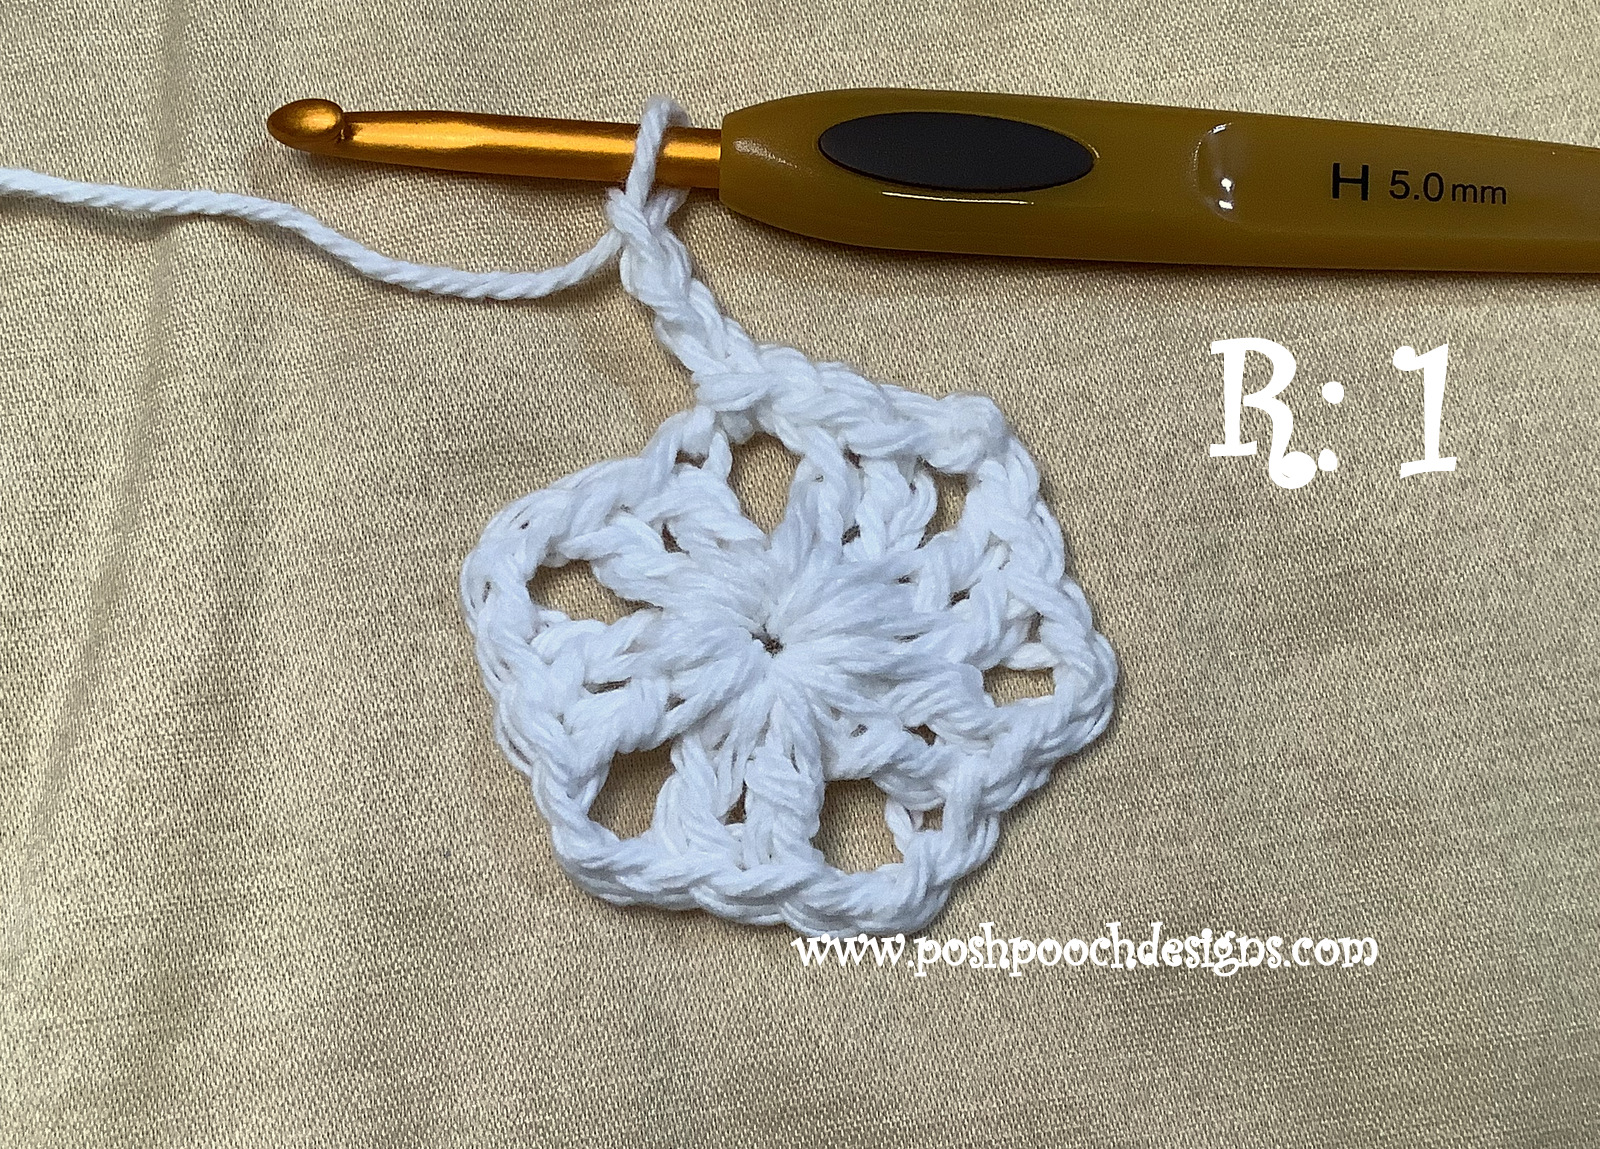
R: 1 – Ch
25, dc in the 4th ch from the hook,
Ch1 does not count as a st
Ch3 Counts as a dc
dc in each ch across,
Turn, ch 3 (23 dc)
Turn, ch 3 (23 dc)

dc across, turn, ch 3 (23 dc)
R: 3 – R: 5
– Repeat R: 2

* Ch2, sk 2 dc, 1 dc in the next 3 dc*
Repeat from * to * 3 more times, Turn, ch 3
(15 dc, 4 ch 2)

*Ch2, 3 dc in the next ch2 sp*
Repeat from * to * 2 more times,
1 dc in the last 3 dc, turn, ch 3 (18 dc, 3 ch2)

R: 8 – 1 dc in the next 2 dc,
* Ch2, 3 dc in the next ch2 sp*
Repeat from * to * 3 more times
(15 dc, 4 ch 2)
* Ch2, 3 dc in the next ch2 sp*
Repeat from * to * 3 more times
(15 dc, 4 ch 2)

R: 9 –
Repeat R: 7
R: 10 –
Repeat R: 8

*2 dc in the ch2 sp, 1 dc in the next 3 dc*
Repeat from * to * For 3 more times,
turn, ch 3 (23dc)


until the length is reached.
Place the
ends together and twist 1 time,
Sc the ends together, tie off weave in the ends.
Sc the ends together, tie off weave in the ends.

Flip Right side out.

If a straight scarf is desired, Repeat the 5 solid Dc rows.
Do not join the ends, tie off weave in the ends.
Do not join the ends, tie off weave in the ends.

An AD Free PDC File Is Available
In My Ravelry Shop At This LINK
For $4.50