Showing posts with label tutorial. Show all posts

Friday, February 28, 2025

FRIDAY FUN DAY! Cozy Granny Spring Scarf Crochet Pattern By Sara Sach

 FRIDAY FUN DAY!  
Cozy Granny Spring Scarf 
Crochet Pattern 
By Sara Sach of Posh Pooch Designs


The Cozy Granny Spring Scarf is designed to match
 The Cozy Granny Spring Beanie Hat. It is designed 
with the same granny style stitch pattern and also 
the same yarn. Premier Puzzle yarn in the
 Hopscotch color.

The Cozy Granny Spring Beanie Hat
Crochet Pattern And Video LINK

As with The Cozy Granny Spring Beanie, the pattern
 is quite simple. It alternates Rows of Double Crochet
 and Rows of Granny stitches.
It makes a such a comfy cozy hat, as well as,
 the blanket. I also designed a scarf to go with it,
 and a few other items, coming soon.


I love how they look together.
Perfect for Spring mornings and fall evenings.
And The colors are just perfect to add a touch of
 Spring color to your outfits. The Scarf can be a
 regular straight scarf, and the ends can be stitched
 together for a infinity scarf. 


I designed the Cozy Crazy Granny Blanket
 in 2020. I loved it so much I designed a beanie hat
 and scarf using the same style Pattern.

Crazy Cozy Granny Blanket Pattern LINK


See The Video On my Crochet Youutbe 
Channel At This LINK


Cozy Granny Spring Scarf Crochet Pattern

Add This Crochet Pattern To Your Ravelry Favorites

Skill: Easy
 
Materials:
Crochet Hook – J / 6.mm
Yarn - Bulky (5) Acrylic - 4.5 oz. Premier Puzzle Yarn / Hopscotch
Yarn Needle

Stitches:
Chain (ch)
Slip Stitch (slst)
Single Crochet (sc)
Double Crochet (dc)
Skip (sk)
Space (sp)
 
Size: 8 X 48
1 Repeat - 10 Rows = 8 inches
 
Notes:
Ch1 does not count as a st
Ch3 Counts as a dc
 
Pattern:
 
R: 1 – Ch 25, dc in the 4th ch from the hook, 
dc in each ch across,
 Turn, ch 3 (23 dc)


R: 2 – 1 dc in the next dc and in each
 dc across, turn, ch 3 (23 dc)
 
R: 3 – R: 5 – Repeat R: 2


R: 6 – 1 dc in the next 2 dc,
* Ch2, sk 2 dc, 1 dc in the next 3 dc*
Repeat from * to * 3 more times, Turn, ch 3
(15 dc, 4 ch 2)


R: 7 – 1 dc in the next 2 dc, 3 dc in the ch2 sp,
*Ch2, 3 dc in the next ch2 sp*
Repeat from * to * 2 more times,
1 dc in the last 3 dc, turn, ch 3 (18 dc, 3 ch2)


R: 8 – 1 dc in the next 2 dc,
* Ch2, 3 dc in the next ch2 sp*
Repeat from * to * 3 more times
 (15 dc, 4 ch 2)


R: 9 – Repeat R: 7
 
R: 10 – Repeat R: 8


R: 11 – 1 dc in the next 2 dc,
*2 dc in the ch2 sp, 1 dc in the next 3 dc*
Repeat from * to * For 3 more times, 
turn, ch 3 (23dc)


Repeat R: 1- 10 For 6 More times


If a longer scarf is desired, keep repeating
 until the length is reached.

Place the ends together and twist 1 time,
 Sc the ends together, tie off weave in the ends.

Flip Right side out.


If a straight scarf is desired, Repeat the 5 solid Dc rows. 
Do not join the ends, tie off weave in the ends. 


An AD Free PDC File Is Available
In My Ravelry Shop At This LINK
 For $4.50 


Monday, September 4, 2023

Waffle Stitch Pot Holder Crochet Pattern | Posh Pooch Designs

 Waffle Stitch Pot Holder
 Crochet Pattern 
By Sara Sach of Posh Pooch Designs


The Waffle Stitch Pot Holder is a double thick Hot Pad.
 It will protect your surfaces from hot pans and 
casseroles, as well as, protect your 
hands from getting burned.


It is made by stitching 2 squares, a front and a back,
 and stitching them together. The waffle stitch is a fun
 texture stitch pattern to make.
It's a nice texture stitch and looks lovely also.
I think you will really enjoy stitching this Pot holder up.


The Yarn I used to design it is a Peaches And Creme
 cotton yarn, in the Oasis colorway. It's an off white yarn
 with specks of brown, orange and green. 
It's a perfect Fall color combination.
And I Love How it turned out!

See The Video On My Crochet Youtube 
Channel At This LINK


Waffle Stitch Pot Holder Crochet Pattern

Please Add This Crochet Pattern To Your Ravelry Favorites

Skill: Easy

Materials:
Crochet Hook – H / 5.0 mm.
Yarn – Cotton, Med (4) C1 -3 oz. Peaches and Creme / Oasis
                                           C2 - 1 oz. Auburn Clay, Craft Secret
Yarn Needle
 
Stitches:
Chain (ch)
Slip Stitch (slst)
Single Crochet (sc)
Double Crochet (dc)
Front Post Double Crochet (FPDC)
Back Post Double Crochet (FPDC)
 
Size: 8 X 8 Inches
 
Notes:
Ch1 Does not count as a st
Ch3 Counts as a dc
 

Pattern: Make 2 squares
 
R: 1 – Ch 28, dc in the 4th ch from the hook,
1 dc in each ch across, turn, ch 3 (26 dc)


R: 2 – 1 dc in the next dc,
*FPDC in the next dc, 1 dc in the next 2 dc*
Repeat From * to * across, turn, ch 3 (8 FPDC, 18 dc)


R: 3 – FPDC in the next dc,
*BPDC in the next st (FPDC of the previous row)
FPDC in the next 2 dc*
Repeat From * to * across, turn, ch 2 (18 FPDC, 8 BPDC)


R: 4 - 1 dc in the next dc,
*FPDC in the next dc, 1 dc in the next 2 dc*
Repeat From * to * across, turn, ch 3 (8 FPDC, 18 dc)


R: 5 - FPDC in the next dc,
*BPDC in the next st (FPDC of the previous row)
FPDC in the next 2 dc*
Repeat From * to * across, turn, ch 2 (18 FPDC, 8 BPDC)


R: 6 - 1 dc in the next dc,
*FPDC in the next dc, 1 dc in the next 2 dc*
Repeat From * to * across, turn, ch 3 (8 FPDC, 18 dc)


R: 8 – R: 14 – Repeat R: 5 And R: 6
Alternating every other row
Tie off the 1st Square and weave in your ends.
 

Make 2

Place the 2 squares together, right sides facing out.


Starting in the top right corner, join c2, ch1,
evenly sc around all 4 sides of the pot holder.

Place 3 sc in each of the 4 corners, join with a slst to the 1st sc,
Ch 16, Join to the sc with a sl, 18 sc around the ch,
join to the same sc, tie off and weave in your ends. 


An Ad Free PDF file is Available
 In My Raverly Shop At This LINK
For $3.50


Friday, August 25, 2023

FRIDAY FUN DAY! Letter Beaded Bracelets Crochet Pattern | Posh Pooch Designs

 FRIDAY FUN DAY!
Letter Beaded Bracelets
Crochet Pattern
By Sara Sach of Posh Pooch Designs


This is a really fun fun project and I just know
 you will enjoy this.
The Letter Beaded Bracelets are super easy and fun
 to make, as well as, fun to wear.

I Choose To Us The Word "Crochet".
 You can use any word or words you like.
You Will need to adjust the beads to center them.


Any medium (4) yarn will work and any beads, 
as long as they will slide onto your yarn, will work.
Think of all the color and bead combinations!
It's literally limitless.
I made several And I Love Them.
I Love the look of the Wooden beads, 
and I also love the look of the plastic beads. 


Get in your yarn stash and bead stash and use
 your creativity, and design some bracelets.
 I will warn you making these bracelets, are so so fun, 
it's is a little bit addictive.

See The Video On My Crochet Youtube
 Channel At This LINK


Letter Beaded Bracelet Crochet Pattern

Please Add This Crochet Pattern To Your Ravelry Favorites

Skill: Easy
 
Materials:
Crochet H / 5.00 MM
Yarn- 1 oz. of any Med 4 yarn (cotton, acrylic or any fiber)
13 - 18 beads of Choice
Yarn Needle
 
Stitches:
Chain (ch)
Single Crochet (sc)
 
Size: 1 X 8 inches
4 chs = 1 inch

Notes:
Ch1 does not count as a st
Demo is worked using the Wooden YARN Beads
 
 
Pattern:

 R: 1 – Thread The Beads onto your working yarn,


 Ch 31, Push the beads forward until we need them.


sc in the 2nd ch from the hook, and in each ch across, turn, ch 1
(30 sc)


R: 2 – 1 sc in the 1st 4 sc, *slide 1 bead forward, sc in the next 2 sc*
Repeat From * to * 3 more times, (4 beads added) sc in the next sc,
 
We are working from the back of the bracelet on R:2,
The beads will naturally push to the front.

**slide 1 bead forward, sc in the next 2 sc**
Repeat From ** to ** 3 More times (4 beads to spell YARN)
Sc in the next sc,
 

Repeat From * to * 4 times, (4 beads)
 And sc in the last 3 sc, turn and ch 1
(30 sc)
 

Please Note: If you added chs or subtracted chains,
Or used a different word you will need to 
Adjust the placement of your beads, to center them.
 
R: 3 – 1 sc in each sc across, tie off leaving a 8 inch tail of yarn.
Thread the tail of yarn onto the needle.
Place the ends of the bracelet together and
 sew them together with the needle and tail of yarn.


You can cut the yarn strands or add more beads, for added fun.


An Ad Free PDF File Is Available
In My Ravelry Shop At This LINK
For $ 2.50

Friday, July 14, 2023

Snowflake Ornaments Crochet Pattern And How To Stiffen Them | Posh Pooch Designs

 Snowflake Ornaments Crochet Pattern
 And How To Stiffen Them
 With Sara Sach of Posh Pooch Designs


This lovely Snowflake is designed to be a Christmas
 And Holiday ornament, measuring 6 X 6 inches
One it stiffened up for hanging, we add a ribbon hanger
 with beads for a fun touch.
The Snowflakes stitch up pretty quick and you can
 make sever in one sitting. 
They will look wonderful hanging on your Christmas tree,
 stockings, the mantel and any place you would like to 
hang them for all your festive occasions.


There are 3 Ways of Stiffening Your Snowflake
 For Hanging up.

1. Glitter Spray -  Go outside, Lay the snowflake on a paper towel.
Spry the back of the Snowflake let it dry. Turn it over and 
spray the front.
When it's dry add a hanger.

2. Glitter Glue - Lay the snowflake on a paper towel.
Mix equal parts of Glue and water. 
With a paint brush, paint the back of the snowflake.
When it's dry, turn it over and paint the front.
When it's dry add a hanger.

3. White School Glue - Mix equal amounts of white school glue and water
 in a bowl. Dip the snowflake in the mixture, until it's covered.
Lay on a paper towel to dry or paper plate. Pat out some of
 the moisture. You will need to turn it a few times as it's 
drying to keep it from sticking to the paper towel.
You can sprinkle with glitter while the glue is wet
 for a glitter effect.

I have used all three methods and love #1 the best. It
is the quickest to apply and dry, and least messy.
Plus it adds glitter and stiffen at the same time.


See The Video On Crochet Youtube 
Channel At This LINK


Snowflake Ornaments Crochet Pattern

Please Add This Crochet Pattern To Your Raverly Favorites
 
Skill: Easy
 
Materials:
Crochet Hook – H / 5.00 MM
Yarn – Med (4) Cotton / White 1.5 oz/ Premier Just Cotton
Yarn Needle
 
Stitches:
Chain (ch)
Slip Stitch (slst)
Single Crochet (sc)
Double Crochet (dc)
Space (sp) Skip (sk)
Picot Stitch (pcst)
 
Size: 6 X 6 Inches
 
Notes:
Ch1 Does not count as a dc
Ch3 counts as dc
 
Pattern:
 
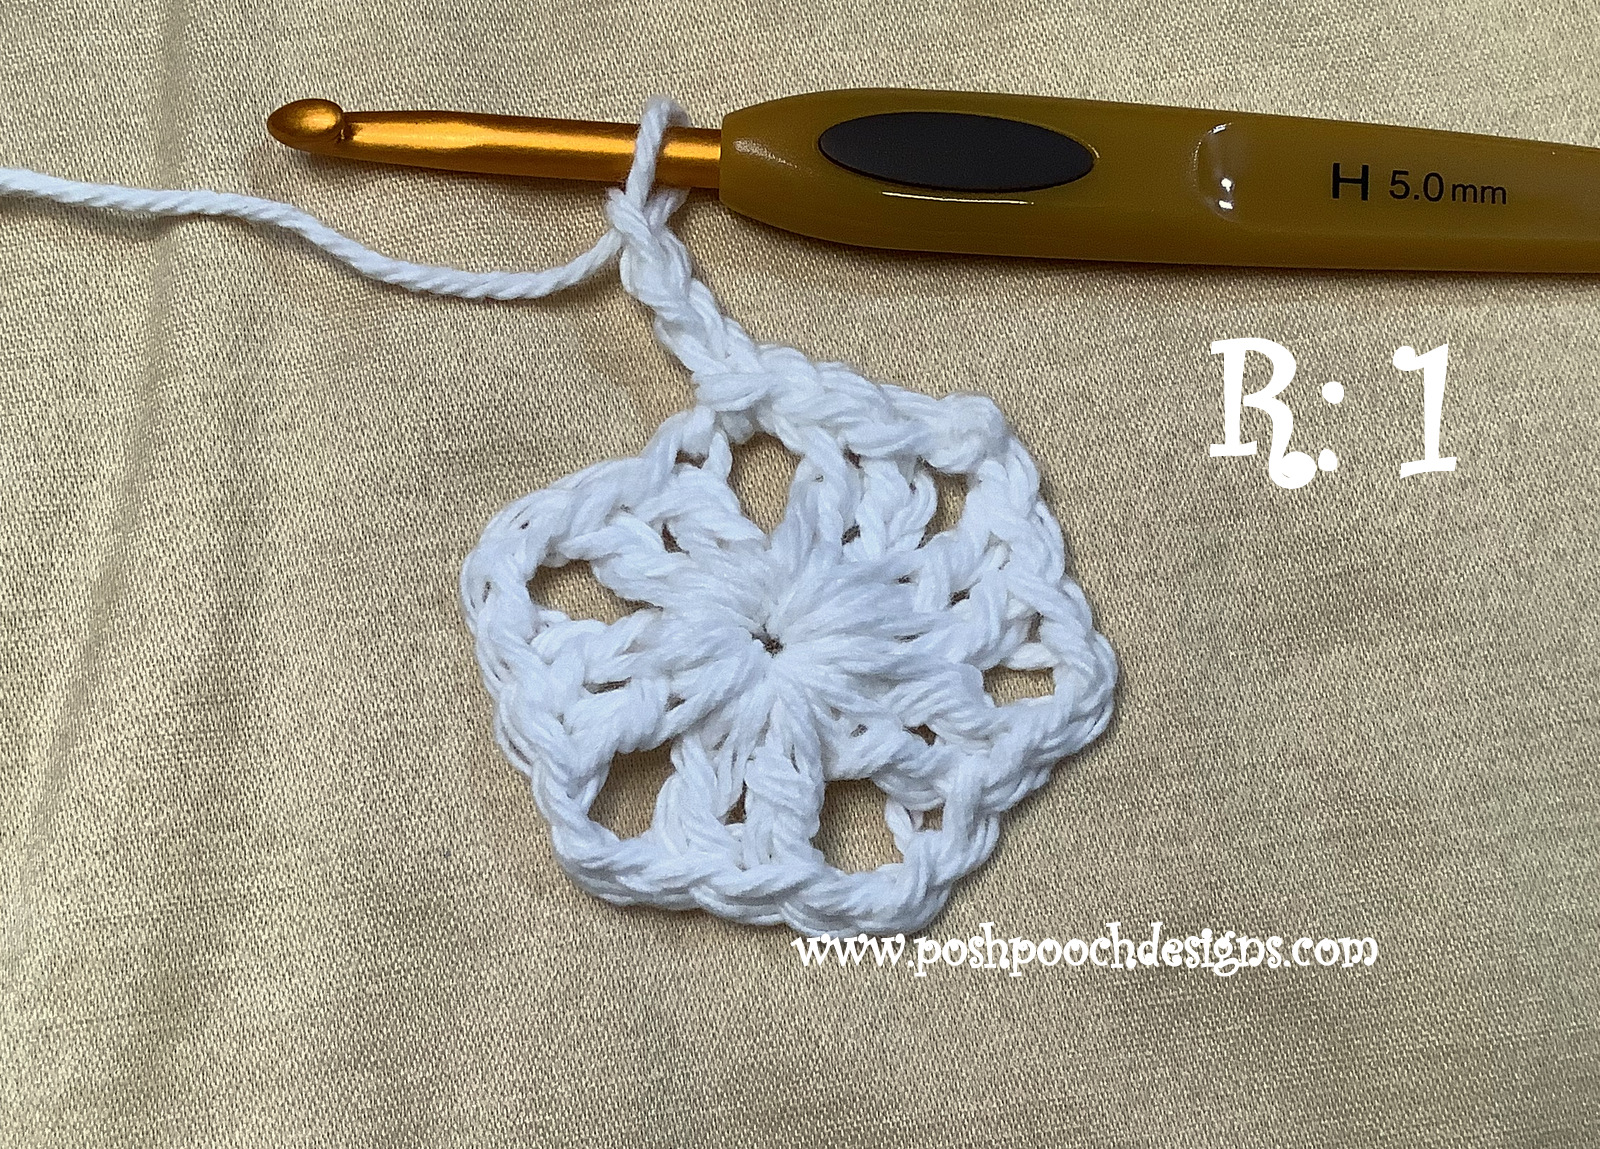
R: 1 – With C1, Ch 5 join in a circle,
Ch3, dc, ch2 in the circle,
*2dc, ch2*
Repeat From * to * 4 more times, join to the ch3 with a slst,
Slst in the next 2 dc, slst in the ch 3 sp
(6 sets of 2dc, ch2)


R: 2 – Ch3, dc, ch2, 2dc in the ch2 sp, ch1
*2dc, ch2, 2dc, ch1 in the next ch2 sp*
Repeat From * to * 4 more times
Join to the ch3 with a slst,
Slst in the next 2 dc, slst in the ch 3 sp
(6 sets of 2dc, ch2, 2dc, ch1)


R: 3 - Ch3, dc, ch2, ch1, sc in the ch1 sp, ch1
*2dc, ch2, dc, ch1 in the next ch2 sp, ch1, sc in the ch1 sp, ch1*
Repeat From * to * 4 more ties, join to the ch3 with a slst,
Slst in the next 2 dc, slst in the ch 3 sp
 (6 sets of 2dc, ch2, 2dc, ch1, sc, ch1)


R: 4 – Ch3, dc, pcst, 2dc in the 1st ch2 sp, ch2,
Sc, pcst, sc in the sc, ch2,
* 2 dc, pcst, 2dc in the 1st ch2 sp, ch2,
Sc, pcst, sc in the sc, ch2*
Repeat from * to * 4 more times,
Join to the ch3 with a slst, tie off and weave in your ends.
(6 sets of 2dc, pcst, 2dc, ch2, sc, pcst, sc, ch2)


Beaded Hanger:  Add a Piece of ribbon or hard, 
add  some beads of Your choosing, tie a knot at the top
and trim with scissors. 


Stiffen the Snowflake with one of the methods described above.


An Ad Free PDF File Is Available
In My Ravelry Shop At This LINK
 For $3.50