Showing posts with label Holiday. Show all posts

Friday, December 6, 2024

Fuzzy Peppermint Pillow Crochet Pattern By Sara Sach

FRIDAY FUN DAY!
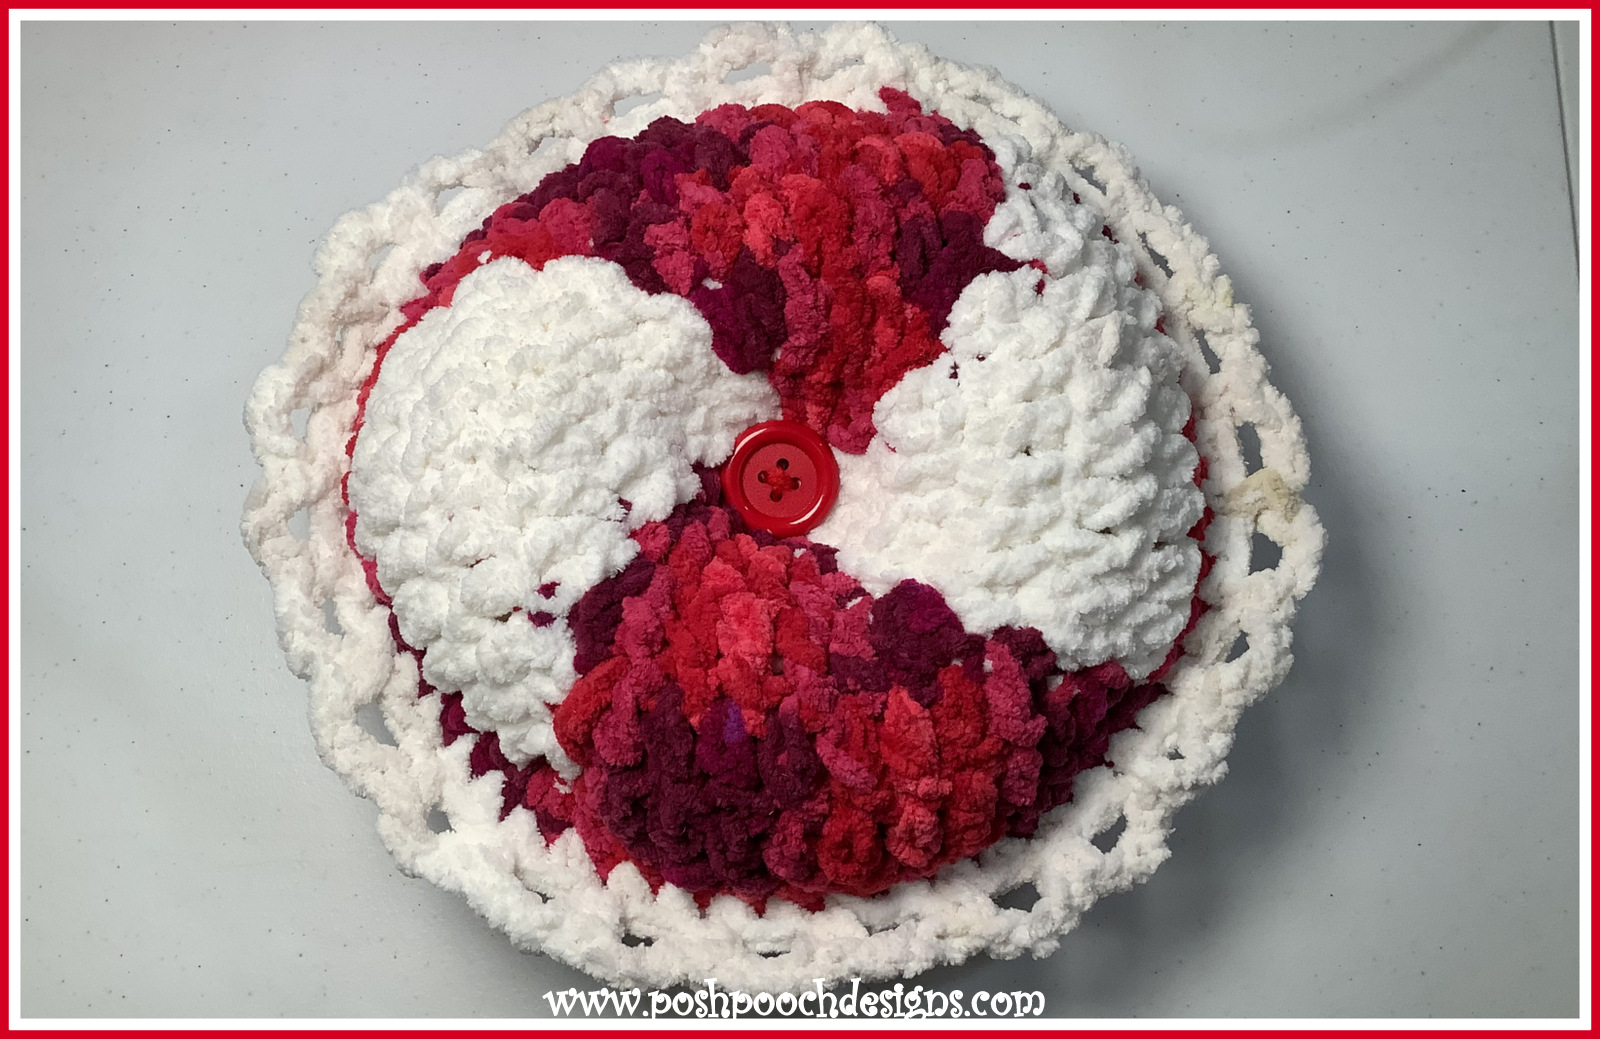
 Fuzzy Peppermint Pillow 
Crochet Pattern 
By Sara Sach of Posh Pooch Designs

The Fuzzy Peppermint Pillow is the perfect
 Project for A Sweet And Festive
Friday Funday!

It is designed using Bernat super bulky (6) weight 
blanket yarn, so it stitches up super quick. And,
It only uses a few ounces of yarn
You can make it in just a couple of hours. 


It Measure 12 X 12 inches and it's a nice addition
 to your Christmas and Holiday decorations.
It is also so soft and squishy, that everyone will
 want one. 

You do not have to make it in traditional Christmas
 Colors, just use your imagination and look through
 your yarn stash and see what fun color combinations
 you can come up with.


I just know you will enjoy stitching up some of these.
I know I did. They are so fun to make, decorate with
 and give to others.


See The Video on My Crochet Youtube
Channel At This LINK


Fuzzy Peppermint Pillow Crochet Pattern

Please Add This Crochet Pattern To Your Ravelry Favorites
 
Skill: Easy
 
Materials:
Crochet Hook – N / 9 mm.
Yarn- Super Bulky (6) Bernat Blanket Yarn –
          C1- Red – Cranberry Variegated- 4 oz.
          C2- Wispy Whites – 4 oz.
Yarn Needle
Stuffing - Polyfiberfil- 10 -12 oz.
2 Buttons- 1 – 1.5 inches
 
Stitches:
Chain (ch)
Slip Stitches (slst)
Single Crochet (sc)
Double Crochet (dc)
Change to (chgto)
Shell Stitch (shst) 3 dc in the same sc
 
Size - 12 inches
 
Notes:
Ch3 Counts as a dc
When Changing colors do not cut your yarn,
           Carry it across the back of the circle.

How To Change Colors:


 A.-You will change Colors every 4th dc
yo, pull through the 1st 2 loops,

Yo with C2 and pull through the 2 loops 

This gives you a neat and tidy color change.


Pattern:

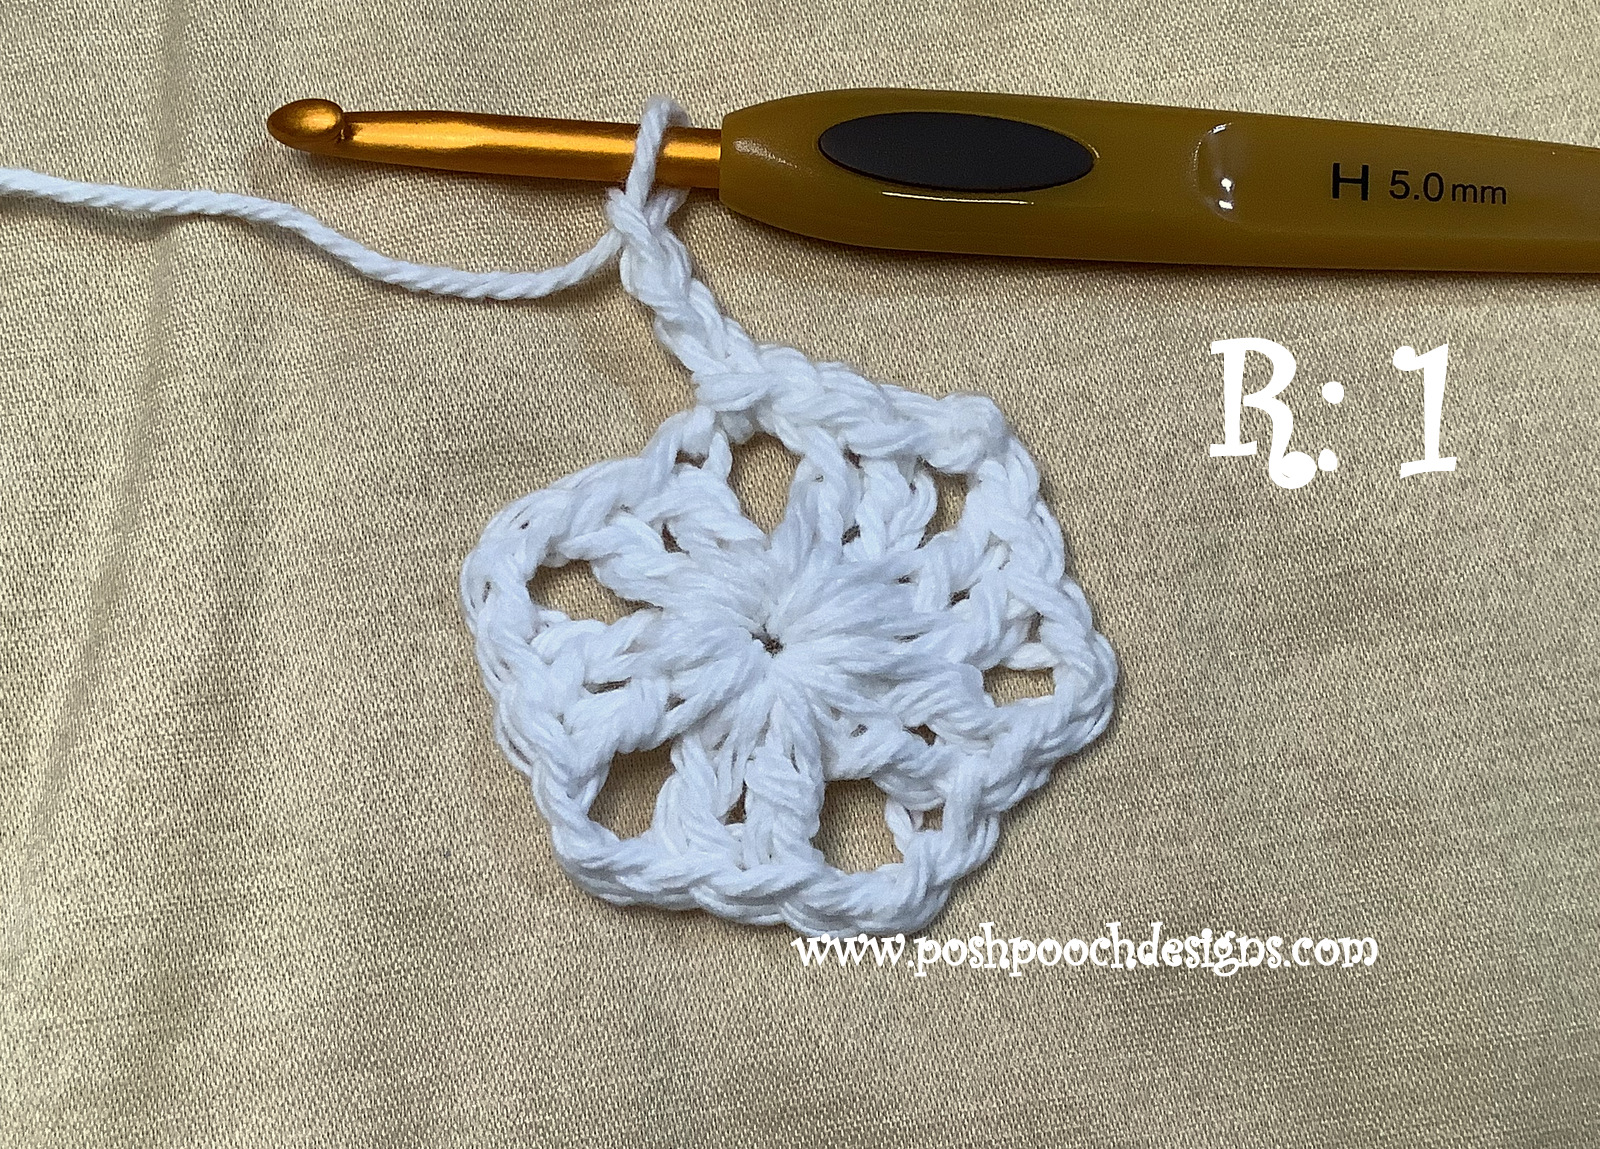
R: 1 - With C1, Ch 5, join in a circle, ch3, 3 dc in the circle,
Chgto C2, leave c1 attached, 4 dc,
Chgto C1, leave c1 attached, 4 dc,
Chgto C2, leave c2 attached, 4 dc,
Join to the ch3, slst in the next dc,
(8 C1 dc, 8 C2 dc = 16 dc)
 
When Changing colors leave yarn attached,
Carry across the back of the circle.

 
R: 2- Chgto to C1, slst in the next dc,
2 dc in this dc, 1 dc in the next 2 dc, 2 dc in the next dc,
Chgto C2, 2 dc in the next dc, 1 dc in the next 2 dc, 2 dc in the next dc,
Chgto C1, 2 dc in this dc, 1 dc in the next 2 dc, 2 dc in the next dc,
Chgto C2, 2 dc in this dc, 1 dc in the next 2 dc, 2 dc in the next dc,
Join to the ch3, slst in the next dc,
(12 C1, 12 C2 = 24 dc)


R: 3 - Chgto to C1, slst in the next dc,
2 dc in this dc, 1 dc in the next 4 dc, 2 dc in the next dc,
Chgto C2, 2 dc in the next dc, 1 dc in the next 4 dc, 2 dc in the next dc,
Chgto C1, 2 dc in this dc, 1 dc in the next 4 dc, 2 dc in the next dc,
Chgto C2, 2 dc in this dc, 1 dc in the next 4 dc, 2 dc in the next dc,
Join to the ch3, slst in the next dc,
(16 C1, 16 C2 = 32 dc)


R: 4 - Chgto to C1, slst in the next dc,
2 dc in this dc, 1 dc in the next 6 dc, 2 dc in the next dc,
Chgto C2, 2 dc in the next dc, 1 dc in the next 6 dc, 2 dc in the next dc,
Chgto C1, 2 dc in this dc, 1 dc in the next 6 dc, 2 dc in the next dc,
Chgto C2, 2 dc in this dc, 1 dc in the next 6 dc, 2 dc in the next dc,
Join to the ch3, slst in the next dc,
(20 C1, 20 C2 = 40 dc)


R: 5 - Chgto to C1, slst in the next dc,
2 dc in this dc, 1 dc in the next 8 dc, 2 dc in the next dc,
Chgto C2, 2 dc in the next dc, 1 dc in the next 8 dc, 2 dc in the next dc,
Chgto C1, 2 dc in this dc, 1 dc in the next 8 dc, 2 dc in the next dc,
Chgto C2, 2 dc in this dc, 1 dc in the next 8 dc, 2 dc in the next dc,
Join to the ch3, slst in the next dc,
(24 C1, 24 C2 = 48 dc)


R: 6 – Tie off C2, With C1,
*2 sc in the 1st dc, 1 sc in the next 10 sc, 2 sc in the next sc*
Repeat from * to * 3 more times,
Join to the sc with a slst, tie off weave in the ends.


Repeat R: 1- R: 6 For A Front and back


Place the 2 circles together, right sides out,
Chgto C2, Sc them together, leaving a opening for stuffing.
Stuff and sc closed the hole, join to the 1st sc


Trim - *ch3, sk 1 sc, sc in the next sc*
Repeat around pillow, join to the 1st sc, tie off, weave in the ends.

Buttons:
Attach a button  to center of the pillow, on both sides.


An Ad Free PDF file is Available
 In My Ravelry Shop A This LINK
 For $4.50


Friday, November 22, 2024

Gnome Christmas Ornaments Crochet Pattern By Sara Sach

 Gnome Christmas Ornaments 
Crochet Pattern 
By Sara Sach of Posh Pooch Designs


The Gnome Christmas Ornaments are
so silly and cute, they will make you giggle.
 I Just love them, and you will too.

I received so many requests for an easy Gnome
 Christmas Ornament, that I decided to design one.
 I got into my Christmas yarn and had fun. 
Although it is a super easy
 design, it is also super cute! They are sure to bring
 a smile and a giggle from all who see them.


Do They look familiar? 


Gnome For The Holidays Pillow
Crochet Pattern And Video -  LINK


I designed the Gnome Christmas Ornaments to look 
similar to the Gnome Christmas Pillows.
 I shrunk them down so we can hang them on
 our Christmas Trees.
They would also make great gift tags, or place markers. 
As well as, look adorable added to a Christmas Bunting.
There are just so many ways to decorate with The 
Christmas Gnome ornaments.


Get in your yarn stash and choose your favorite colors
 or make them for you friends and family, in their
 favorite colors. Add a button to fit there personalities.
I think this would be a fun friends and family project.


See The Video On My Crochet Youtube
 Channel At This LINK


Gnome Christmas Ornaments Crochet Pattern

Please Add This Crochet Pattern To Your Ravelry Favorites
 
Skill: Easy
 
Materials:
Crochet hook – H / 5 mm
Yarn – Med (4) Acrylic, 4 colors of Your choosing – 1 oz. of each)
                                        C1 - Body, C2 – Beard, pompom, C3 – Hat, C4 - nose)
Stuffing – Polyfiberfil- about a handful
Decorative button
Thin Ribbon – 16 inches
Optional Nose - Wooden Bead 
 
Stitches:
Chain (ch)
Slip Stitch (slst)
Single Crochet (sc)
Front Loop Only (FLO)
Change to (chgto)
Single Crochet Together (sctog) Decrease
 
Size: 7.5 X 4 Inches
 
Notes:
Ch1 Does Not Count as a st
 

How To Change Colors For The Beard


Pull up a loop,

yo with next color,
pull that loop through the 2 loop


st the next st with new color
 
Pattern:

Front Of The Gnome -
R: 1 – With C1, Ch 12, sc in the 2nd ch from the hook,
 1 sc in each ch across, turn, ch 1 (11 sc)


R: 2 - 1 sc in each ch across, turn, ch 1 (11 sc)
 
R: 3 – R: 4 – Repeat R: 2


R: 5 – Sc in the 1st 5 sc,
Chgto C2, 1 sc,
Chgto C1, 1 sc in the last 5 sc, turn, ch1 (11sc)


R: 6 - Sc in the 1st 4 sc,
Chgto C2, 3 sc,
Chgto C1, 1 sc in the last 4 sc, turn, ch1 (11sc)


R: 7 - Sc in the 1st 3 sc,
Chgto C2, 5 sc,
Chgto C1, 1 sc in the last 3 sc, turn, ch1 (11sc)
 
R: 8 - Sc in the 1st 2 sc,
Chgto C2, 7 sc,
Chgto C1, 1 sc in the last 2 sc, turn, ch1 (11sc)


R: 9  – R: 10 – Repeat R: 8
Tie off C1
 

R: 11 – With C2, FLO, slst in each sc, turn (11 slst)

 
R: 12 – Tie off C2, Chgto C3, FLO, sc in the unworked loops of R: 11 (11 sc)


R: 13 – With C3, 1 sc in each st across, turn, ch1 (11 sc)
 
R: 14 – R: 15 – Repeat R: 13


R: 16 – Sctog The 1st 2 sc, 1 sc in the next 7 sc, sctog the last 2 sc,
Turn, ch1 (9 sc)
 
R: 17 – 1 sc in each sc, turn, ch 1 (9 sc)


R: 18 - Sctog The 1st 2 sc, 1 sc in the next 5 sc, sctog the last 2 sc,
Turn, ch1 (7 sc)

R: 19- Repeat R: 16 (7 sc)
 
R: 20- Sctog The 1st 2 sc, 1 sc in the next 3 sc, sctog the last 2 sc,
Turn, ch1 (5 sc)
 
R: 21 - Repeat R: 16 (5 sc)


R: 22 - Sctog The 1st 2 sc, 1 sc in the next sc, sctog the last 2 sc,
Turn, ch1 (3 sc)
 
R: 23 - Sctog The 1st 2 sc, 1 sc in the next sc, turn, ch 1 (2sc)
 
R: 24 - Sctog The 1st 2 sc, tie off weave in the ends.
 

Back of The Gnome –

R: 1 – With C1, Ch 12, sc in the 2nd ch from the hook,
 1 sc in each ch across, turn, ch 1 (11 sc)
 
R: 2 - 1 sc in each ch across, turn, ch 1 (11 sc)
 
R: 3 – R: 10 – Repeat R: 2
 
Repeat R: 11 – 22 - Front The Front Of The Gnome.


Assembly –

Place the Front and Back Together, Right sides out.
Join matching yarn to the right side of the gnome where the
Body and hat meet.
Sc evenly up to the point of the hat, and down the other side of the hat.
 
Chgto yarn color to match the body of the Gnome,
Sc evenly down the side and across the bottom of the gnome,
Leave side open for stuffing.


Stuff the Gnome,
And sc up the opening. Weave in the ends.
 
Nose
Opt - 1 - Attach a Wooden bead to the center front of the Gnome.

 Opt 2  With C4, Ch 3, 2 hdc in the 3rd ch from the hook,
Ch 1, join to the ch, tie off. Attach to the front of the gnome
With needle and yarn ends.


Make a small pompom and attach to the top of the hat.
 
Add a Christmas Button of choice.
 
Add The Thin Ribbon to the top for a hanger.


An Ad Free PDF file Is Available
In My Ravelry Shop At This LINK
for $3.50


Friday, July 14, 2023

Snowflake Ornaments Crochet Pattern And How To Stiffen Them | Posh Pooch Designs

 Snowflake Ornaments Crochet Pattern
 And How To Stiffen Them
 With Sara Sach of Posh Pooch Designs


This lovely Snowflake is designed to be a Christmas
 And Holiday ornament, measuring 6 X 6 inches
One it stiffened up for hanging, we add a ribbon hanger
 with beads for a fun touch.
The Snowflakes stitch up pretty quick and you can
 make sever in one sitting. 
They will look wonderful hanging on your Christmas tree,
 stockings, the mantel and any place you would like to 
hang them for all your festive occasions.


There are 3 Ways of Stiffening Your Snowflake
 For Hanging up.

1. Glitter Spray -  Go outside, Lay the snowflake on a paper towel.
Spry the back of the Snowflake let it dry. Turn it over and 
spray the front.
When it's dry add a hanger.

2. Glitter Glue - Lay the snowflake on a paper towel.
Mix equal parts of Glue and water. 
With a paint brush, paint the back of the snowflake.
When it's dry, turn it over and paint the front.
When it's dry add a hanger.

3. White School Glue - Mix equal amounts of white school glue and water
 in a bowl. Dip the snowflake in the mixture, until it's covered.
Lay on a paper towel to dry or paper plate. Pat out some of
 the moisture. You will need to turn it a few times as it's 
drying to keep it from sticking to the paper towel.
You can sprinkle with glitter while the glue is wet
 for a glitter effect.

I have used all three methods and love #1 the best. It
is the quickest to apply and dry, and least messy.
Plus it adds glitter and stiffen at the same time.


See The Video On Crochet Youtube 
Channel At This LINK


Snowflake Ornaments Crochet Pattern

Please Add This Crochet Pattern To Your Raverly Favorites
 
Skill: Easy
 
Materials:
Crochet Hook – H / 5.00 MM
Yarn – Med (4) Cotton / White 1.5 oz/ Premier Just Cotton
Yarn Needle
 
Stitches:
Chain (ch)
Slip Stitch (slst)
Single Crochet (sc)
Double Crochet (dc)
Space (sp) Skip (sk)
Picot Stitch (pcst)
 
Size: 6 X 6 Inches
 
Notes:
Ch1 Does not count as a dc
Ch3 counts as dc
 
Pattern:
 
R: 1 – With C1, Ch 5 join in a circle,
Ch3, dc, ch2 in the circle,
*2dc, ch2*
Repeat From * to * 4 more times, join to the ch3 with a slst,
Slst in the next 2 dc, slst in the ch 3 sp
(6 sets of 2dc, ch2)


R: 2 – Ch3, dc, ch2, 2dc in the ch2 sp, ch1
*2dc, ch2, 2dc, ch1 in the next ch2 sp*
Repeat From * to * 4 more times
Join to the ch3 with a slst,
Slst in the next 2 dc, slst in the ch 3 sp
(6 sets of 2dc, ch2, 2dc, ch1)


R: 3 - Ch3, dc, ch2, ch1, sc in the ch1 sp, ch1
*2dc, ch2, dc, ch1 in the next ch2 sp, ch1, sc in the ch1 sp, ch1*
Repeat From * to * 4 more ties, join to the ch3 with a slst,
Slst in the next 2 dc, slst in the ch 3 sp
 (6 sets of 2dc, ch2, 2dc, ch1, sc, ch1)


R: 4 – Ch3, dc, pcst, 2dc in the 1st ch2 sp, ch2,
Sc, pcst, sc in the sc, ch2,
* 2 dc, pcst, 2dc in the 1st ch2 sp, ch2,
Sc, pcst, sc in the sc, ch2*
Repeat from * to * 4 more times,
Join to the ch3 with a slst, tie off and weave in your ends.
(6 sets of 2dc, pcst, 2dc, ch2, sc, pcst, sc, ch2)


Beaded Hanger:  Add a Piece of ribbon or hard, 
add  some beads of Your choosing, tie a knot at the top
and trim with scissors. 


Stiffen the Snowflake with one of the methods described above.


An Ad Free PDF File Is Available
In My Ravelry Shop At This LINK
 For $3.50