Skill: Easy Materials: Crochet Hook
– H / 5.00 Yarn – C1 – Med
(4) Acrylic - Skin tone - 1 oz. C2 - Med
(4) Acrylic - White Sparkle – 2 oz. C3 / C4 – Skirt Accent Color -Small Amount of red and green C5 – Med (4) Acrylic - hair color
1 oz. Small Amount of brown, red for face Yarn Needle Stuffing –
Polyfiberfil Stitch
markers Stitches: Chain (ch) Singe
Crochet (sc) Double
Crochet (dc) Skip (sk) Space (sp) Size: 12 inches Notes: Doll Body,
arms and legs are stitched in the round, Do Not join rounds. Pattern: Step 1- The Doll Head and Body
Make 4 - 2 arms, 2 legs R: 1 – With
C1, ch 2, 5 sc in the 2nd ch from the hook (5sc) R: 2 – 2 sc
in each sc (10sc) R: 3 – 1 sc
in each sc (10sc) Weave in the beginning tail of yarn.
R: 4 – R: 5
– Repeat R: 3
R: 6– Chgto
To C2, Repeat R : 3 R: 7 – R: 13
– Repeat R: 6 Tie off
leaving a 12 inch tail of yarn. Stuff and
slst closed, leave the remainder of the yarn tail for sewing onto the angel Repeat R: 1
– R: 13 for 3 more times – 2 for arms and 2 for legs
Wings: R: 1 –With
C2, Ch 5, join in a circle, ch3, 6 dc in the circle, turn, ch 3 (7dc) R: 2 -1 dc
in the same st as the ch3, 2 dc in each dc, turn, ch 3 (14 dc)
R: 3 – 2 dc
in the next dc, turn, ch3 (28 dc) R: 4 – 1 dc
in each dc, turn, ch 1 (28dc)
R: 5 – sc in
the 1st sc, *ch3, sk 1 sc, sc in the next sc* Repeat From
* to * across, slst in the last sc, tie off weave in your ends.
Halo: With C2, Ch
18, join in a circle, 20 sc around the circle, join to the 1st sc, Tie off
leaving a 8 inch tail of yarn for sewing onto the angel’s head.
Sew them closed with the tail of yarn and needle. Stuff the
Angel, Place legs
and pin them in place. Pin the bottom closed. With C2, and needle, whip stitch the bottom of the Angel’s Skirt closed,
and sewing the legs in place.
Sew the arms in place, with matching yarn and needle. lined up on the side, at the neck.
With the
needle and matching yarn and gather around the neck of the Angel, pulling
gently, wrap yarn a few times around and tie securely.
Chain 50,
tie a bow around the Angels’ neck.
Angel Wings:
Fold The Wings in half, and line up in the center of the back of the angel.
With matching yarn and Needle, attach wings at the neck with whip stitches,
and only sew 2 inches down, attach yarn and weave in in the end.
A 12 inch piece of yarn, wrap around the center o the wings and gently gather.
Tie a know at the base of the wings and secure.
Angel’s Hair: With Hair Color of choice, and needle stitch some long stitch to look like hair, As shown in the pic.
It is up to you how thick you would like your Angels Hair.
Add Braids by adding 6 strands of yarn about 18 inch long to each side of
the head, and braid the strands. add a yarn bow to the end of each braid. Halo; Place the
halo on The Angels head and sew in place.
Lastly stich on the eyes and mouth with yarn of choice.
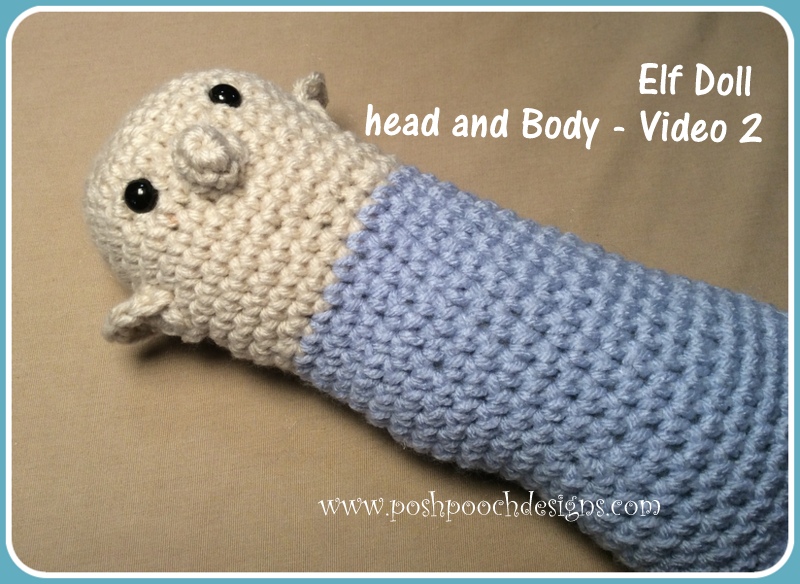
R : 1 - With Beige yarn, ch 2, 6 sc in the 2nd ch from the
hook, join.( 6 sc)
R : 2 - 2 sc in each sc, ( 12 sc)
R : 3 - *1 sc in the
1st sc, 2 sc in the next sc, Repeat from * around, (18, sc)
R : 4 - * 1 sc in
the 1st 2 sc, 2 sc in the next sc, Repeat from * around, (24 sc)
R : 5 - * 1 sc in
the 1st 4 sc, 2 sc in the next sc, Repeat from * around, (28 sc)
R : 6 - * 1 sc in
the 1st 6sc, 2 sc in the next sc, Repeat from * around, (32 sc)
R : 7 - 1 sc in each
sc, (32 sc)
R : 8-15 - Repeat R
: 7 (32 sc)
R : 16 - * 1 sc in
the next 6 sc, 1 dc dec with the next 2 sts,
Repeat from around, (28 sc)
R : 17 - Repeat R: 16 , (25 sc)
R : 18 - Change to Green Sparkle yarn, 1 sc in each sc, (25 sc)
R : 19-40 - 1 sc in
each sc, (25 sc )
The body needs to
measure about 6 inches.
Tie off after R : 40, leaving a 25 inch tail, Place the eyes in the head
if using the snap
eyes, then stuff the head and body of the elf,
then fold flat and sew closed
with the tail.
Ears: make 2
R : 1 - With beige yarn, ch 2, 6 sc in the 2nd ch from the
hook.
join. ( 6 sc)
R : 2 - 1 sc in the 1st 3 sc,
1 hdc, 1dc, 1 hdc in the next sc,
1 sc in the last 2 sc, join and tie off,
leave a 10 inch tail for sewing on
to the head.
Place each ear on the sides of the elf head and sew in place.
Nose:
R : 1 - With beige yarn, ch 2, 6 sc in the 2nd ch from the
hook.
join. ( 6 sc)
R : 1 sc in
each sc, tie off, leaving a 10 in tail to sew on to head. Place nose in the
center of the face and sew in place.
Stuff lightly. For the bends in the knees and elbows you sew across with matching yarn.
Work
legs and Arms in rounds
Legs: make 2, each leg should measure about 8 inches
R : 1 - With Black yarn, ch3, 6 sc in the 2nd ch from the
hook, join, ( 6 sc)
R : 2 - 2 sc in each sc, (12 sc)
R : 3 - 1 sc in each sc, 12 sc
R : 4-8 -Repeat R : 3 (12 sc)
R : 9 - Change to Green Sparkle Yarn, 1 sc in each sc, ( 12
sc)
R : 10 - *1 sc in the 1st sc, 2 sc in the next sc, Repeat
around, ( 18 sc)
R : 11 - 1 sc in each sc, ( 18 sc)
R : 12-24 - Repeat R : 11 ( 18 sc)
Tie off after
R: 22, leave a 12 inch tail for sewing leg closed.
Arm - Make 2, Each Arm should measure about 6 inches
R : 1 - With Red Sparkle yarn, ch3, 6 sc in the 2nd ch from
the hook, join, ( 6 sc)
R : 2 – 2 sc in each sc, (12 sc)
R : 3 – R: 4 - 1 sc in each sc, (12 sc)
R : 5 -1 sc in 1st 4 sc, ch 3, slst in the same sc, 1 sc in
the next 8 sc,
(ch 3 makes
the thumb, 12 sc)
R:-8 - 1 sc in each sc, (12 sc)
R : 9 - Change to Green Sparkle Yarn, 1 sc in each sc, ( 12
sc)
R : 10 - 1 sc in each sc ( 12 sc)
R : 11- 19- Repeat R : 10 ( 12 sc)
Tie off after R: 19, leave a 12 inch tail for sewing arm
closed.
Assembly
Line the arms up with the
edge of the neck and sew them on each side.
Line the legs up at the bottom of the body of
the Elf and sew them on.
Step
3 : Collar, Shirt Trim, Hat Video 4 - Click This LINK
Collar -
R : 1 - With 1 strand of fun fur and 1 strand of
White sparkle yarn, ch 32,
1 dc in the 2nd ch from the hook and in each ch
across. ch 1 turn. ( 31 dc)
R : 2 - 1 dc in each dc ( 41 dc) tie off. Wrap collar around
the neck of the elf,
sew the top corner together to look like a collar, tack
collar to Elf, to keep it in place.
Shirt Trim -
R : 1 - With 1 strand of fun fur and 1 strand of
White sparkle yarn, ch 32,
1 dc in the 2nd ch from the hook and in each ch
across. ch 1 turn. ( 31 dc)
R : 2 - 1 dc in each dc ( 41 dc) tie off. Wrap
band around the bottom edge of the
shirt, where the legs are sewed on. Sew the back closed, then tack in place.
Step 4: Hat: will be stitched in rounds. Video 5 - Click This LINK
R : 1 - ch 2, 5 sc in the 2nd ch from the hook, join in a
circle w a sl st.( 5sc)
R : 2 - 2 sc in each sc, (10 sc)
R : 3 - 1 sc in each sc, ( 10 sc)
R : 4 - * 1 sc in the 1st sc, 2 sc in the next, Repeat
From * around, ( 15 sc)
R : 5 - 1 sc in each sc, ( 15 sc)
R : 6 - * 1 sc in the 1st 2 sts, 2 sc in the next, Repeat
From * around, ( 20 sc)
R : 7- 1 sc in each sc, ( 20 sc)
R : 8 - * 1 sc in the 1st 3 sc, 2 sc in the next, Repeat
From * around (25 sc)
R : 9 - 1 sc in each sc, ( 25 sc)
R : 10 - * 1 sc in
the 1st 4 sc, 2 sc in the next, Repeat From * around (30 sc)
R : 11 - 1 sc in each sc, ( 30 sc)
R : 12 - * 1 sc in the 1st 5 sc, 2 sc in the next, Repeat
From * around (35 sc)
R : 13 - 1 sc in each sc, ( 35 sc)
R : 14 - * 1 sc in
the 1st 6 sc, 2 sc in the next, Repeat From * around (40 sc)
R : 15 - 1 sc in each sc, ( 40 sc)
R : 16 - * 1 sc in
the 1st 7 sc, 2 sc in the next, Repeat From * around (45 sc)
R : 17 - 1 sc in each sc, ( 45 sc)
R : 18- Trim, Change to 1 strand of White and 1 strand of
Fun fur,
1dc in each sc around, join and tie off.
Pom pom: With only the fun fur, wrap the yarn
around your 3 middle fingers,
about 15 times. Cut a piece of white yarn about 10
inches long,
then slip it through the loops and tie securely.
Do not cut loops, fluff it out and attach to the top of the hat.
Gently stuff the hat, if you want it to stand up.
Hair: With Brown yarn, Wrap yarn around your 3
middle fingers 10 times,
Cut a 12 in piece of yarn and slip through the loops
and tie securely.
Will look like a loose pompom, do not cut the loops.
Attach
the loops to the top of the Elf head with the ties,
Them put them to the front like bangs.
Place the hat on top of the elf head and sew it on using
white yarn. Lastly with a piece of red yarn, embroider a smile on the face of the Elf.
Last year I made the Green Elf, and
this year I made the Elf Red.
They are so fun to make.
I am thinking of maybe one in Ice Blue
would look cute.
An Ad Free PDF File is Now Availble in my Ravelry For $3.50 At This LINK
To See How I made the Big Elf Behind the regular elfs, Click This LINK He is huge - 3 Feet Tall!


.JPG)
.JPG)
.JPG)
.JPG)
.JPG)
.JPG)


