FRIDAY FUN DAY!
Easy Lined Granny Bag
Crochet Pattern
By Sara Sach of Posh Pooch Designs

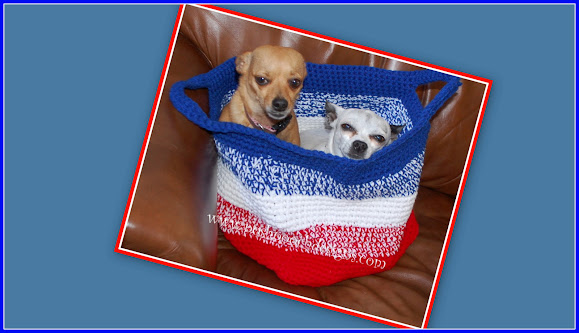
Today we are stitching up a super easy
Crochet Granny Bag,
and adding a Liner to the bag,
with a pocket and bag strap.

This Bag is 14 X 14 inches with strong sturdy strap.
It will hold just anything.
Perfect for shopping at the market, using as a tote,
travel bag and even a purse.
It's got a pocket for your phone, keys or chap stick.

This Crochet Pattern for the bag is easy
and works great on it's own.
Adding the liner, with a pocket and lining the bag
strap makes super sturdy as well as super cute!
The Yarn Is Red Heart Super Saver Stripes
in the primary colorway.
The fabric is duck cloth I ordered from Hobby Lobby
that is a granny square print.
So Cute and perfect for this bag.
See The Video On My Crochet Youtube
Channel At This LINK
Easy Lined Granny Bag Crochet Pattern
Please Add This Crochet Pattern To Your Raverly Favorites
Materials:
For Bag:
Crochet Hook – H / 5mm.
Yarn- med (4) Acrylic yarn – Redheart Super Saver Stripes,
Primary stripes (4.oz.)
Yarn Needle
For Liner:
2 pieces - 15 x 17 inch Squares of Fabric of Choice
1 piece – 4 by 22 inches For bag strap
For Bag:
Crochet Hook – H / 5mm.
Yarn- med (4) Acrylic yarn – Redheart Super Saver Stripes,
Primary stripes (4.oz.)
Yarn Needle
2 pieces - 15 x 17 inch Squares of Fabric of Choice
1 piece – 4 by 22 inches For bag strap
1 piece - 6 X 9 inches - For pocket
Needle and matching thread
Or Sewing Machine and thread
Straight pins
Scissors
Crochet Stitches:
Chain (ch)
Slip Stitch (slst)
Single Crochet (sc)
Double Crochet (dc)
Space (sp)
Skip (sk)
Size:
14 X 14 inch bag, not counting the bag strap
2 X 20 inches – Bag Strap
Notes:
Ch1 Does not count as a st
Ch3 Counts as dc
Rounds are joined to ch3 with a slst
Bag Pattern: Make 2 Squares
R: 1 – Ch5,
join in a circle, 2dc, ch1 in the circle
*3 dc, ch1* in the circle,
Repeat from * to * 2 more times, join to the ch3,
Slst in the next 2 dc, slst in the ch1 sp, ch 3 (4 sets of 3dc, ch1)
R: 2 – 2dc,
ch1, 3 dc in the ch1 sp, ch 1,
*3dc, ch1, 3 dc in the ch1 sp, ch 1,
Repeat from * to * 2 more times,
Slst in the next 2 dc, slst in the ch1 sp, ch 3
(4 corners, ch1)
R: 3 -2dc,
ch1, 3 dc in the ch1 sp, ch 1,
3 dc in the next ch1 sp, ch1
*3dc, ch1, 3 dc in the ch1 sp, ch 1,
3 dc in the next ch1 sp, ch1*
Repeat from * to * 2 more times,
Slst in the next 2 dc, slst in the ch1 sp, ch 3
(4 corners, ch1, and 4 sets of 3dc, ch1)
R: 4 - 2dc,
ch1, 3 dc in the ch1 sp, ch 1,
3 dc in the next 2 ch1 sps, ch1
*3dc, ch1, 3 dc in the ch1 sp, ch 1,
3 dc in the next 2 ch1 sps, ch1*
Repeat from * to * 2 more times,
Slst in the next 2 dc, slst in the ch1 sp, ch 3
(4 corners, ch1, and 4 sets of 3dc, ch1 2 times)
R: 5 - 2dc,
ch1, 3 dc in the ch1 sp, ch 1,
3 dc in the next 3 ch1 sps, ch1
*3dc, ch1, 3 dc in the ch1 sp, ch 1,
3 dc in the next 3 ch1 sps, ch1*
Repeat from * to * 2 more times,
Slst in the next 2 dc, slst in the ch1 sp, ch 3
(4 corners, ch1, and 4 sets of 3dc, ch1 3 times)
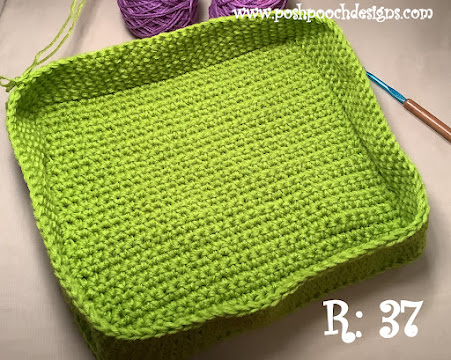
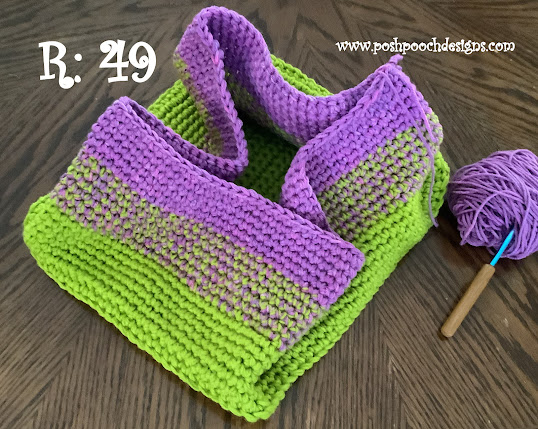
R: 6 – R: 12
– Repeat R: 5, increasing every row
Needle and matching thread
Or Sewing Machine and thread
Straight pins
Scissors
Chain (ch)
Slip Stitch (slst)
Single Crochet (sc)
Double Crochet (dc)
Space (sp)
Skip (sk)
14 X 14 inch bag, not counting the bag strap
2 X 20 inches – Bag Strap
Ch1 Does not count as a st
Ch3 Counts as dc
Rounds are joined to ch3 with a slst
*3 dc, ch1* in the circle,
Repeat from * to * 2 more times, join to the ch3,
Slst in the next 2 dc, slst in the ch1 sp, ch 3 (4 sets of 3dc, ch1)
*3dc, ch1, 3 dc in the ch1 sp, ch 1,
Repeat from * to * 2 more times,
Slst in the next 2 dc, slst in the ch1 sp, ch 3
(4 corners, ch1)
3 dc in the next ch1 sp, ch1
*3dc, ch1, 3 dc in the ch1 sp, ch 1,
3 dc in the next ch1 sp, ch1*
Repeat from * to * 2 more times,
Slst in the next 2 dc, slst in the ch1 sp, ch 3
(4 corners, ch1, and 4 sets of 3dc, ch1)
3 dc in the next 2 ch1 sps, ch1
*3dc, ch1, 3 dc in the ch1 sp, ch 1,
3 dc in the next 2 ch1 sps, ch1*
Repeat from * to * 2 more times,
Slst in the next 2 dc, slst in the ch1 sp, ch 3
(4 corners, ch1, and 4 sets of 3dc, ch1 2 times)
3 dc in the next 3 ch1 sps, ch1
*3dc, ch1, 3 dc in the ch1 sp, ch 1,
3 dc in the next 3 ch1 sps, ch1*
Repeat from * to * 2 more times,
Slst in the next 2 dc, slst in the ch1 sp, ch 3
(4 corners, ch1, and 4 sets of 3dc, ch1 3 times)

You need 2 squares, a front and a back

Place the 2
squares together, right side out.
Sc down the side of the bag, 3 sc in the corner,
Sc across the bottom, 3 sc in the corner,
Sc up the side of the bag,

Working
around The top of the Bag,
sc around the top of the bag,
Join to the 1st sc,
Sc down the side of the bag, 3 sc in the corner,
Sc across the bottom, 3 sc in the corner,
Sc up the side of the bag,

sc around the top of the bag,
Join to the 1st sc,
1 sc in each ac around, join to the 1st sc,
tie off, weave in the ends.
Bag Strap –
R: 1 - Ch 7, sc in the 2nd ch from the hook,
Sc in each ch, turn, ch 1 (6 sc)
R: 2 – 1 sc in each sc across, turn, ch 1 (6sc)
R: 3 – R: 75
– Repeat R: 2
Strap is about 20 inches long
R: 1 - Ch 7, sc in the 2nd ch from the hook,
Sc in each ch, turn, ch 1 (6 sc)
R: 2 – 1 sc in each sc across, turn, ch 1 (6sc)
Strap is about 20 inches long

unless you are not adding the liner.
Cut 2 pieces of Fabric 15 X 17 inches – Bag liner
Cut 1 piece of Fabric 6 X 9 inches – Bag pocket
Cut 1 piece of fabric 4 X 22 inches – Bag Strap
Needle And Thread to match
Scissors
straight pins
Iron and Ironing board
Sewing Machine Optional

I suggest ironing the pocket folds
Fold the top of the pocket down 1 inch,
fold under 1/2 inch And hem the top of the pocket.
Fold The Remaining 3 the same, do not
sew them,
set them aside.
Fold the top of the pocket down 1 inch,
fold under 1/2 inch And hem the top of the pocket.
set them aside.

Fold and iron all 4 side in ¼ of a inch.
Fold in ½ and again iron.
Pin To the Crochet Strap and sew in place.
Set a Side.
Bag Liner-
Fold in ½ and again iron.
Pin To the Crochet Strap and sew in place.
Set a Side.

Place and Sew the pocket 3 inches from the bottom of one of the squares,
centering it on the wrong side of the fabric.

Lay the 2 15 X 17 inch squares together, wrong side out.
Sew the 3 sides together
Square off the Corners, and trim them
Fold The top down 1 inch, then one inch again
Sew the top edge.
Slide Liner inside of bag, and sew the edge to the bag.
Place and sew on the bag handles to the sides of the bag,
with the Fabric side down.
You can add buttons, flowers, bows, ribbons, appliques
or any type of decoration your like.

And Ad Free PDF File Is Available In
My Ravelry Shop At This Link
For $4.50