Monday, August 13, 2018

Waffle On Cowl Crochet Pattern | Posh Pooch Designs

Waffle On Cowl Crochet Pattern
By Sara Sach of


This Cowl is designed using  Colorscape Red Heart Yarn - Rome. 
This yarn is amazingly soft and Luxurious,
yet a good sturdy yarn. And 😄Easy to "Frog" if needed.
(Don't ask me how I know)
It is perfect for the Waffle Stitch Pattern.
See All the gorgeous available colors at This LINK
On The Red Heart site.

The Cowl can be crocheted using any Worsted Weight (4) yarn. The Waffle Stitch is great for cowls made for Men, Women and Boys and Girls.
Just choose their favorite colors and get busy stitching.
 The length is up to you, as well.

The Waffle On
Cowl is
Stitched With the
Waffle Stitch pattern.
 It makes a 
sophisticated
 and 
warm cowl.


See The Video on my Youtube Crochet
 Channel At This LINK


Waffle On Cowl Crochet Pattern By Sara Sach
Please add This Pattern to Your Ravelry Favorites

Skill: Easy

Materials:
Crochet Hook -I/ 5.50MM
Yarn - Medium Weight (4) 
            I used Colorscape By RedHeart - Rome (7 oz.)
Yarn Needle

Stitches:
Chain (ch)
Slip Stitch (slst)
Double Crochet (dc)
Front Post Double Crochet (fpdc)
Back Post Double Crochet (bpdc)

Size: 8 X 30 inches
3 chs = 1 inch, 2 rows = 1 inch

Notes: Ch1 does not count as stitch.

Pattern: 
R: 1 - Ch 27, 1 dc in the 4th ch from the hook, 
1 dc in each ch across, turn Ch 1. (25 dc)

R: 2 – 1 fpdc in the 1st dc, 1 dc in the next 2 dc, fpdc in the next dc,
*1 dc in the next 2 dc, 1 fpdc in the next dc*
Repeat From * to * across, 1 fpdc in the last st, turn, ch 1 (25sts)

R: 3 – 1 bpdc in the 1st dc, fpdc in the next 2 sts,
bpdc in the next st, fpdc in the next 2 sts*
 Repeat From * to * across, 1 bpdc in the last st, turn, ch 1(25 sts)

R: 4 - 1 fpdc in the 1st dc, 1 dc in the next 2 dc, fpdc in the next dc,
*1 dc in the next 2 dc, 1 fpdc in the next dc*
Repeat From * to * across, 1 fpdc in the last st, turn, ch 1 (25sts)

R: 5 - 1 bpdc in the 1st dc, fpdc in the next 2 sts,
bpdc in the next st, fpdc in the next 2 sts*
 Repeat From * to * across, 1 bpdc in the last st, turn, ch 1(25 sts)


R: 6 - R: 120 - Repeat R: 4 and R: 5 alternating rows.

Place the ends of the cowl together, with the right sides out,
sc sewing the ends together.
Tie off and Weave in your ends.

If you would prefer a scarf, add an extra row of Dc after R: 120.


     The Waffle 

        On Cowl

           with

       Red Heart

      Super Saver 

         Stripes
Ad Ad Free PDF file is Available
 For $4.50 

in my Ravelry Shop At This LINK


Friday, August 10, 2018

Pencil Jar Cozy Crochet Pattern | Posh Pooch Designs


Pencil Jar Cozy Crochet Pattern

By Sara Sach of

Fall is coming and school is starting.

How About a nice gift for the 
kiddos new Teacher? 
Or For a Friend who is a teacher.
They can sip cool water all day.
Stitch them up one of these and fill it
 with pens, markers and, pencils.
This new Jar Cozy is perfect for the 
16 oz. Mason jar, but also fits great 
on a small Ice cream container.

See The Video on my Youtube 
Crochet Channel at This LINK


Pencil Jar Cozy Crochet Pattern By Sara Sach
Please add this Pattern to Your Ravelry Favorites

Skill: Easy

 Materials:
Crochet Hook – H/ 5.00MM
Yarn- Cotton Yarn, But WW (4) will work also, about 2 oz, total
           Brown - C1, Yellow - C2, grey - C3, pink - C4
Yarn Needle
Jar – 16oz. Canning Jar

Stitches:
Chain (ch)
Slip Stitch (slst)
Single Crochet (sc)
Double Crochet (dc)
Back Loop only (blo)
Change To (chgto)
Front Post Double Crochet (fpdc)

Size: Fits a 16 oz. Canning jar (4 inches tall)

Notes:
Rounds are joined with a Slip Stitch
Ch 3 after the color change
Ch 3 Counts as a Double crochet

Pattern :
R: 1 – With C1, Ch5, join in a circle. Ch3, 
11 dc in the circle, join, Ch 3. (12dc)

R: 2 –Dc in the same st as the ch3, 
2 dc in each dc around, join, Ch1. (24dc)

R: 3 – 1 sc in each dc around, join, ch 3. (24sc)

R: 4 –  blo, 1 dc in each sc around, join. (24dc)

R: 5 – Chgto C2, ch 3, 1 dc in each sc around, join. (24dc)

R: 6 – Ch 3, 1 dc in next 2 dc, fpdc in the next dc,
*1 dc in the next 3 dc, fpdc in the next dc*
 Repeat From * to * around, join. (24 sts)

R: 7 – R: 9 - Repeat R: 6 (24 sts)


R: 10 - Chgto C3, ch 1, 1 sc in each st around, join, Ch1. (24sc)

R: 11 - 1 sc in each sc around, join. (24sc)

R: 12 – Chgt to C4, ch3, 1 dc in each sc around, join ch1. (24dc)

R: 13 –1 sc in each dc, join,
tie off weave in your ends. (24sc)
Add a Cute Face with 2 French knots and a smile.

Teachers work hard, so be sure to
 tell them "Thank you", too.
An Ad Free PDF File is Available
For $3.50 in my Ravelry Shop
 At This LINK

Wednesday, August 8, 2018

Crochet Pattern Collection of Scarves and Cowls | Posh Pooch Designs

Crochet Pattern Collection
 of Scarves and Cowls
By Sara Sach of

I have Put together a 
"Crochet Pattern Round Up"
of 9 of my Most popular Scarf and Cowl
 Crochet patterns for This year.... so far.

These patterns are all designed by me
 and are free on my blog.
Click the Name of the Pattern,
It is the link that will take you to the blog 
where the free pattern is located.


You can also find Videos of these and 
more on my Youtube 
Crochet Channel At This LINK


Thanks For stopping by!
Keep Calm. and Crochet on!

Tuesday, August 7, 2018

Live With Sara - "Is It A Stitch Or A Stitch Pattern" | Posh Pooch Designs

Live With Sara 
of

Today we are answering the Question,
"Is It A Stitch or A Stitch Pattern".
These 2 term can be very confusing.

See The Video on my Youtube Crochet Channel At This LINK


The Crochet Stitches Are The Basics Stitch -
 chains, single crochet, Double crochet....ect.

Crochet Stitch Patterns are Stitches made from 

combining stitches into patterns.
Like a Box Stitch, V Stitch, Waffle Stitch.
They contain a combination of basic stitches to form
 the Stitch pattern.

📅📅📅📅📅📅📅📅📅📅📅📅📅📅📅📅📅

Let's Make A Crochet Journal
Before The Holidays get here.
you can copy and Paste this one or
Print a monthly calendar For Free
Everything month at This LINK

Use a pen and write in all your ideas, gifts 
and crochet inspiration. yarns you tried that you 
love or didn't love. 
I even write in if I tried a new pattern and it 
did or did not work.
You can also add happy, joyful things.

I like to write with a blue or black pen, 
then use a red for changes and corrections.

📅📅📅📅📅📅📅📅📅📅📅📅📅📅📅📅📅

What's New This Week At 
Posh Pooch Designs

Front Post Beanie - Youth To Adult
Free Crochet Pattern and Video - LINK

Child Front Post Beanie - 3 Sizes
Free Crochet Pattern and Video - LINK

Ombre Pocket Scarf
Free Crochet Pattern and Video - LINK


Thanks For Chatting with me Today!
See Ya Next Week

Friday, August 3, 2018

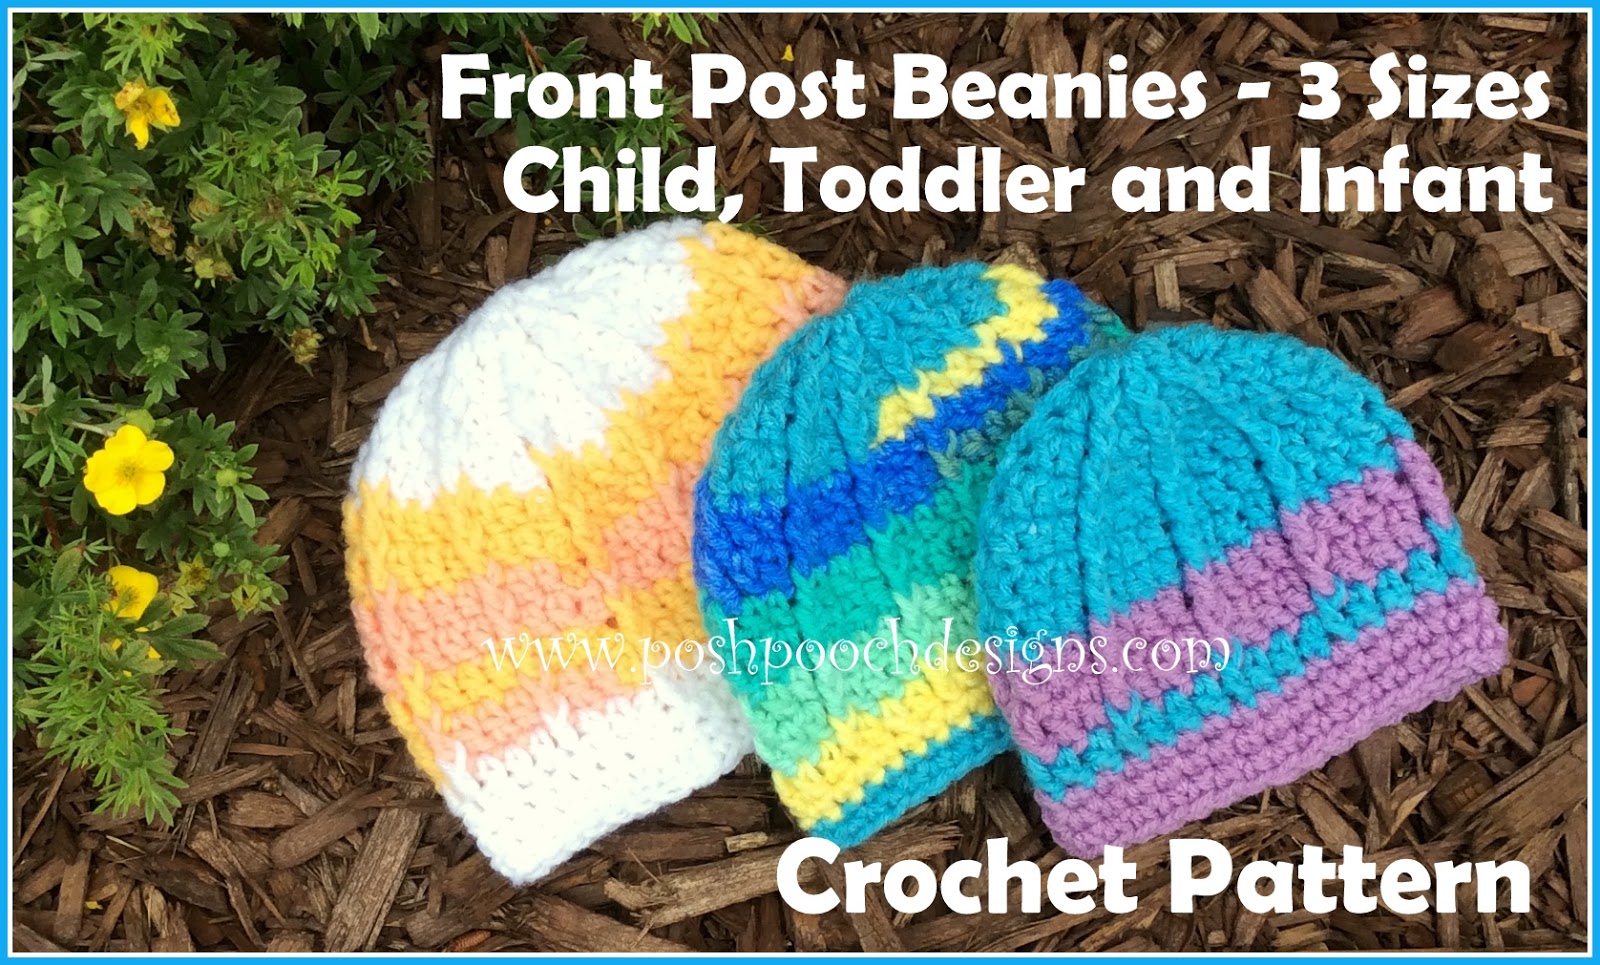
Children's Front Post Beanies - 3 Sizes | Posh Pooch Designs


Children’s Front Post Beanie Crochet Pattern
By Sara Sach of
 Posh Pooch Designs
I recently posted the Re-release of 
the Front Post Beanie in the Youth to Adult Size.
Click This LINK For The Free Pattern and Video
I already had plans to release the child size -
 Infant, Toddler and Child sizes.
And here it is.
This Little hat is great for both boys or girls.
You choose the yarn colors and the amount of stripes.
Use your favorite team colors, seasonal colors or
 make it a solid color.
You will have a one of a kind little beanie for
 the precious baby in your life.

See The Video On My Youtube
 Crochet Channel At This LINK

Children’s Front Post Beanie Crochet Pattern
Infant- Toddler and Child Sizes
Please add this Pattern to Your Ravelry Favorites

Skill - Easy

Materials -
Hook - H/ 5.0 MM
Yarn - Worsted Weight (4) 3 to 4 oz. depending on size
                  I used Bunches of Hugs By Red Heart Yarn
Yarn Needle

Stitches -
Chain (ch)
Slip Stitch (sl st)
Single Crochet (sc)
Double Crochet (dc)
Front post Double Crochet (fpdc)

Size – 3 Sizes –
Infant - 10 inches around, 5 inches length,
Toddler – 12 inches around, 5.5 inches  Length,
Child -  14 inches around, 6 inches length
Pattern is written in infant (with Toddler and child) in parenthesis
         
Notes:
Round are joined with a slst to the ch3
Ch3 Counts as a dc
Stripes and color changes are up to you.
When changing colors, ch3 after the color change

R: 1 - Ch 5, form in a circle with a sl st. ch3 (counts as 1st dc)
 Dc 7(9, 11) more times in the ring, join to ch 3. (8, 10, 12 dc)

R: 2 - Ch 3, *1 fpdc in the next st, 1 dc in the same st*
Repeat around, join.
(16, 20, 24 sts)

R: 3 - Ch 3, *1 fpdc in the next st, 2 dc in the next st, *
 Repeat From * to *, 1 dc in the last dc, join. (24, 30, 36)

R: 4 - Ch 3, *1 fpdc in the next st, 1 dc in the next dc, 2 dc in the next st, *
Repeat From * to *, 2 dc in the last dc, join. (32, 40, 48 sts)

R: 5 - Ch 3,*1 fpdc in the next st, 1 dc in the next 3 st, * Repeat From * to *,
1 dc in the last 2 dc, join. (32, 40, 48 sts)

R: 6 – R: 9 – Infant Repeat R: 5 (32 sts)
R: 6 – R: 10 - Toddler Repeat R: 5 (40 sts)
R: 6 – R: 11 - Child Repeat R: 5 (48 sts)

R: 12 – R: 13 -Ch1, 1 sc in each st around join, ch 1 (36, 40, 48 sts)

R: 14 -1 sc in each st around join,
tie off, weave in your ends. (32, 40, 48 sts)


You can leave them as they are,
But if you want too, 
you can add appliques, bows, flowers or what ever you lie.
I Like them plain and let the yarn be the Star.


A PDF Download for Both the Adult/ Youth
 and Child Beanies - 3 Sizes
is now available in my Ravelry shop
 for $4.50 at This LINK


Wednesday, August 1, 2018

Finger Knit Unicorn Scarf \ Posh Pooch Designs

Finger Knit Unicorn Scarf 
By Sara Sach of

My 5 year old grand daughter asked me to teach her to
 knit a scarf. We picked out this amazing yarn, 
which she called Unicorn Yarn.
It's From Hobby Lobby and it is amazingly soft.
It's listed as a (4), but feels more like a (5)
I decided to teach her to finger knit.
 It's a great protect for little and big kids,
 who want to learn knit.

You really don't need much supplies.
Just some yarn of your choice and your fingers.
I do think chunky yarn works best for little finger.

We practiced a little bit, then she said,
"Oma, can you just make me a video?"
(She calls me Oma, it's German for grandma)
And I said, "Yes of Course"!

See The Video on my Youtube Channel at This LINK

Here are a few pictures of what we did.
 Casting on - Step 1-  hold the yarn across your hand with
 the tail of yarn to the left, use your thumb 
to hold the yarn in place.

 Wrap the yarn across your pointer finger, 
behind your middle finger,
 in front of your ring finger, 
and behind your pinky.

Now, coming back across,
wrap the yarn in front of your pinky, 
behind your ring finger, 
in front of your middle finger, 
then behind your pointer.

 Step 2 - Repeat Step 1 
Wrapping the yarn around your fingers.
2 loops of yarn on each finger.

 Step 3 - While holding the yarn with your thumb, 
starting with your pinky, 
pull the bottom loop over your finger, 
leaving only the 2nd loop on your finger.
Repeat this across on each finger.

Repeat Step 2 and 3 until the scarf has reached
 the desired length.

You will see the Scarf get longer and longer on the
 back of your hand.

Once the scarf is as long as you want it.
Cut the yarn leaving about a 10 inch tail of yarn.

Binding off: Step 4 -put the loop of yarn from your pinky onto your ring finger,
pull the bottom loop over your finger, 
1 loop remains on your ring finger.

Put that loop on your middle finger, 
pull the bottom loop over your finger,
 only one loop remains on your middle finger.

Put that loop on your pointer finger, 
pull the bottom loop over your finger, 
only one loop remains on your pointer finger.
Put the tail of yarn through the last loop
 and pull gently to tie of off.

You can place a knot, 
and tie a bow if you prefer a Cowl.

Now Wasn't That fun!